
first post in a looong time
2021-07-18
So much has happened since my last post.
We decided it was time to find some land and put down some roots. After initially deciding on colorado and interning with Robin Blankenship of Earthnack we realized that there are just too many people in Colorado for that climate, and decided to go east. So we moved to Montpelier Vermont to look for land.
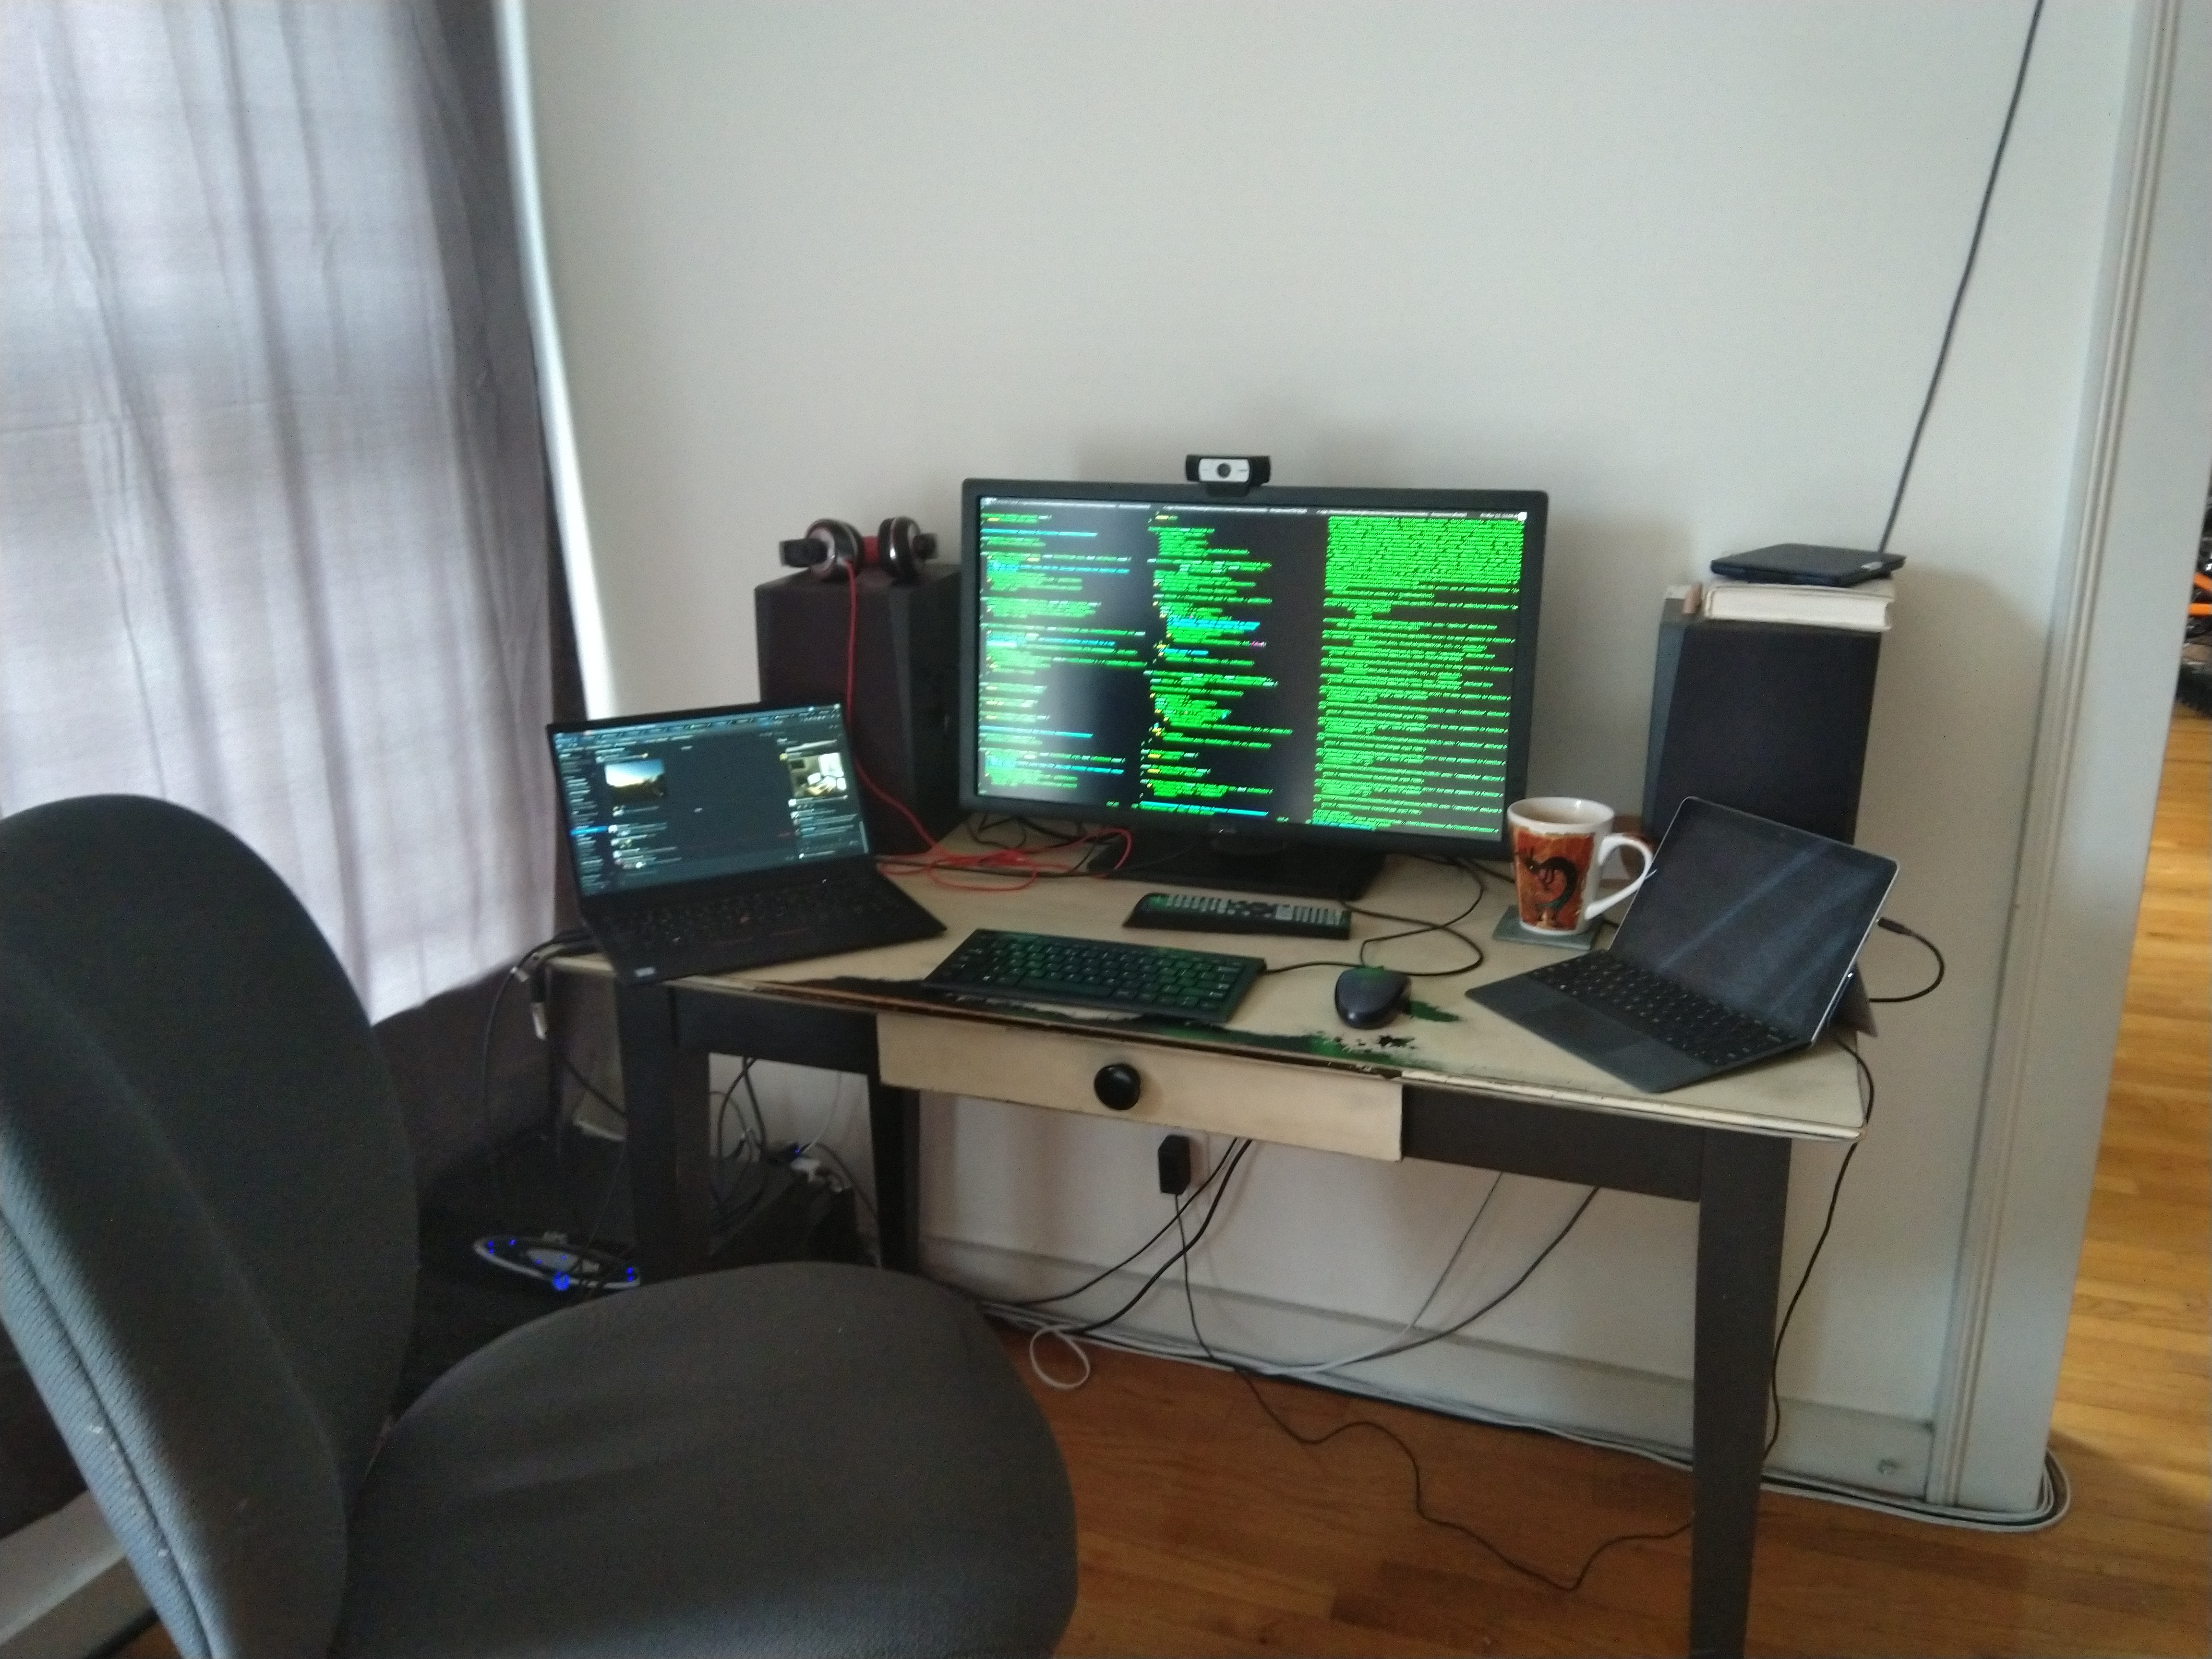
I got a job doing computer stuff again, that's been fun since I finally am doing programming rather than SRE work.
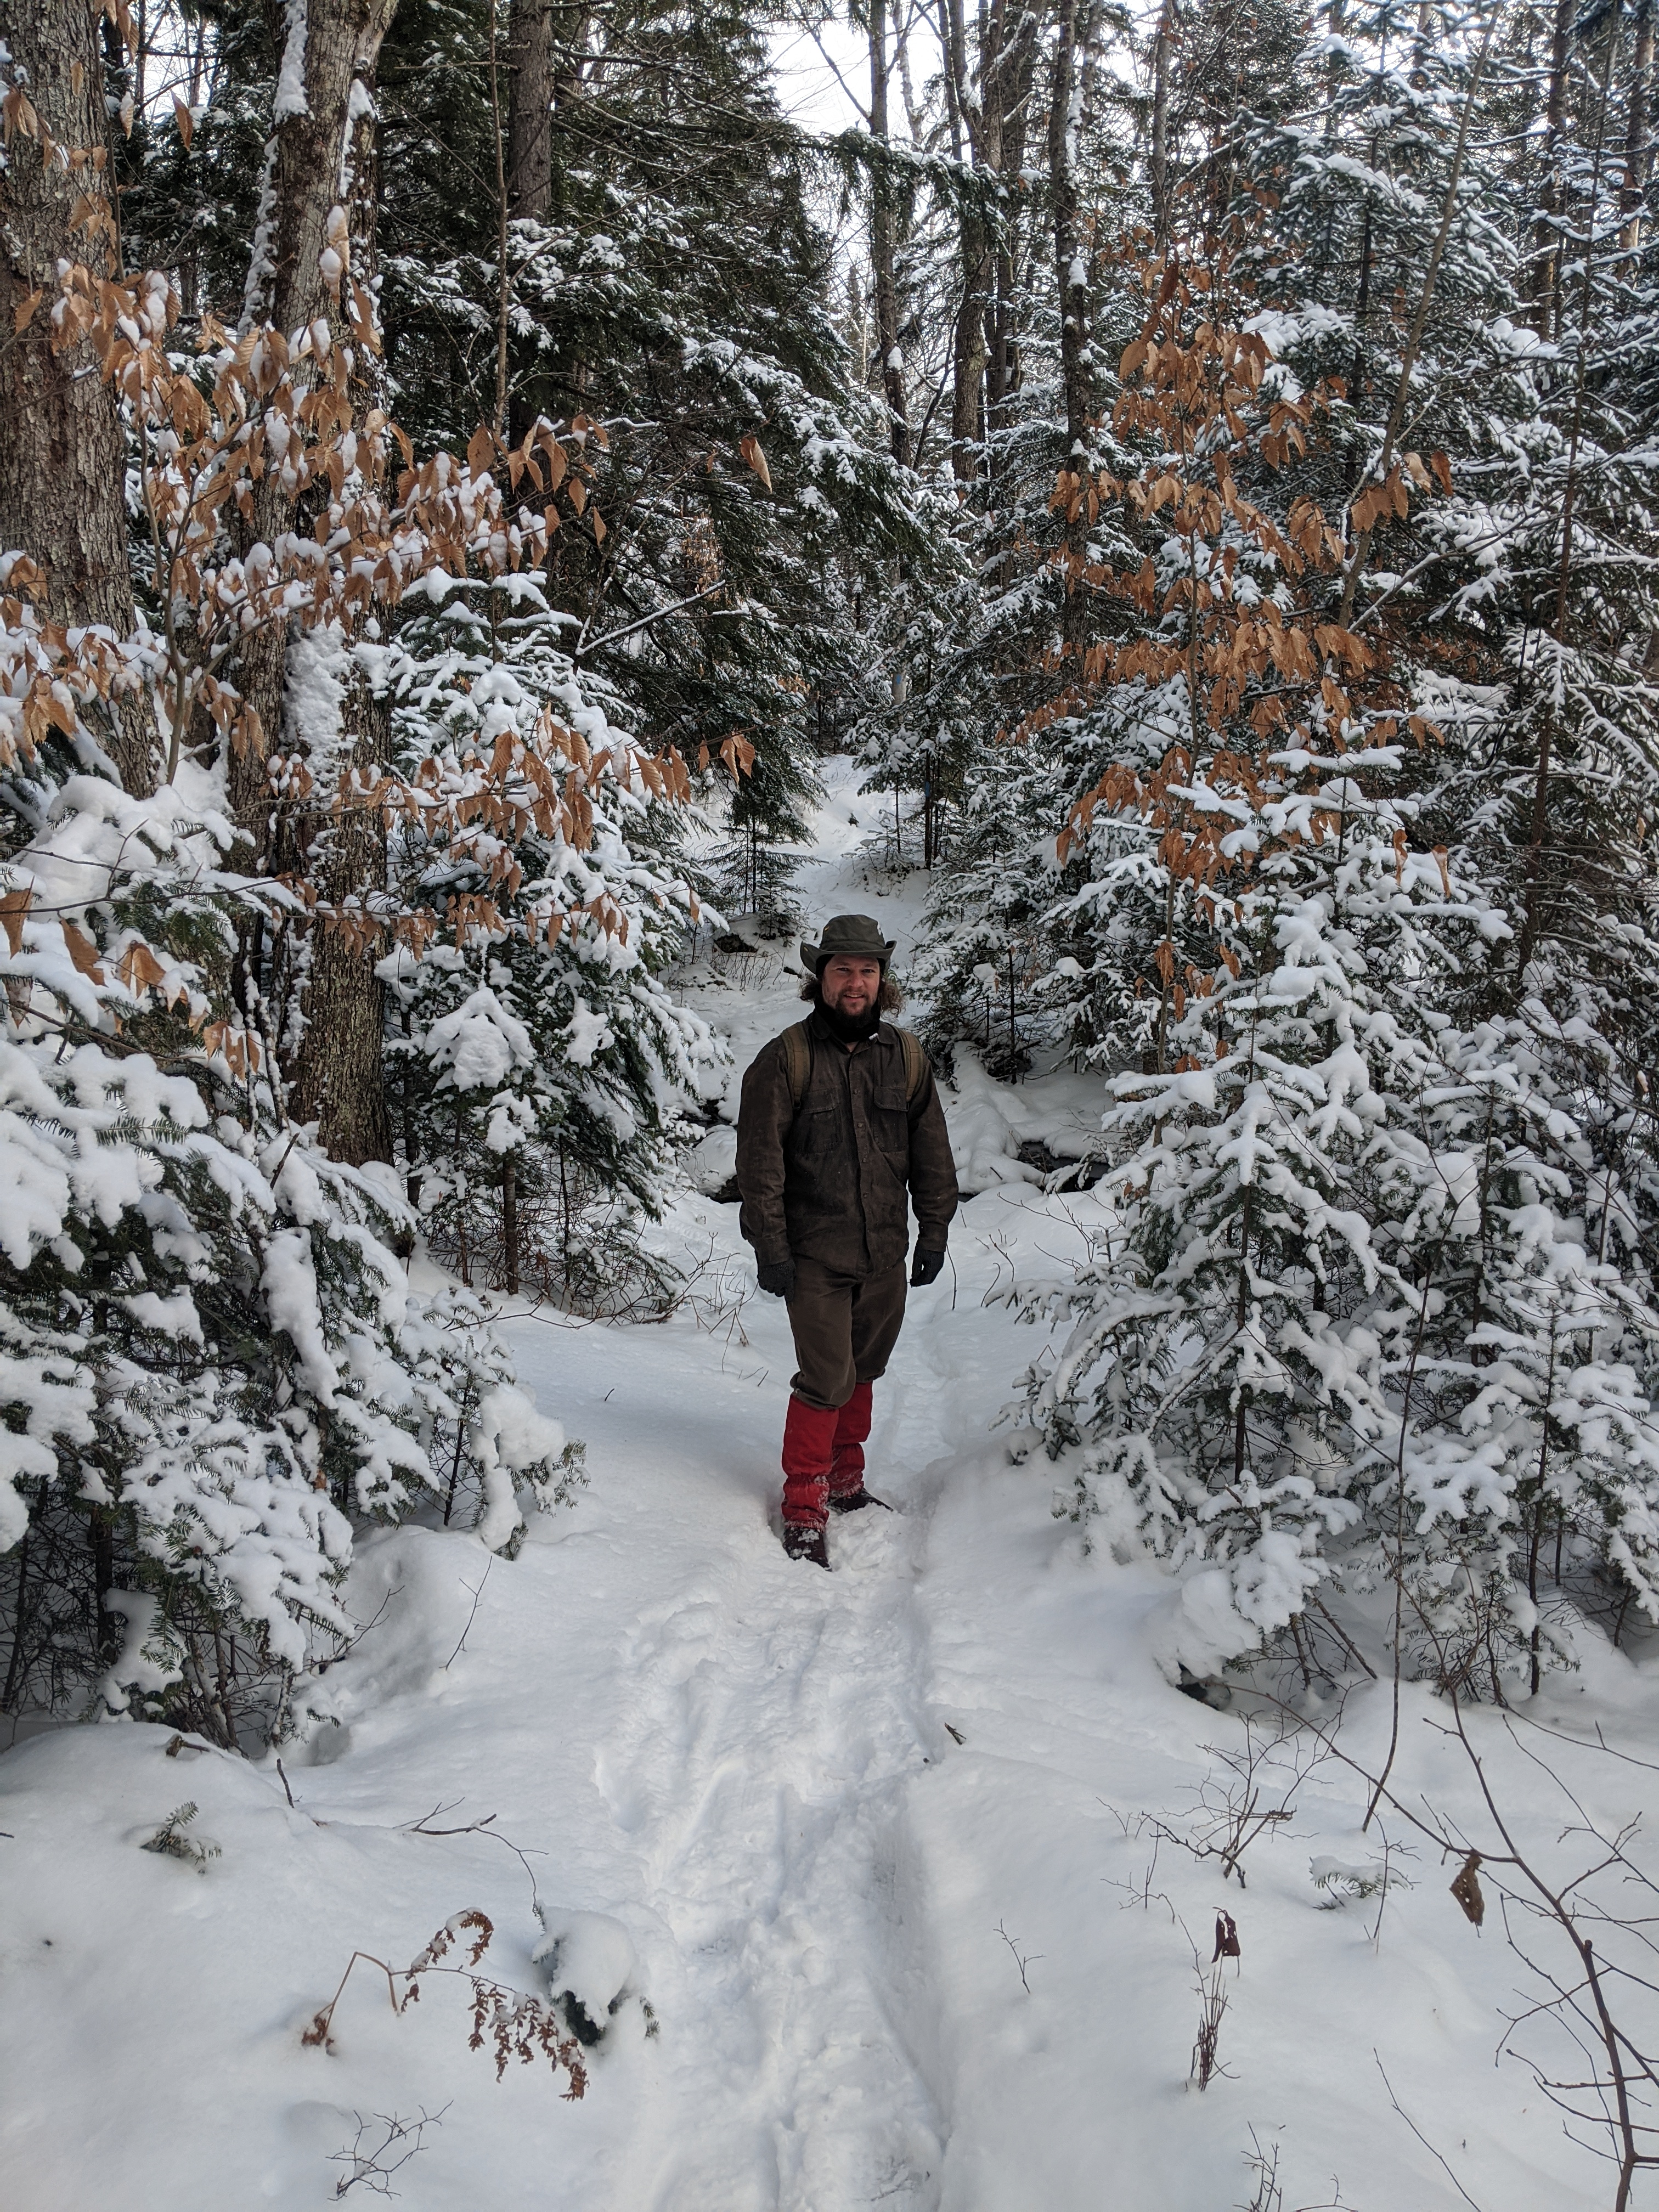
But for a while we were still getting outsiide and messing around occasionally
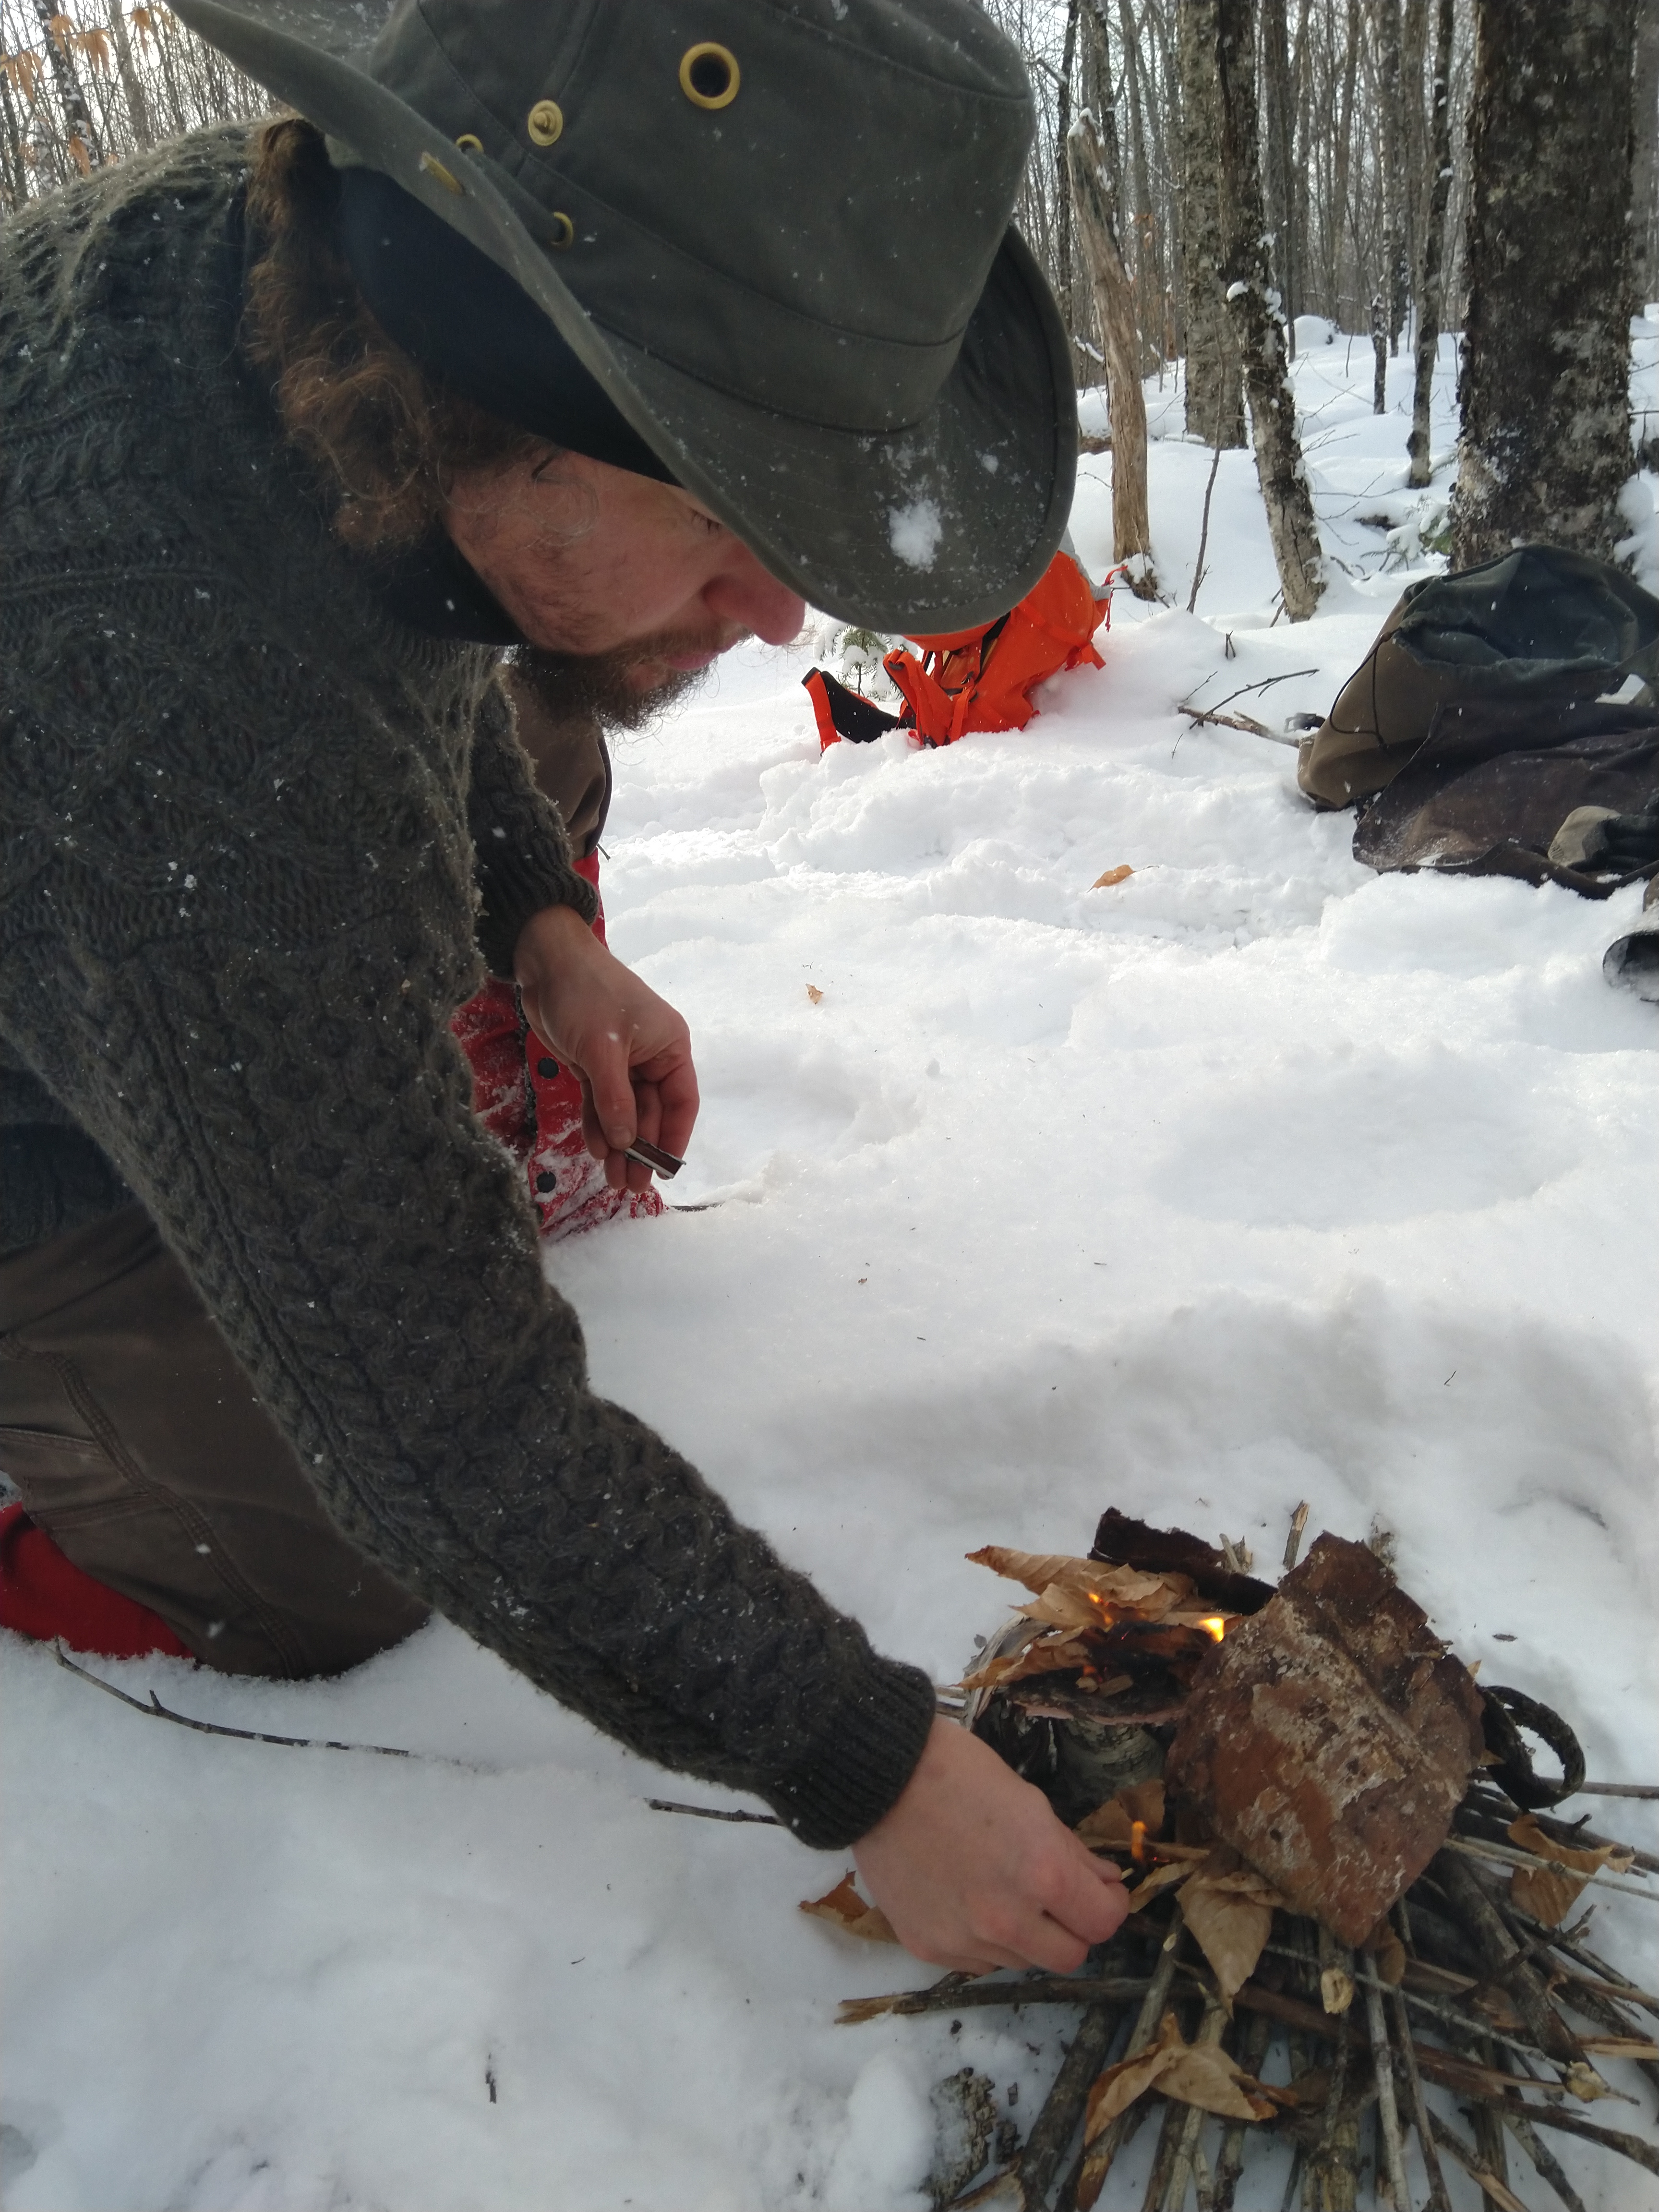
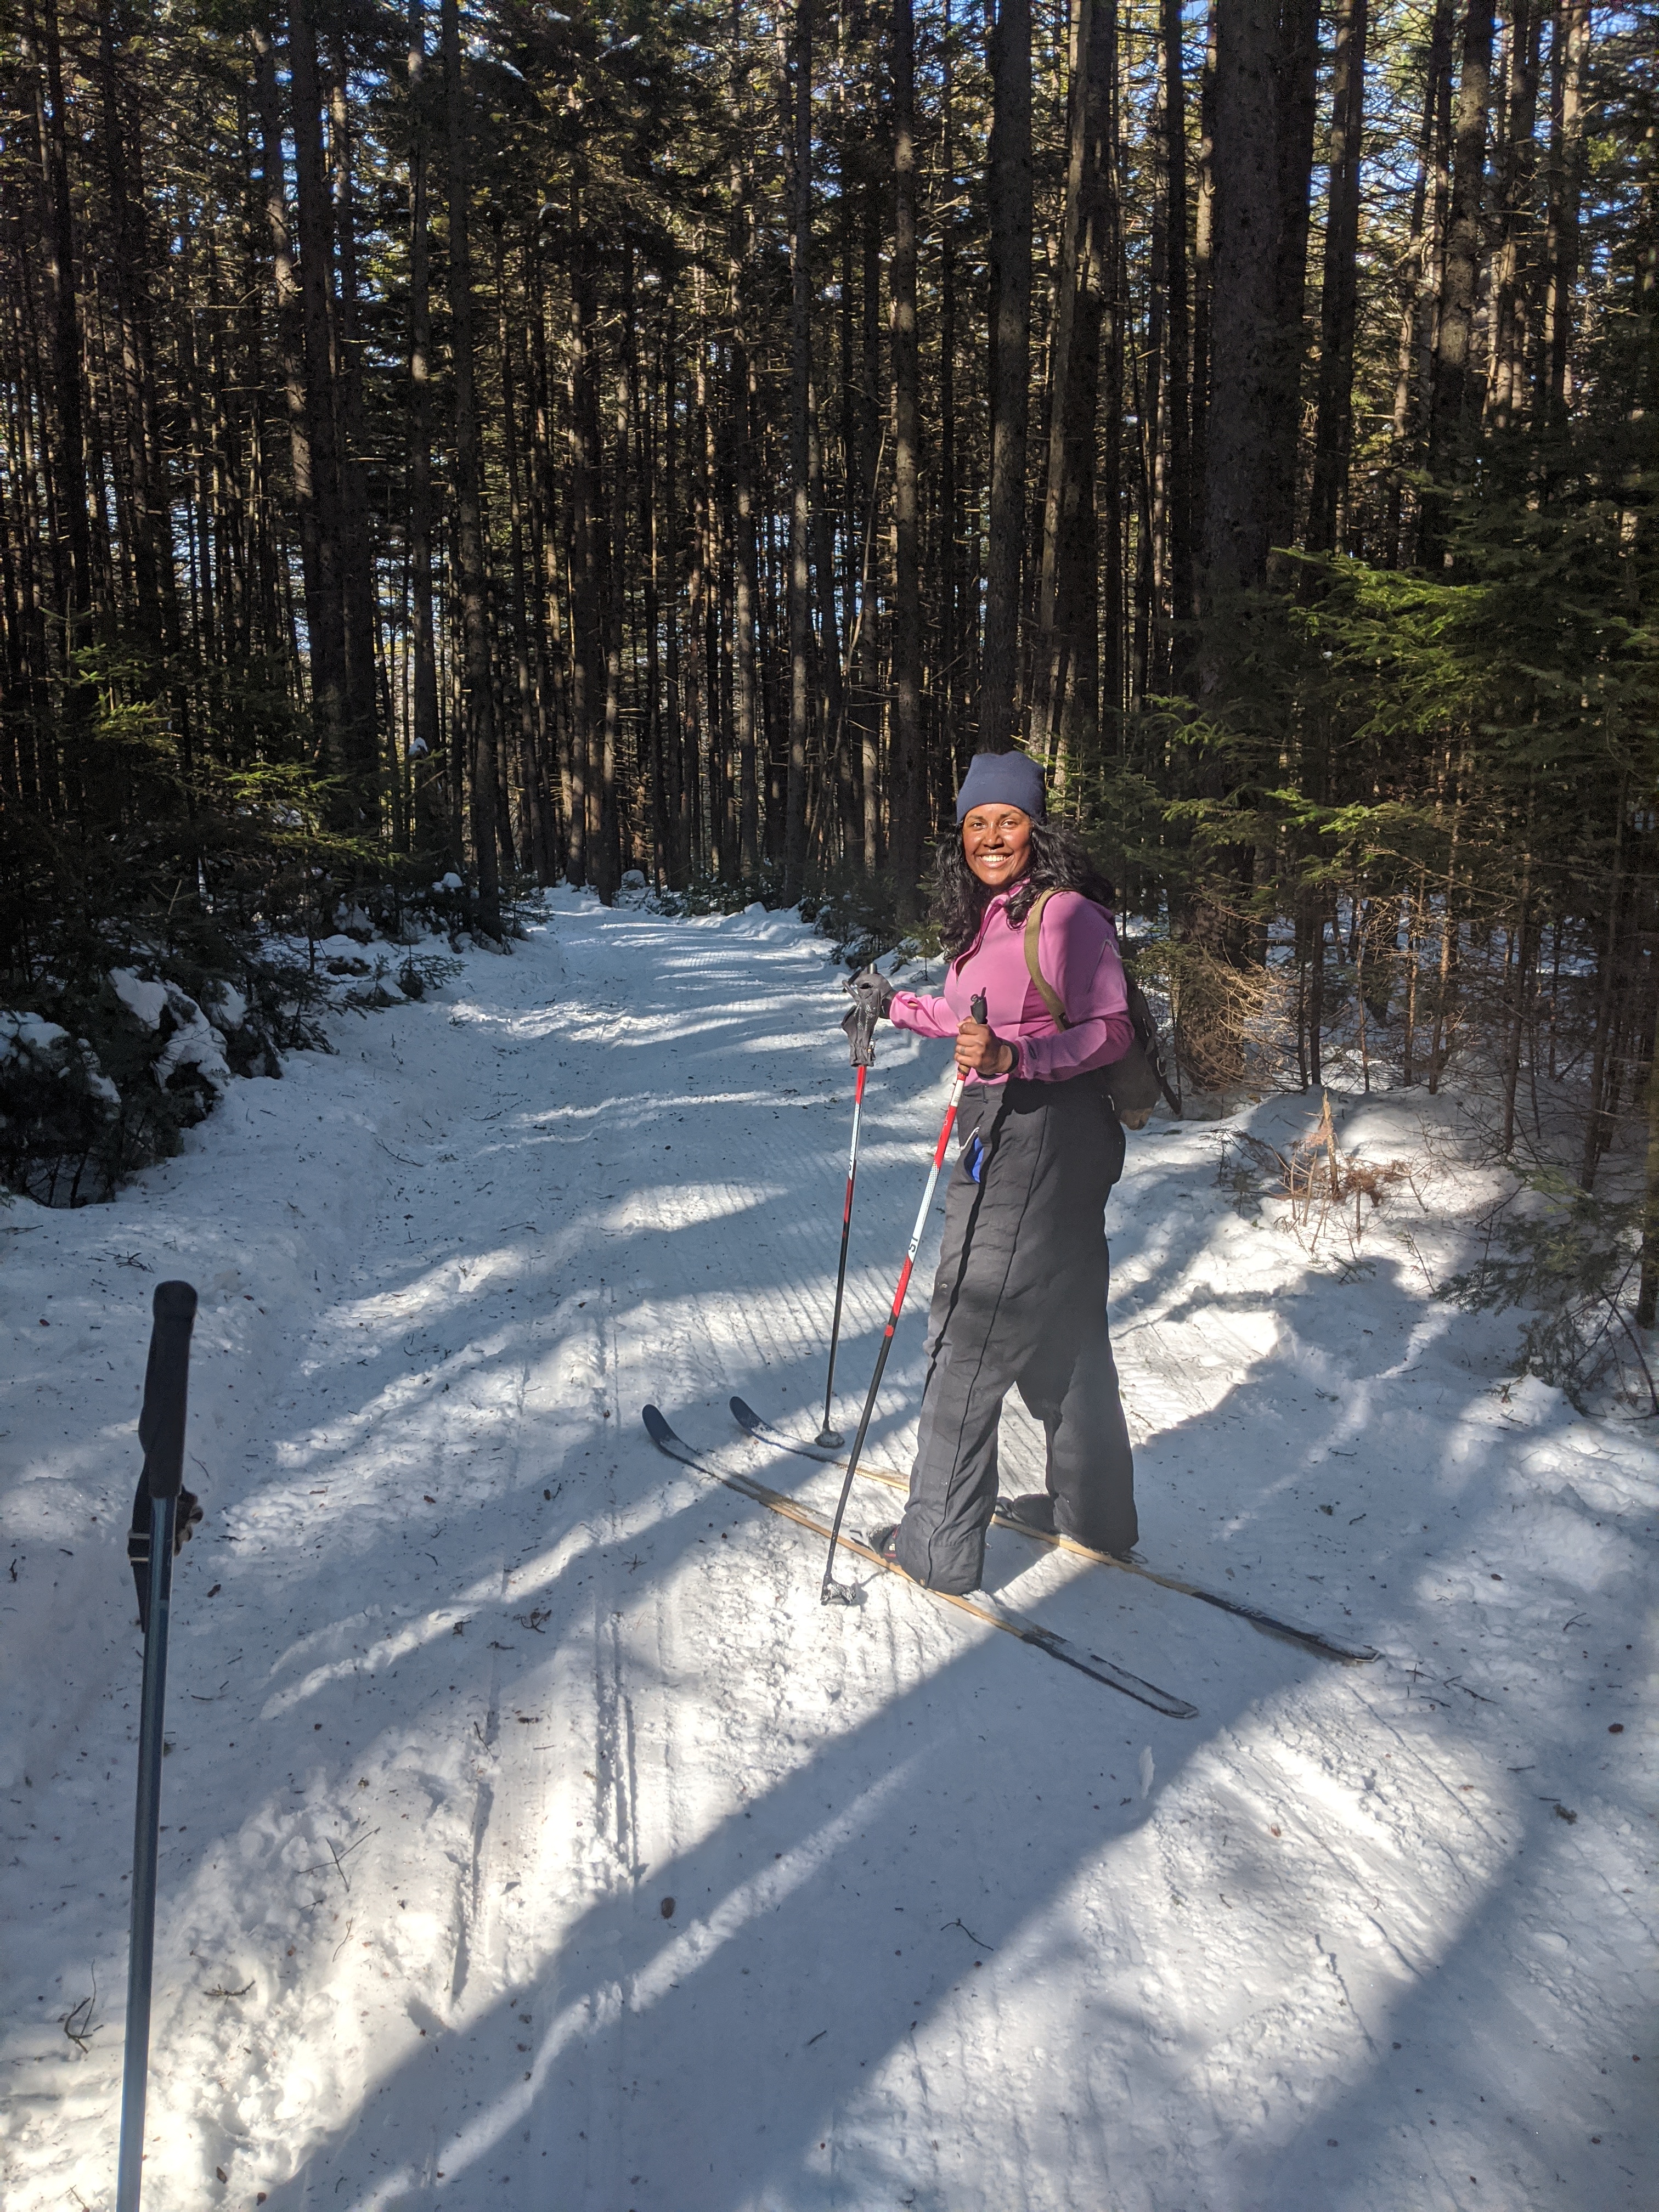
And learning to cross country ski of course
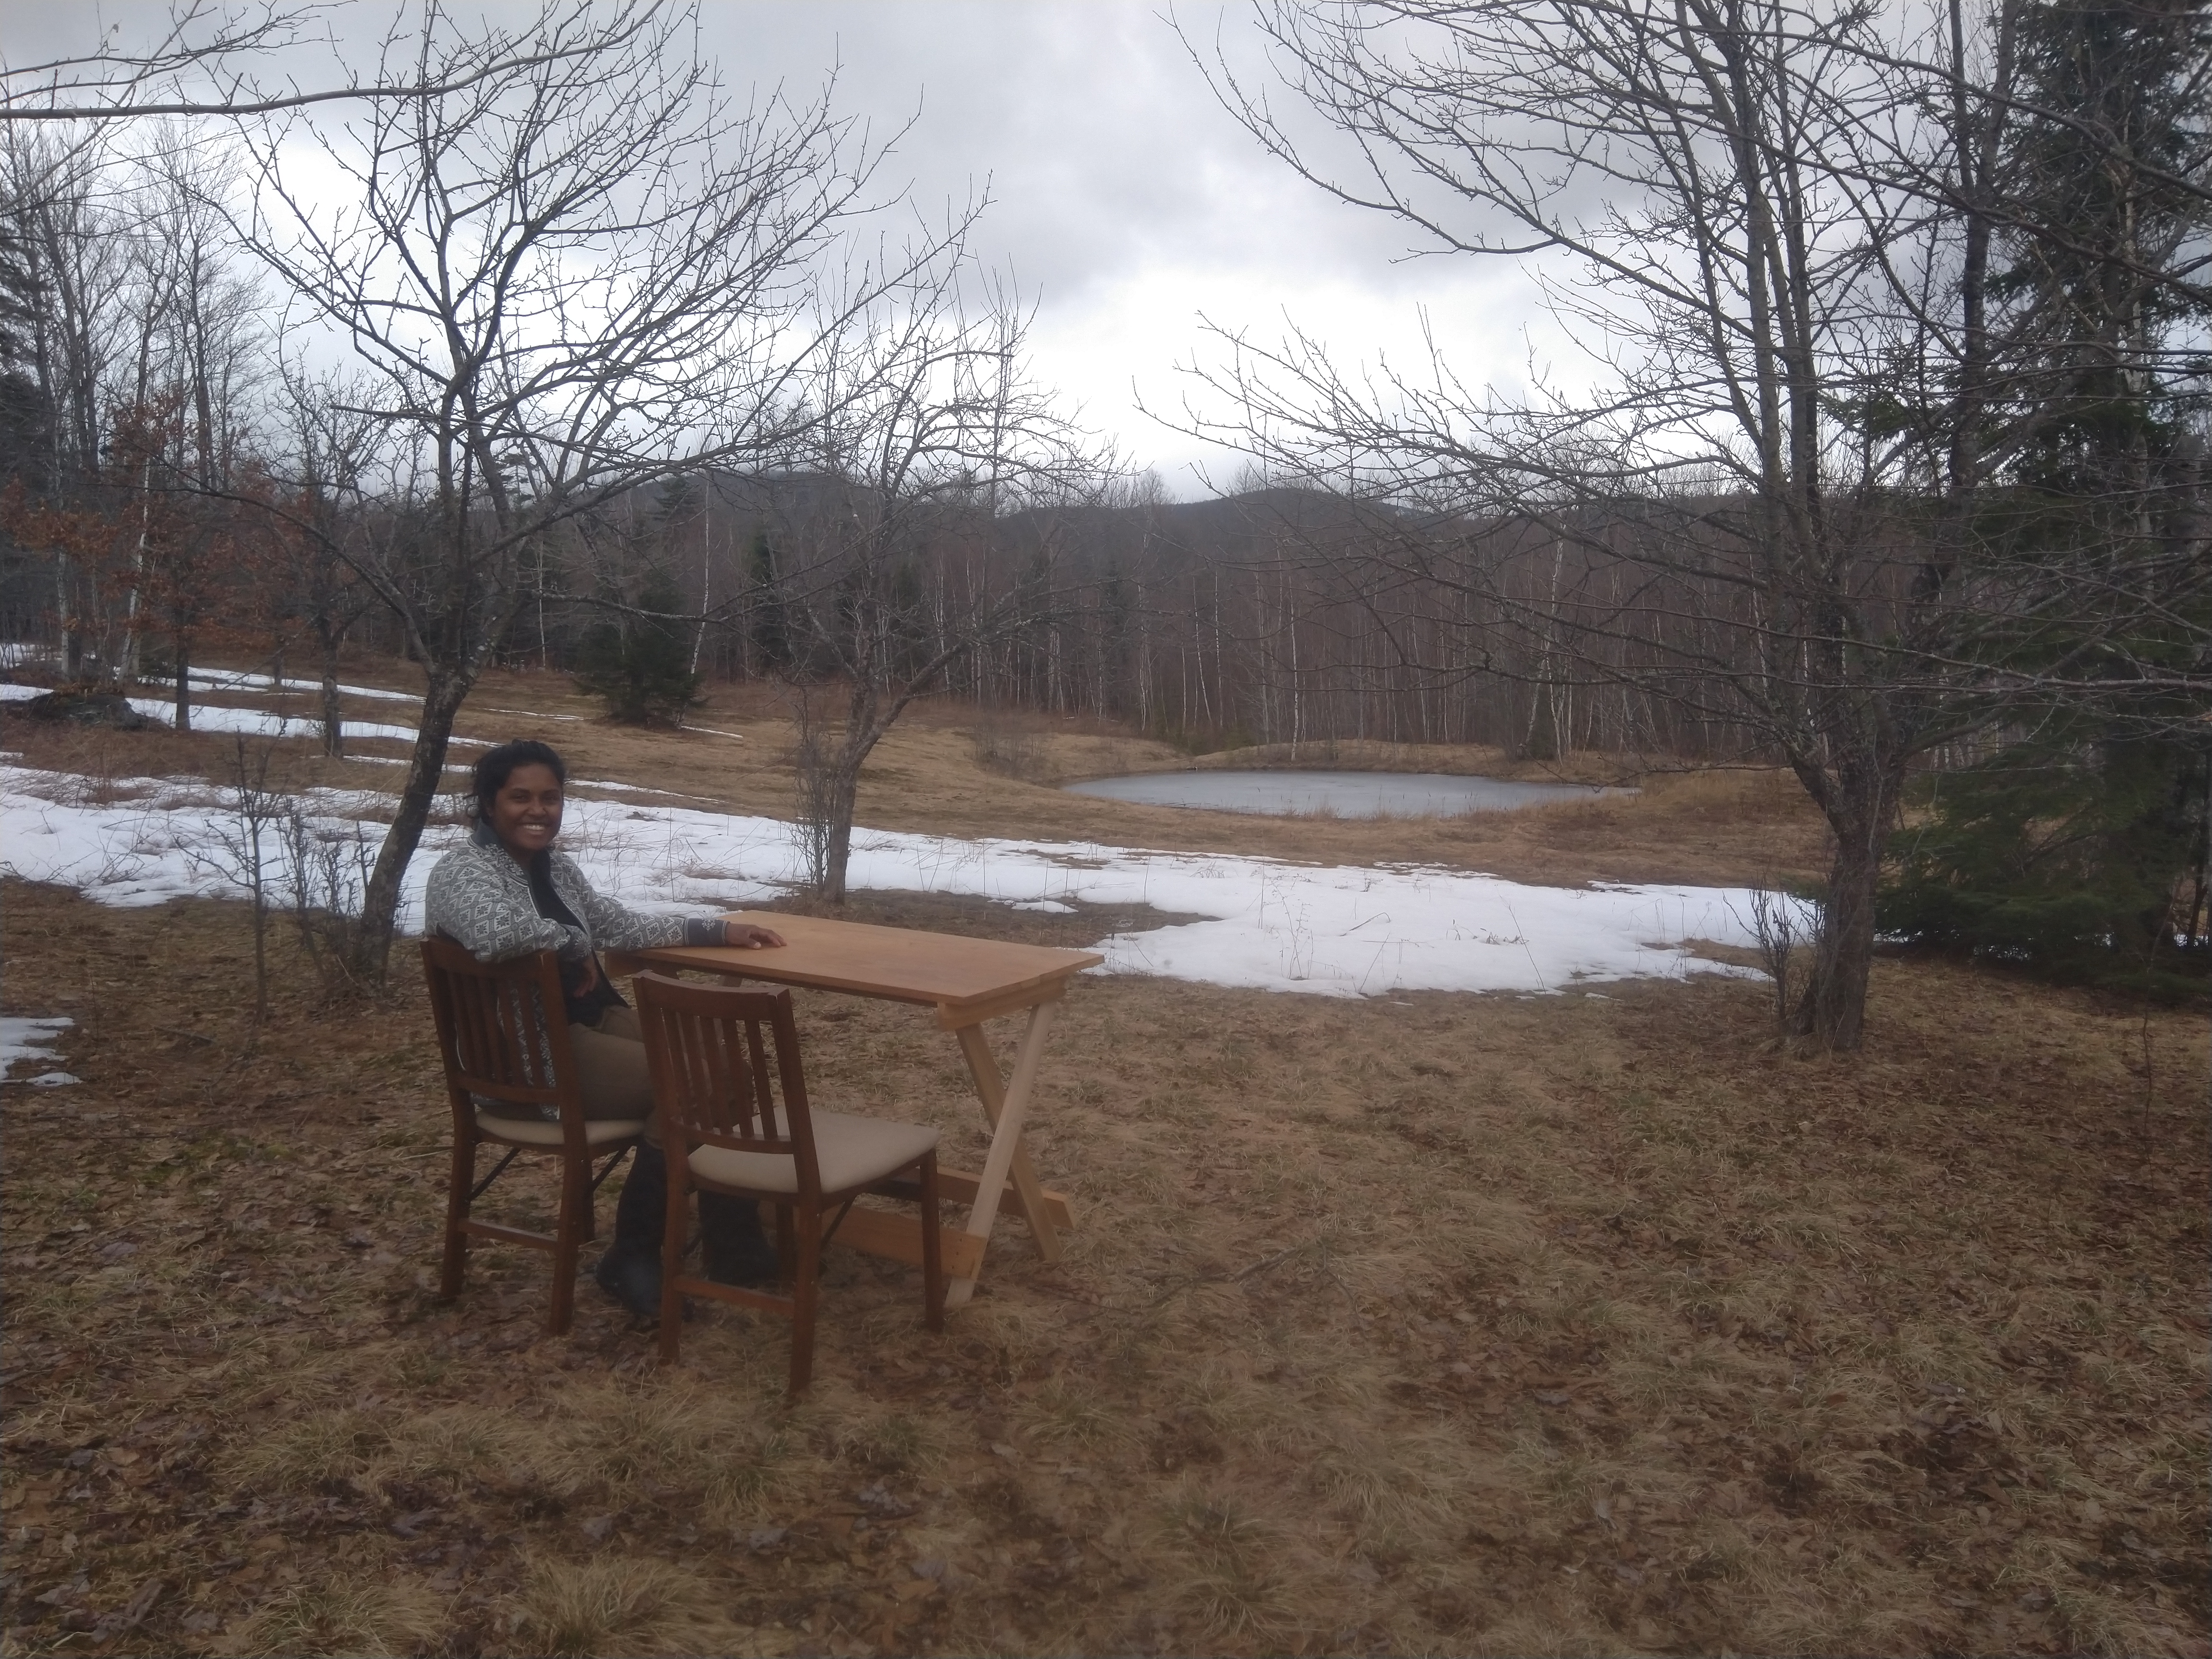
Then we found or land! We found it in the summer but it went off the market before we could put an offer on it, but then it became available again midwinter and we jumped on it.
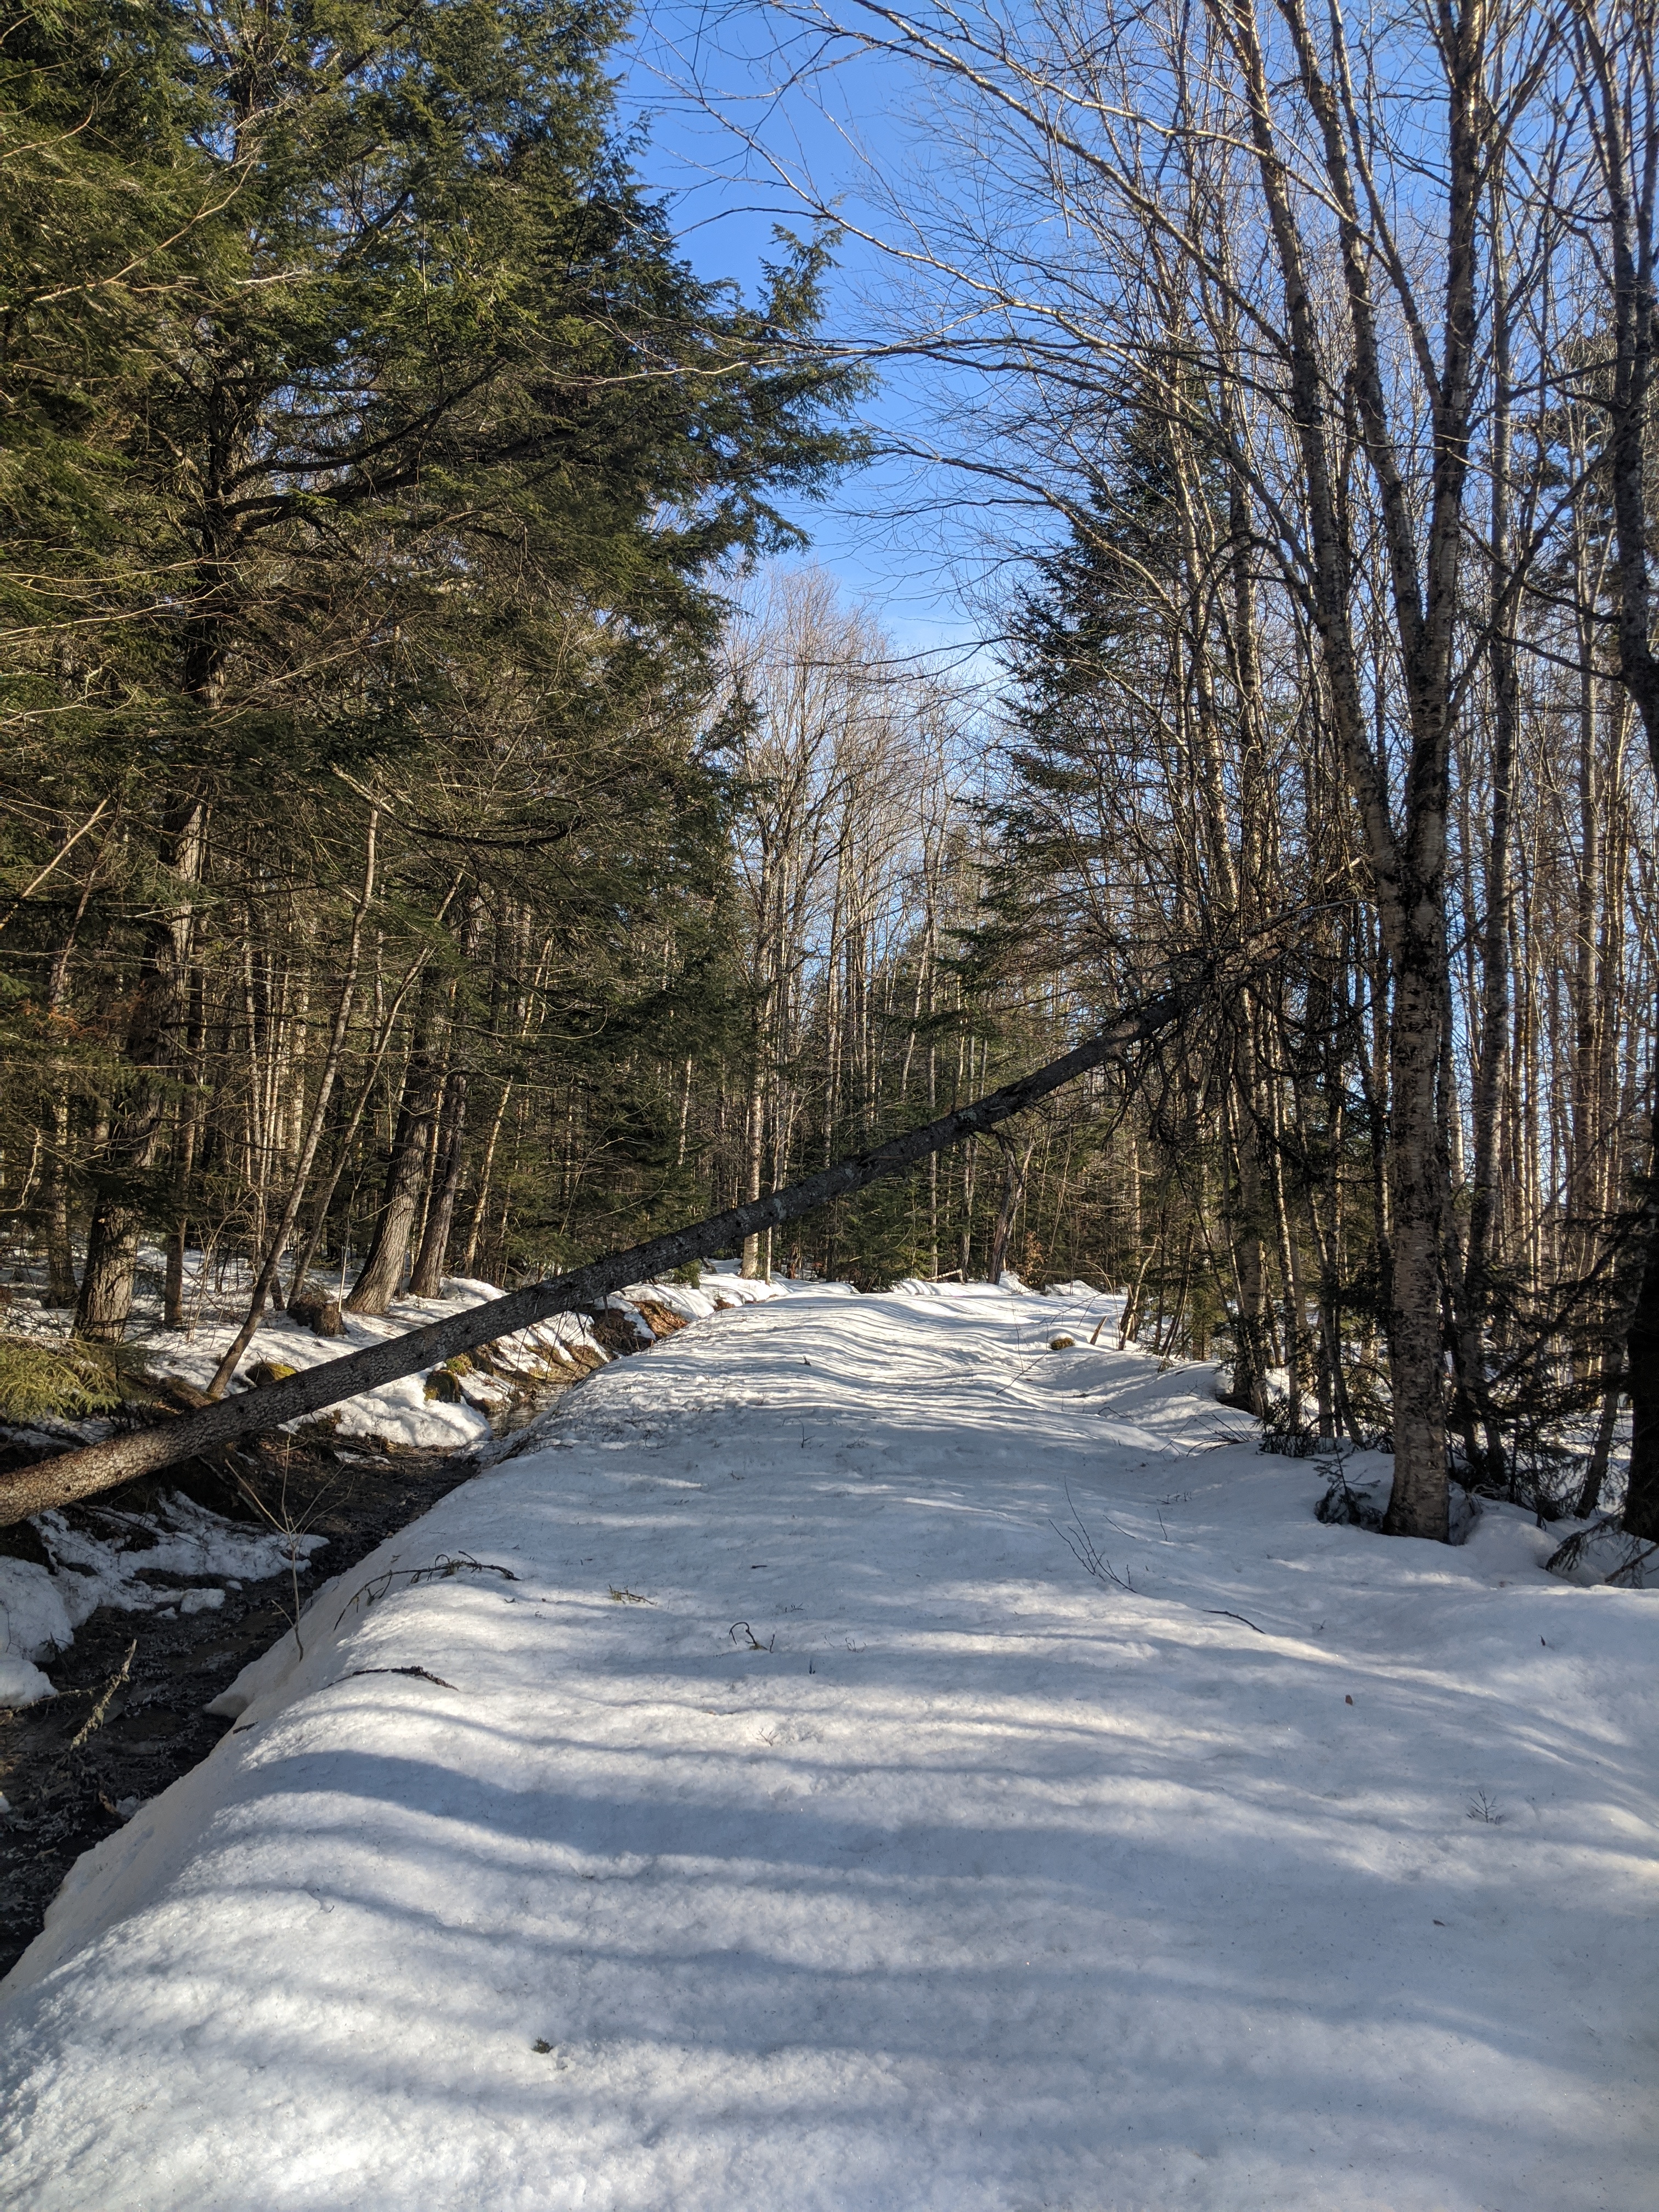
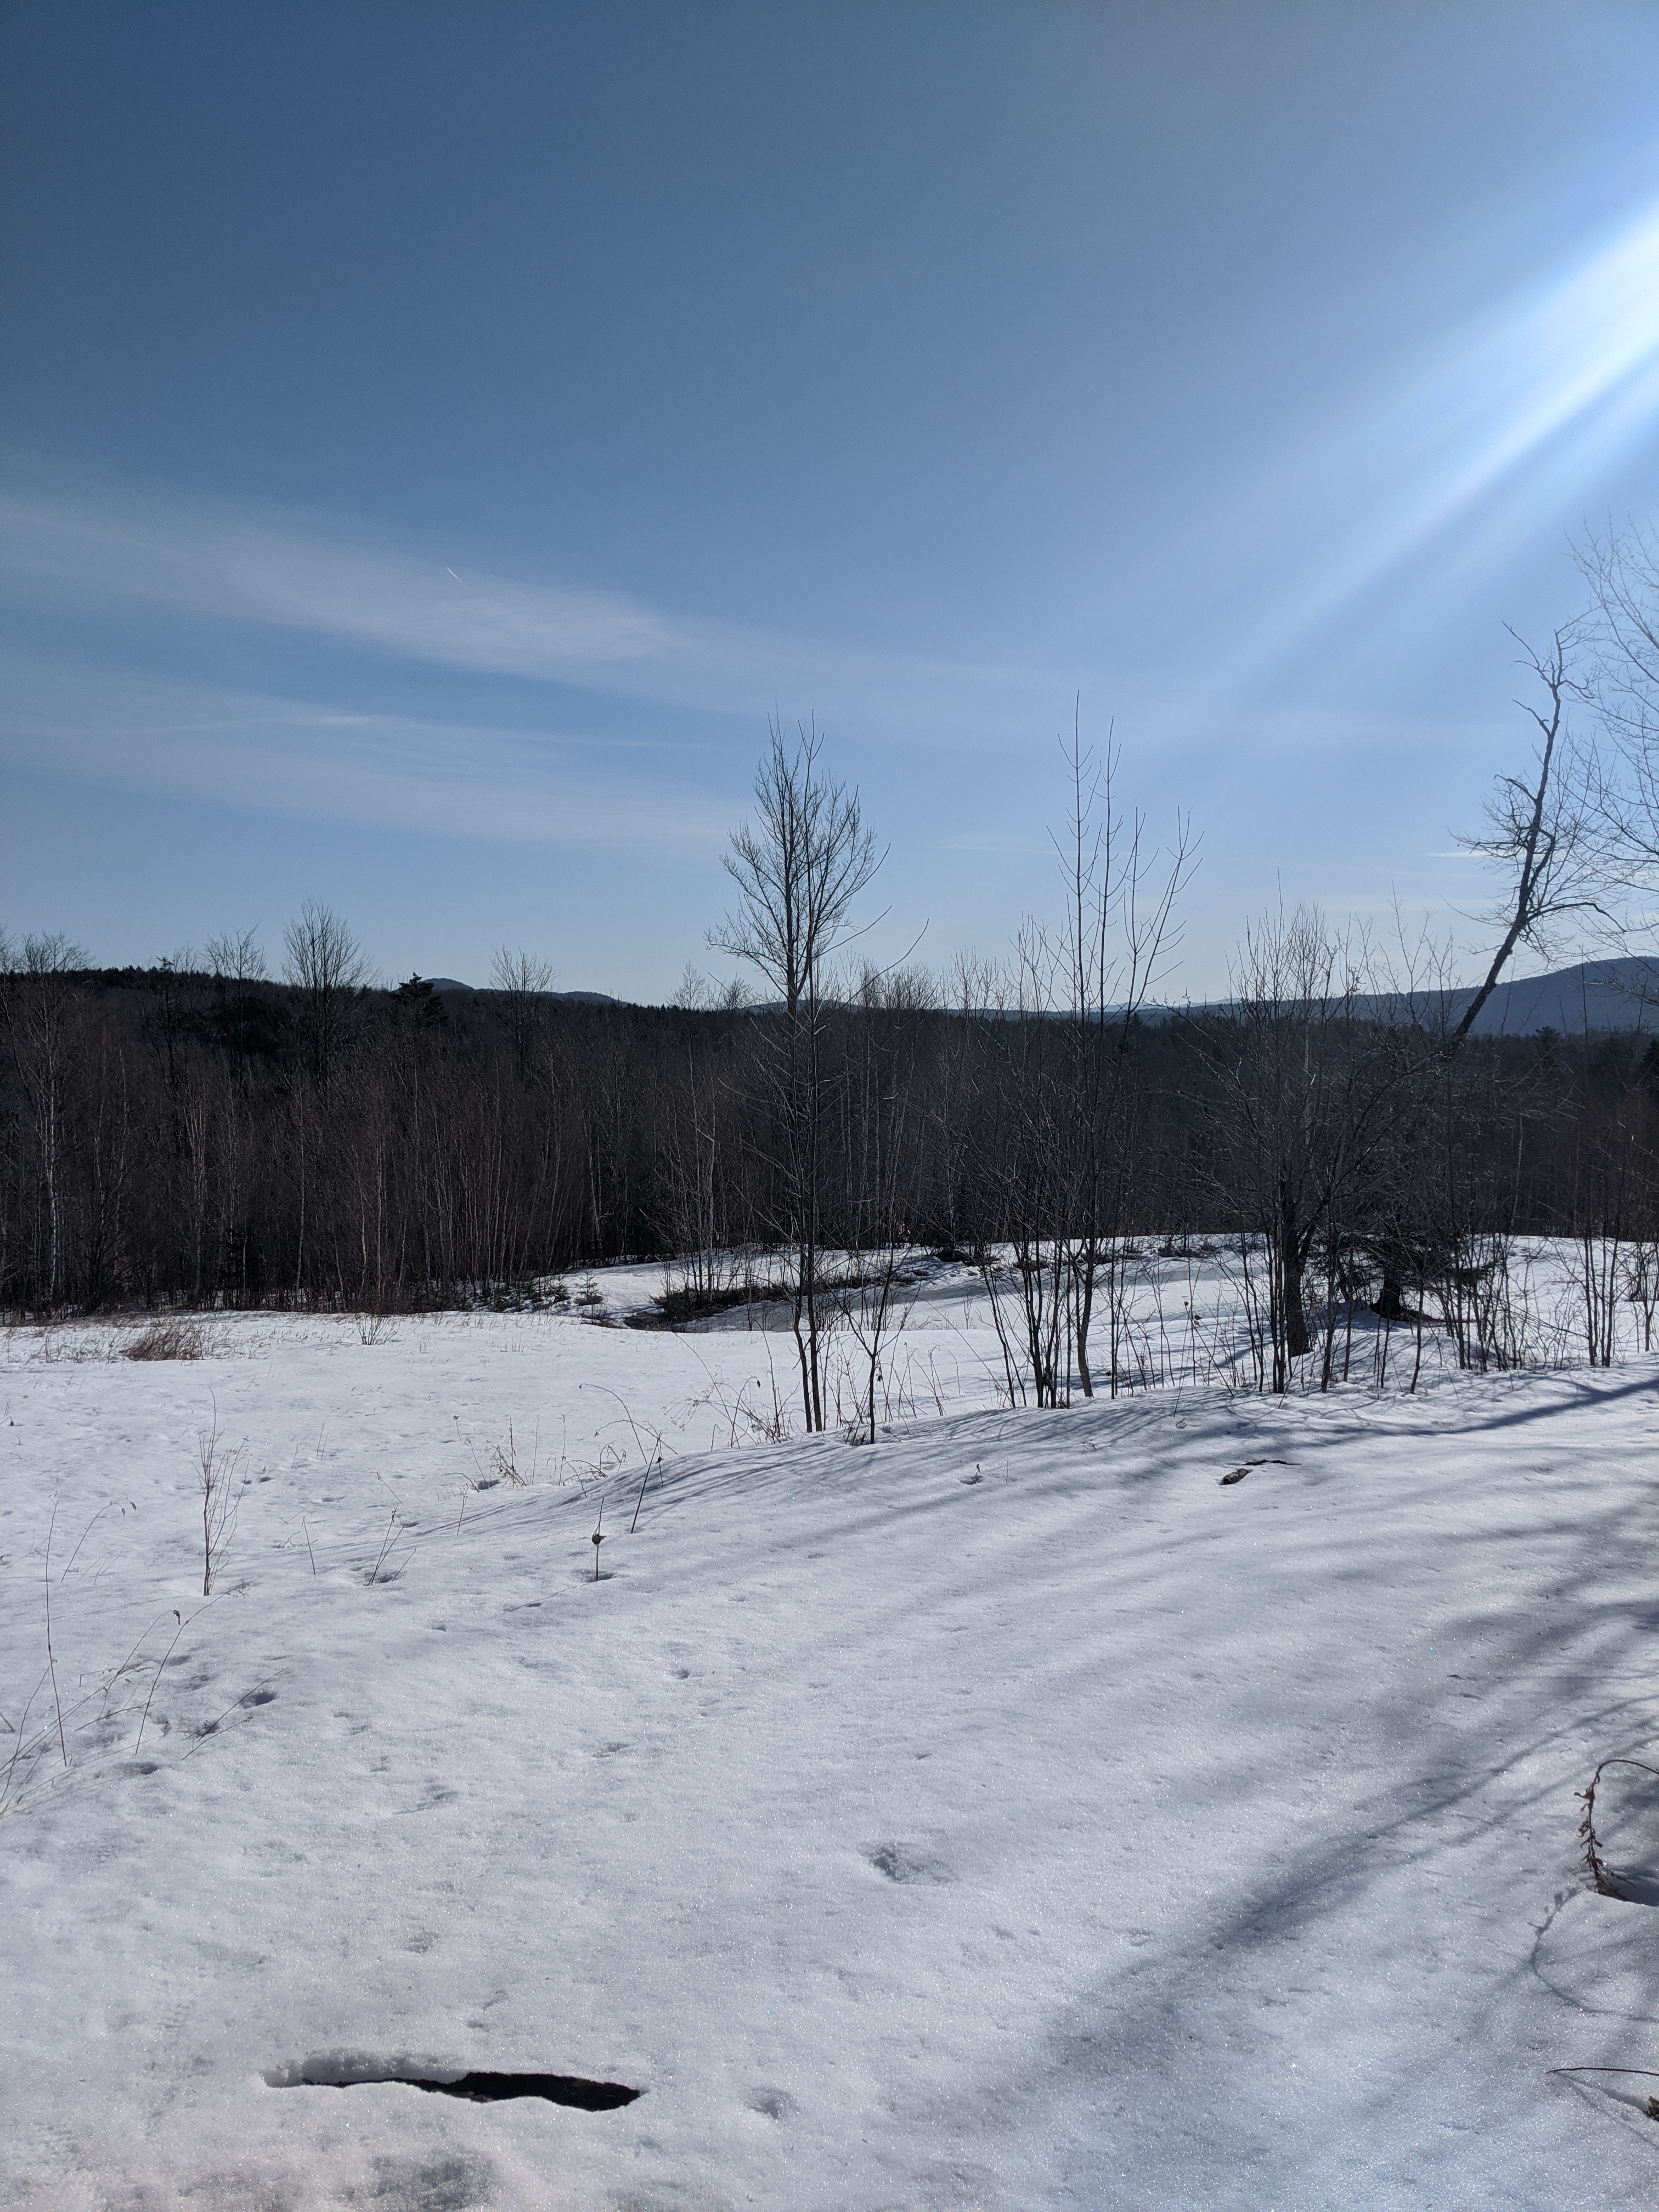
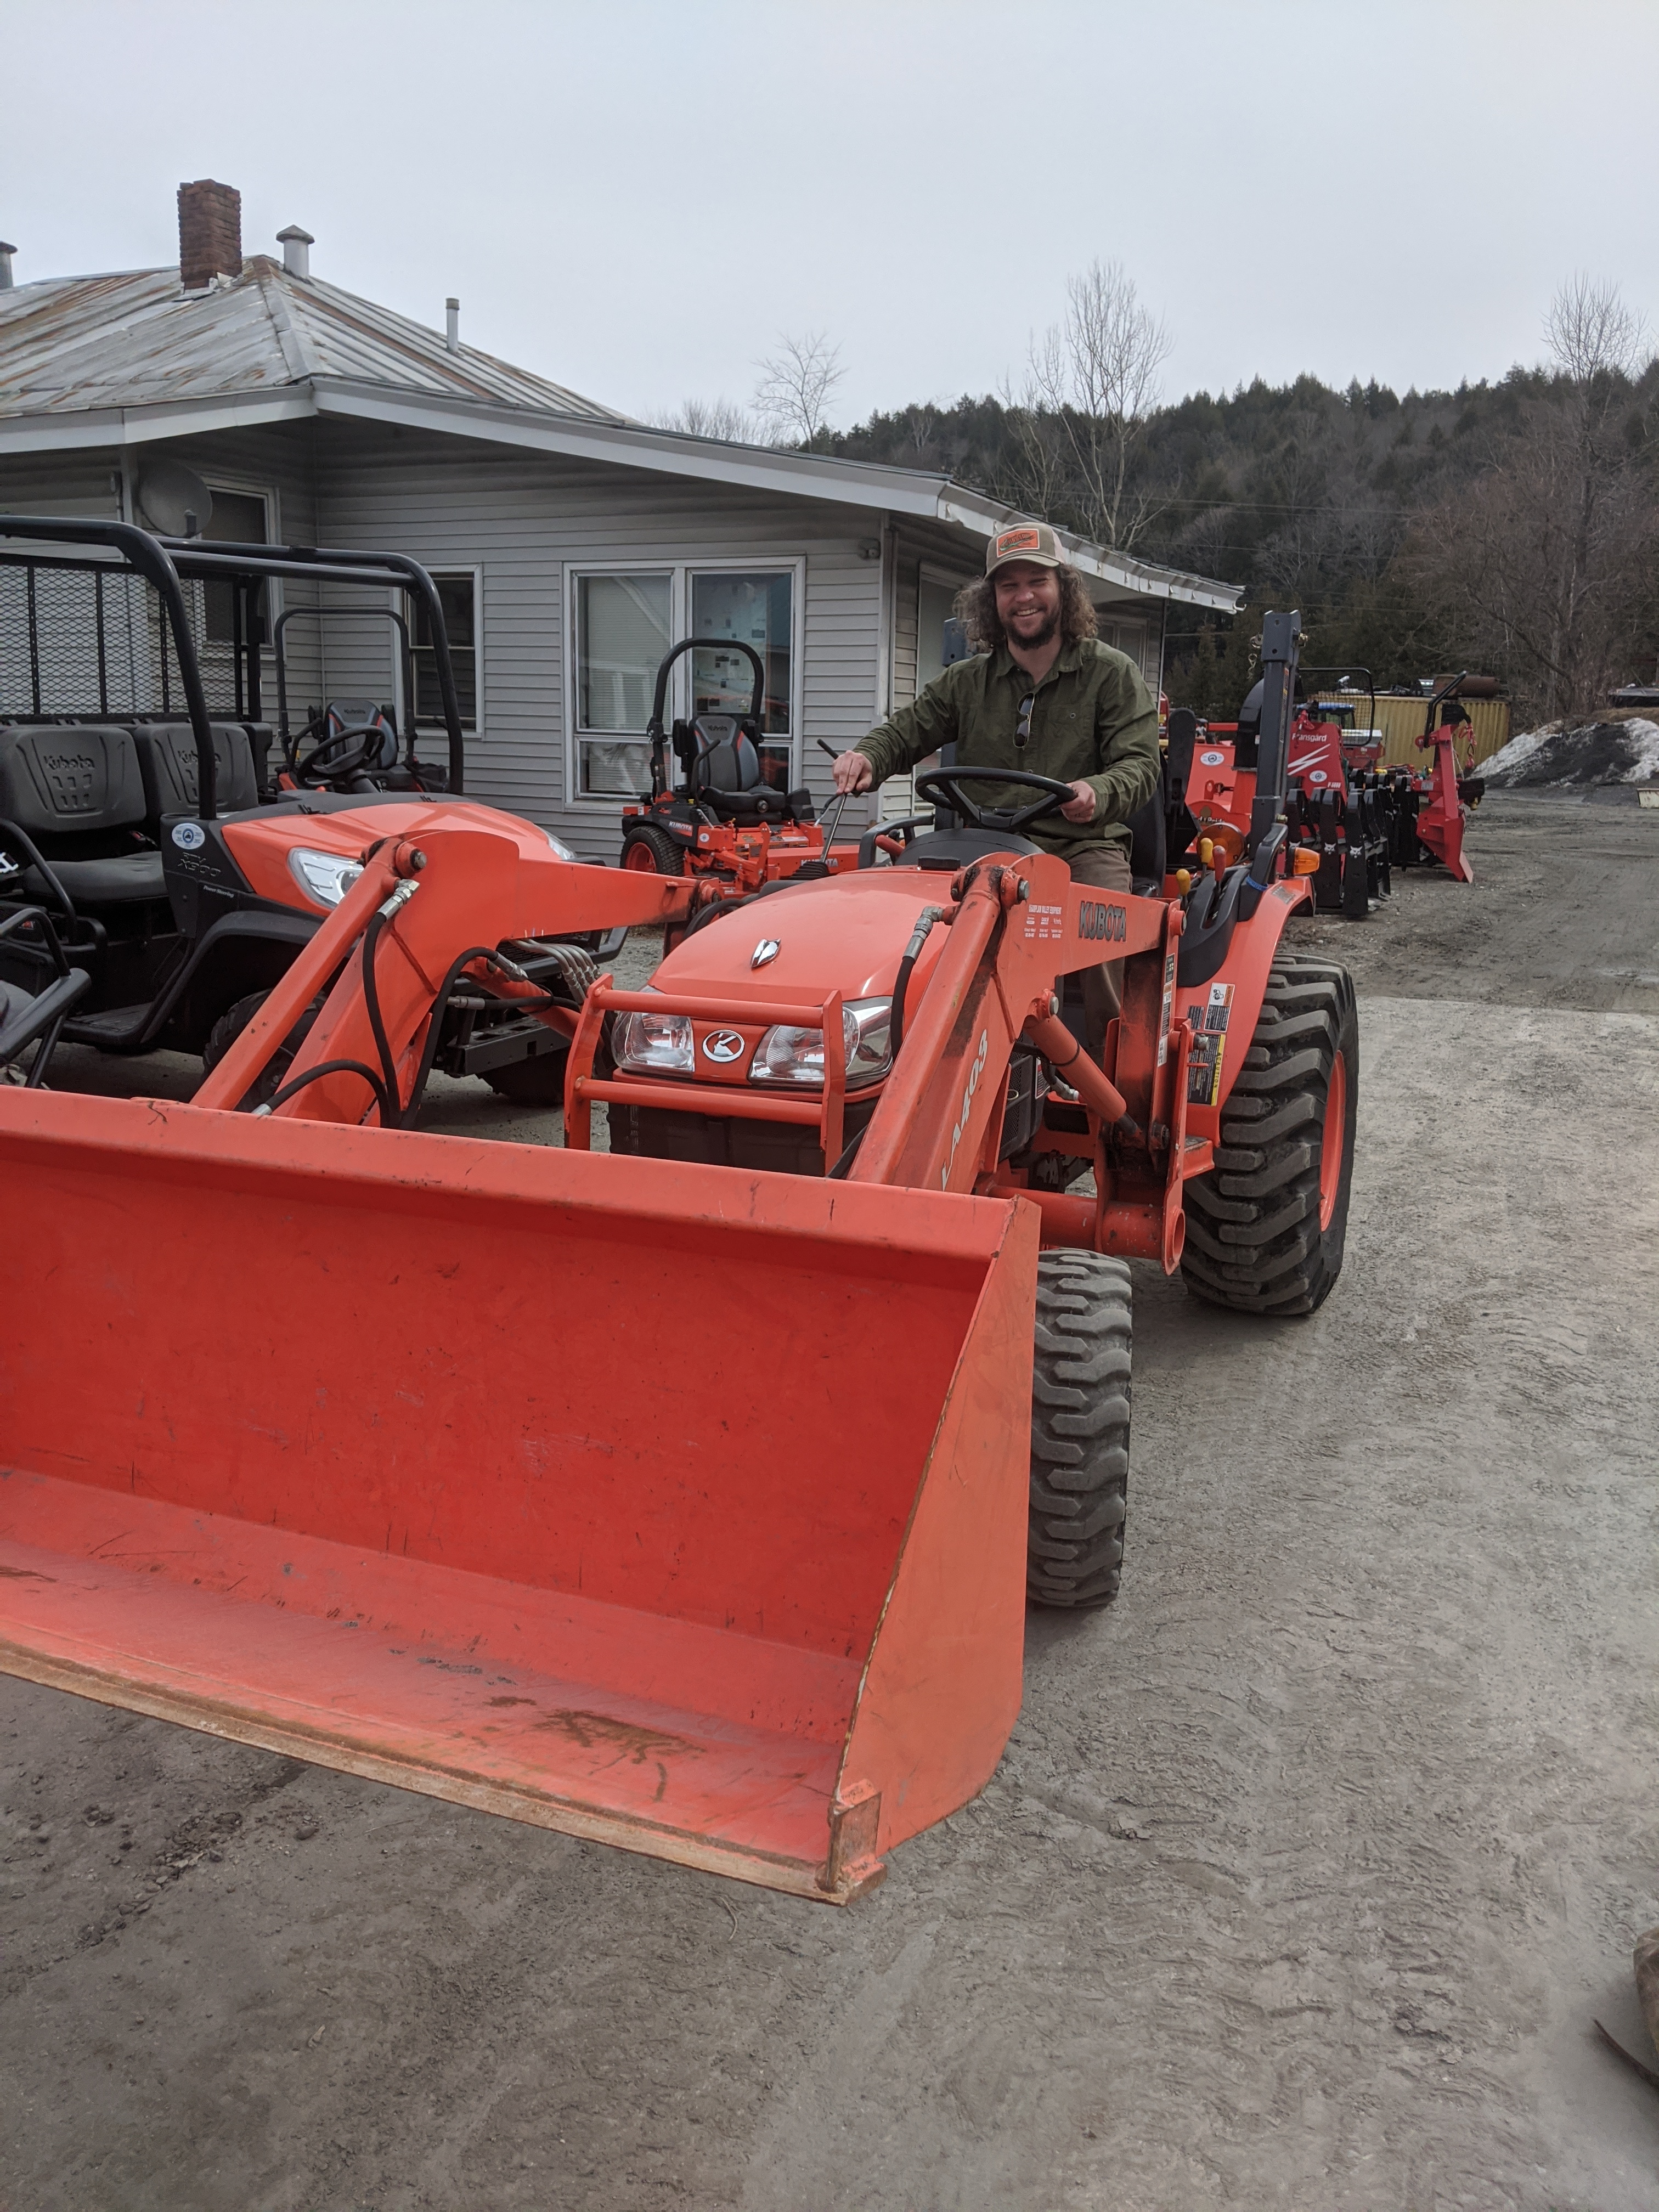
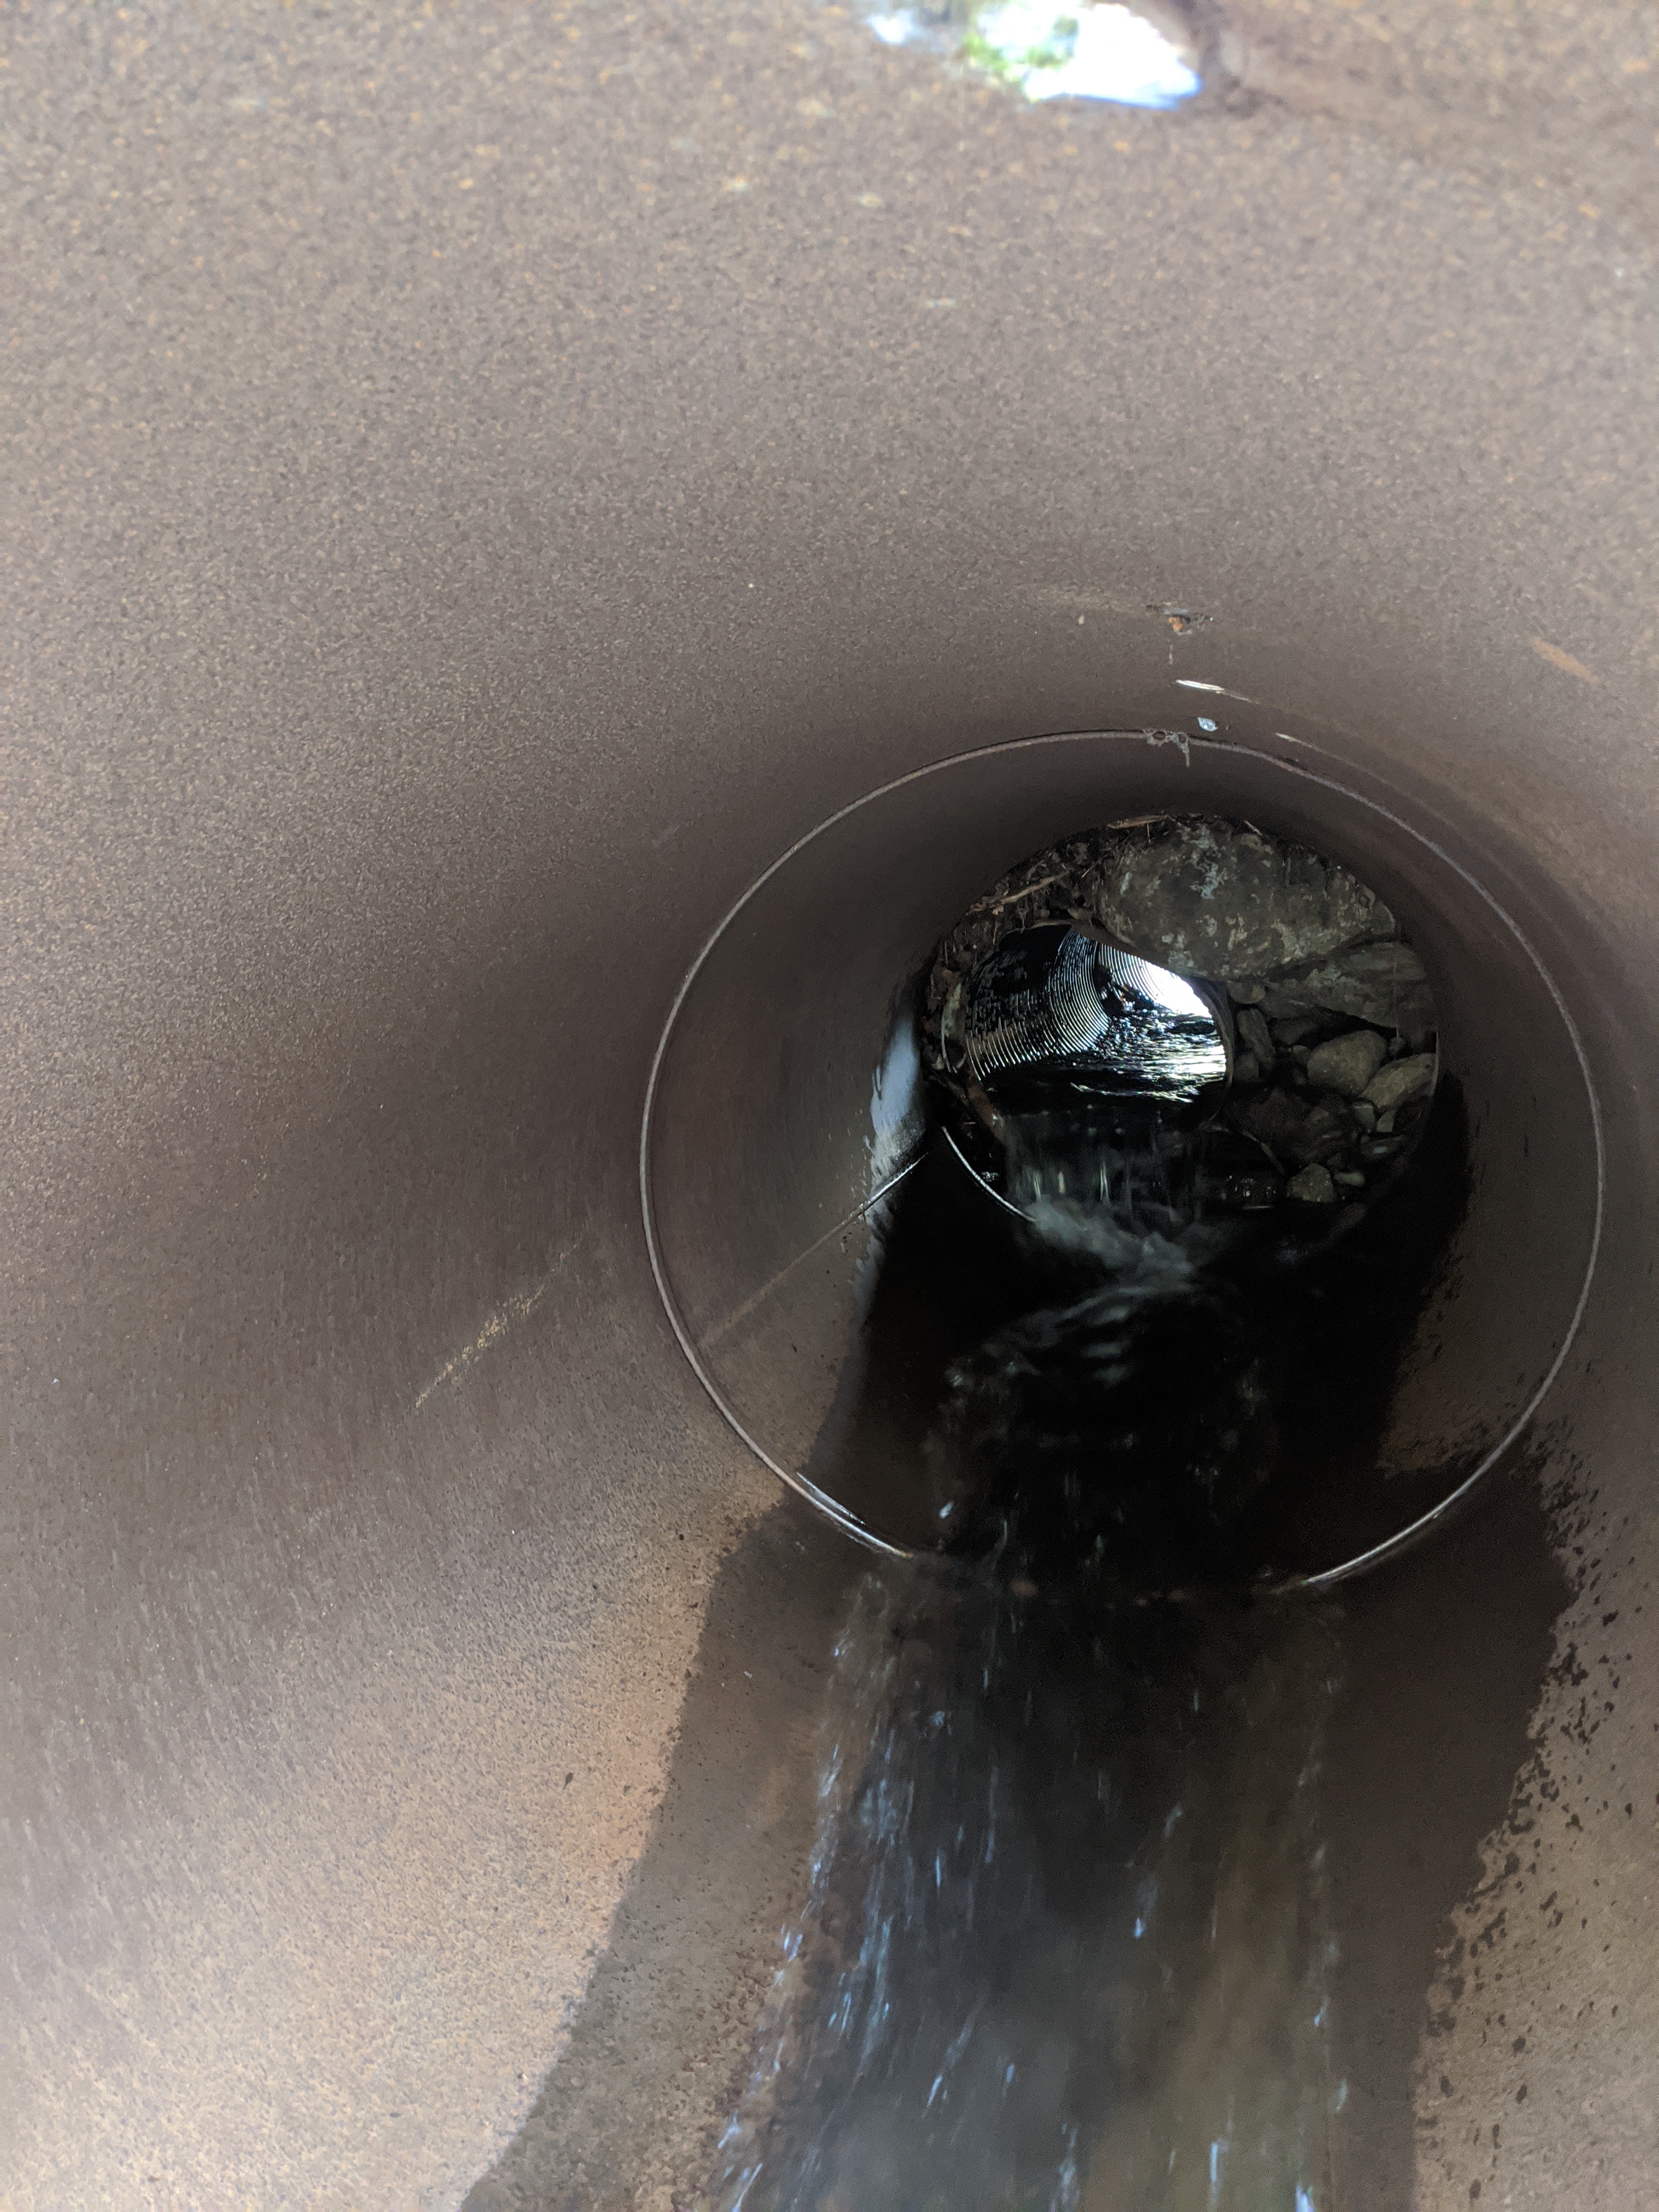
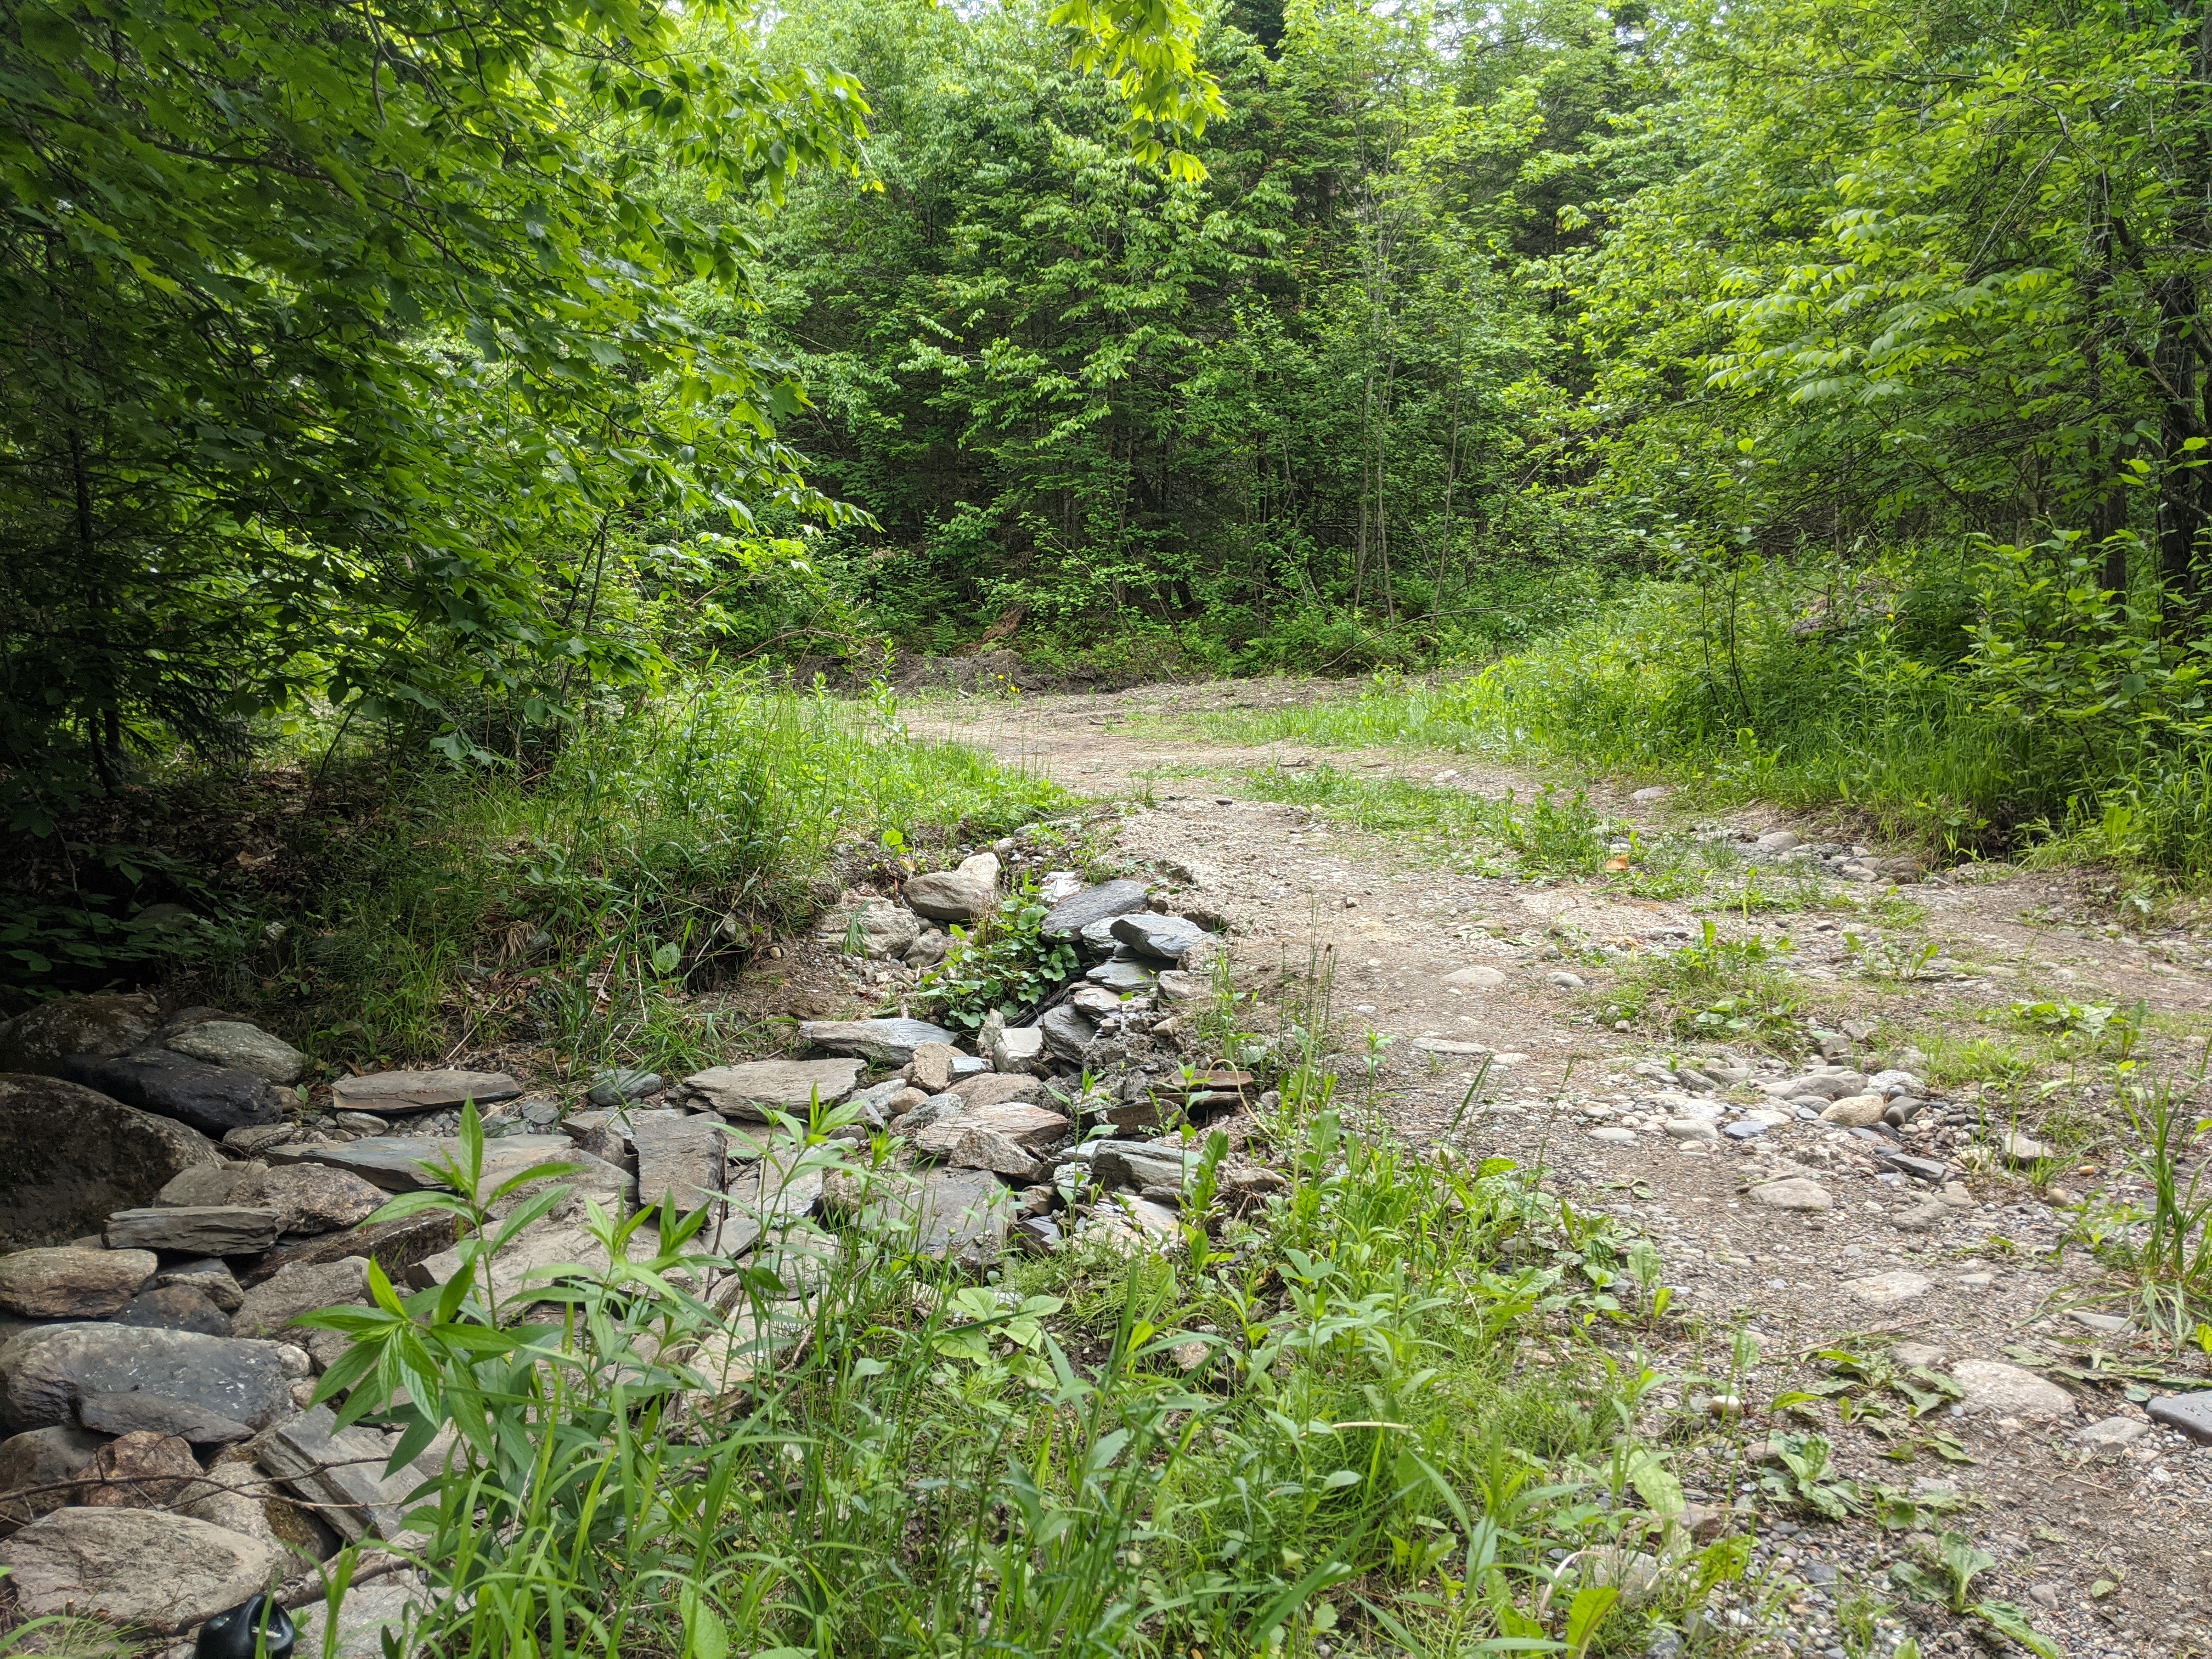
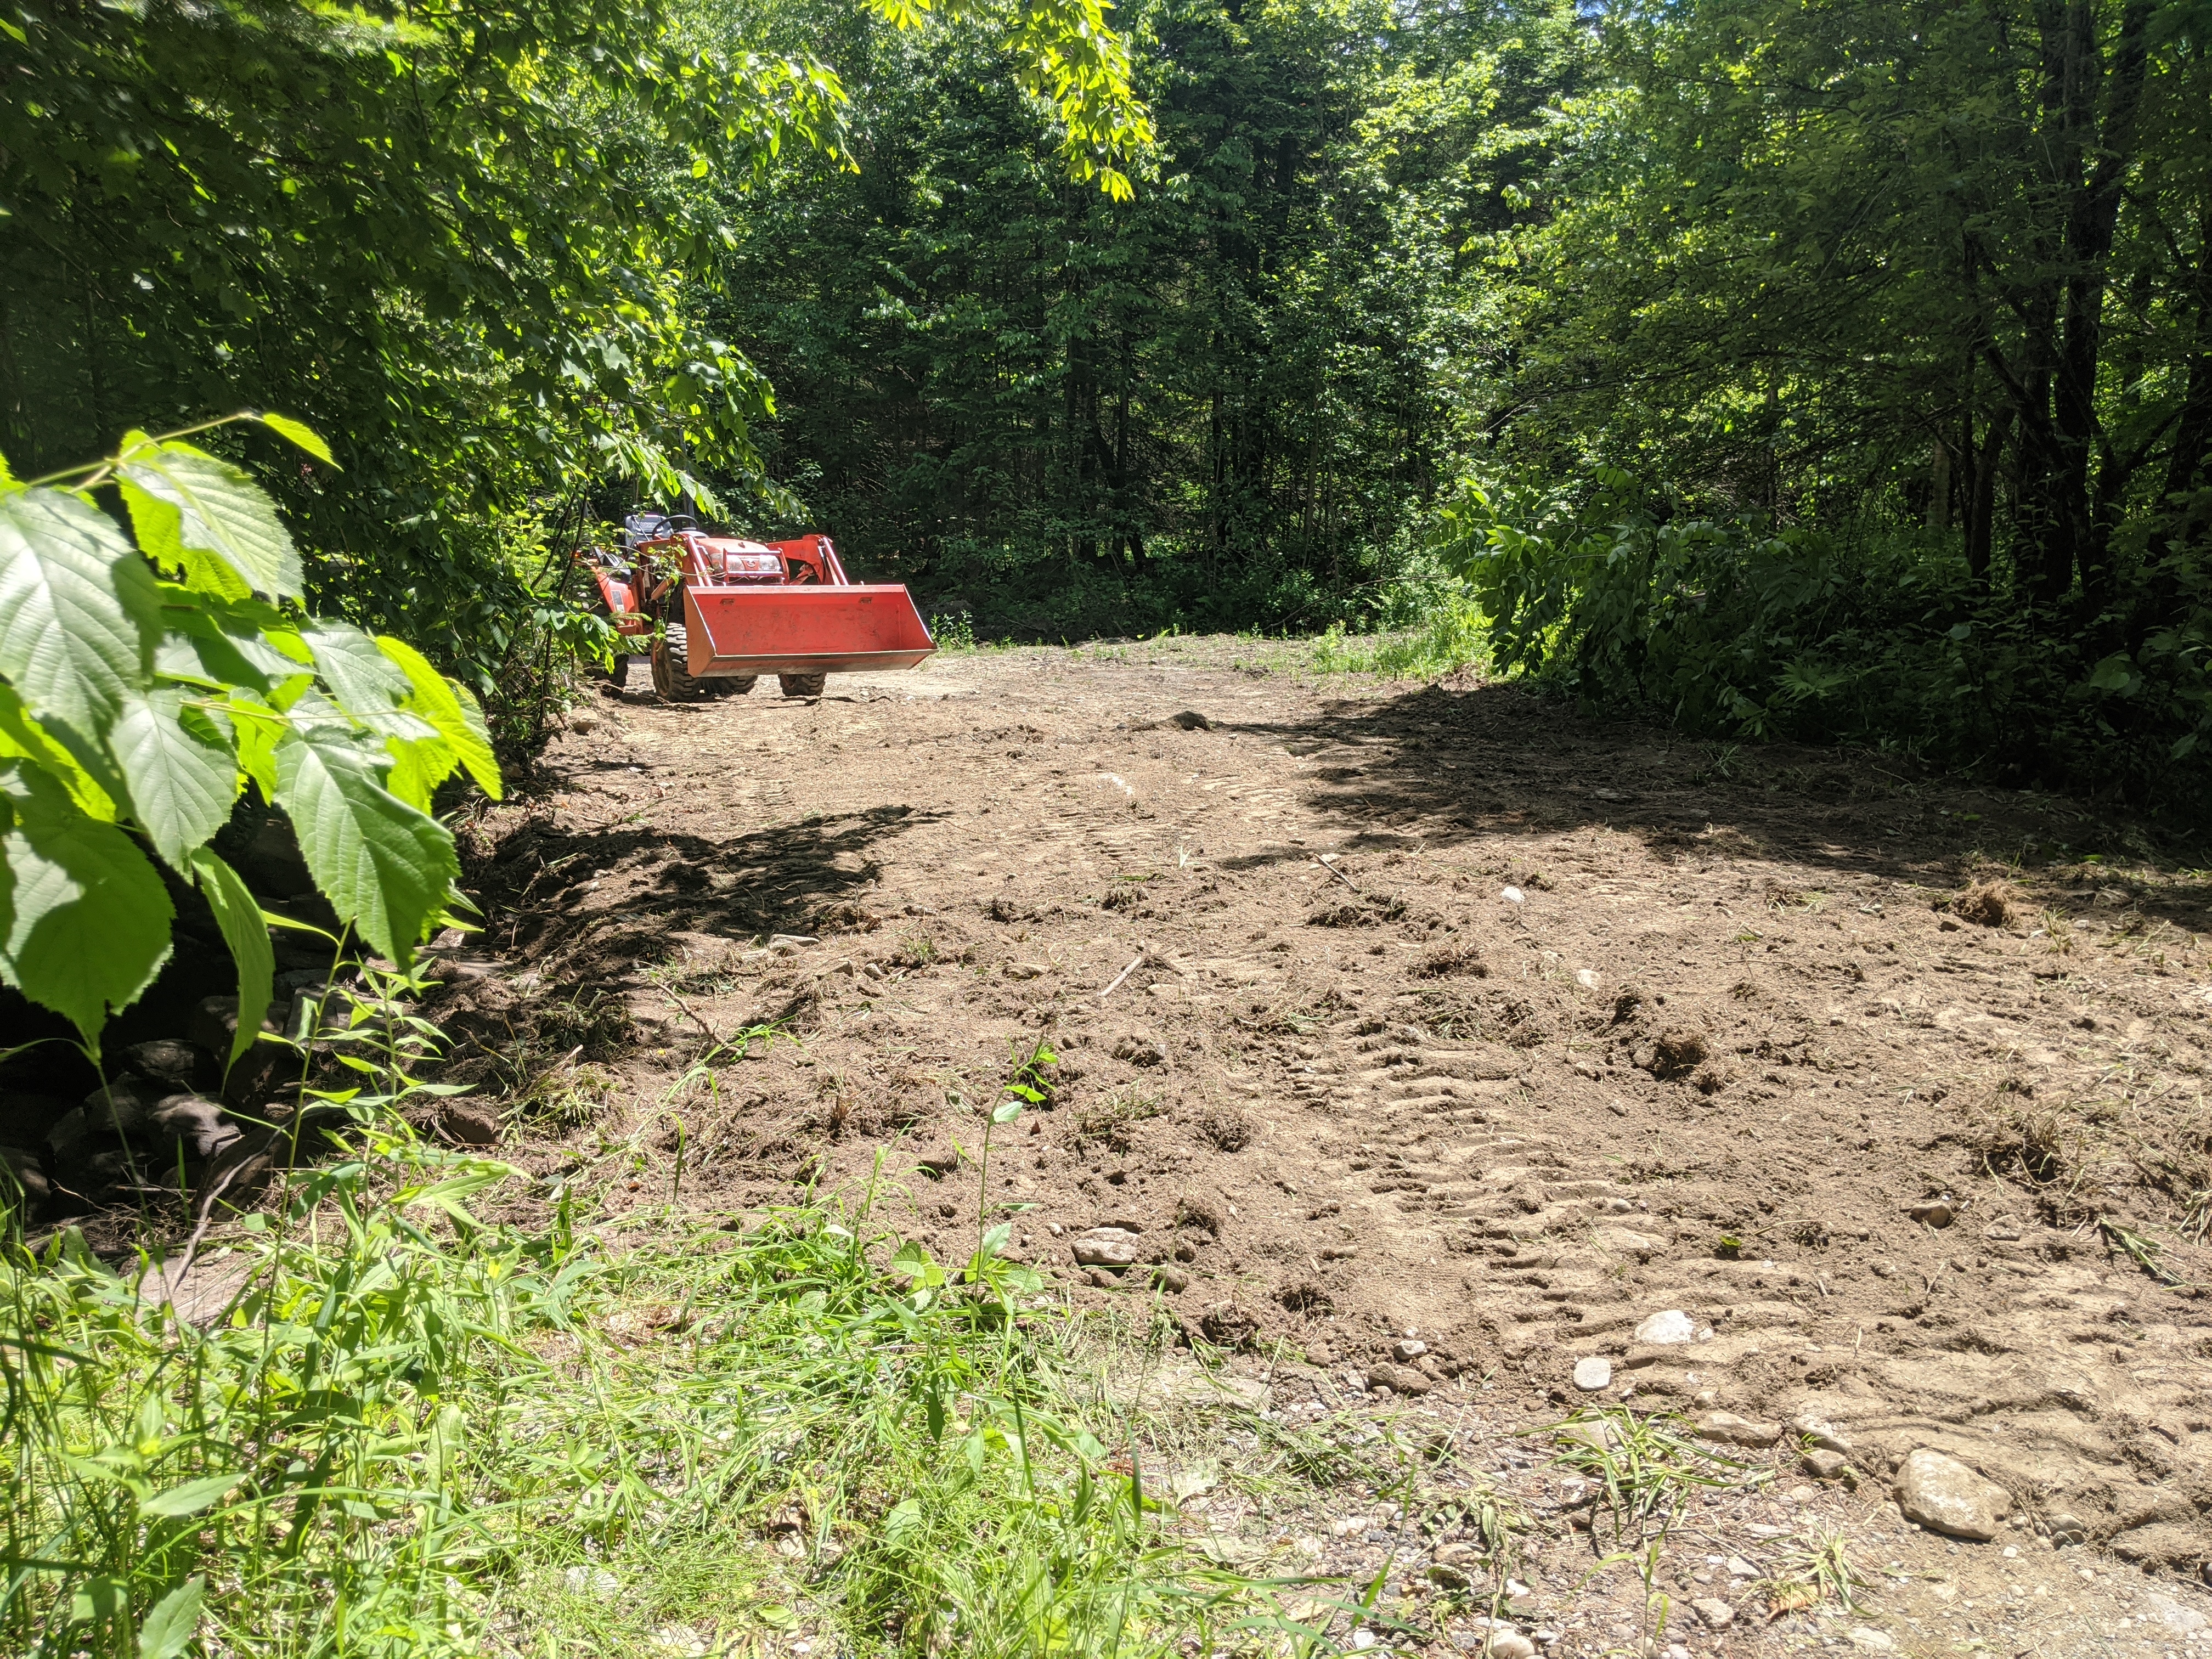
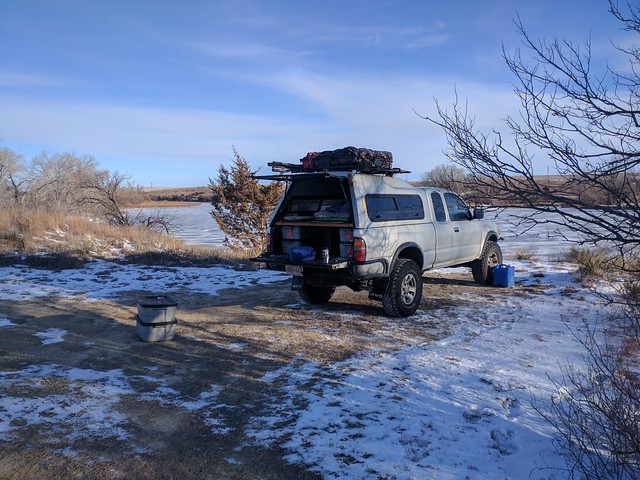
It's 82 acres in a small town near Montpelier VT. A lot of it is is wetland, the road has 8 culverts in it and was in pretty bad shape. So we bought a 30 horse tractor and started working on it.
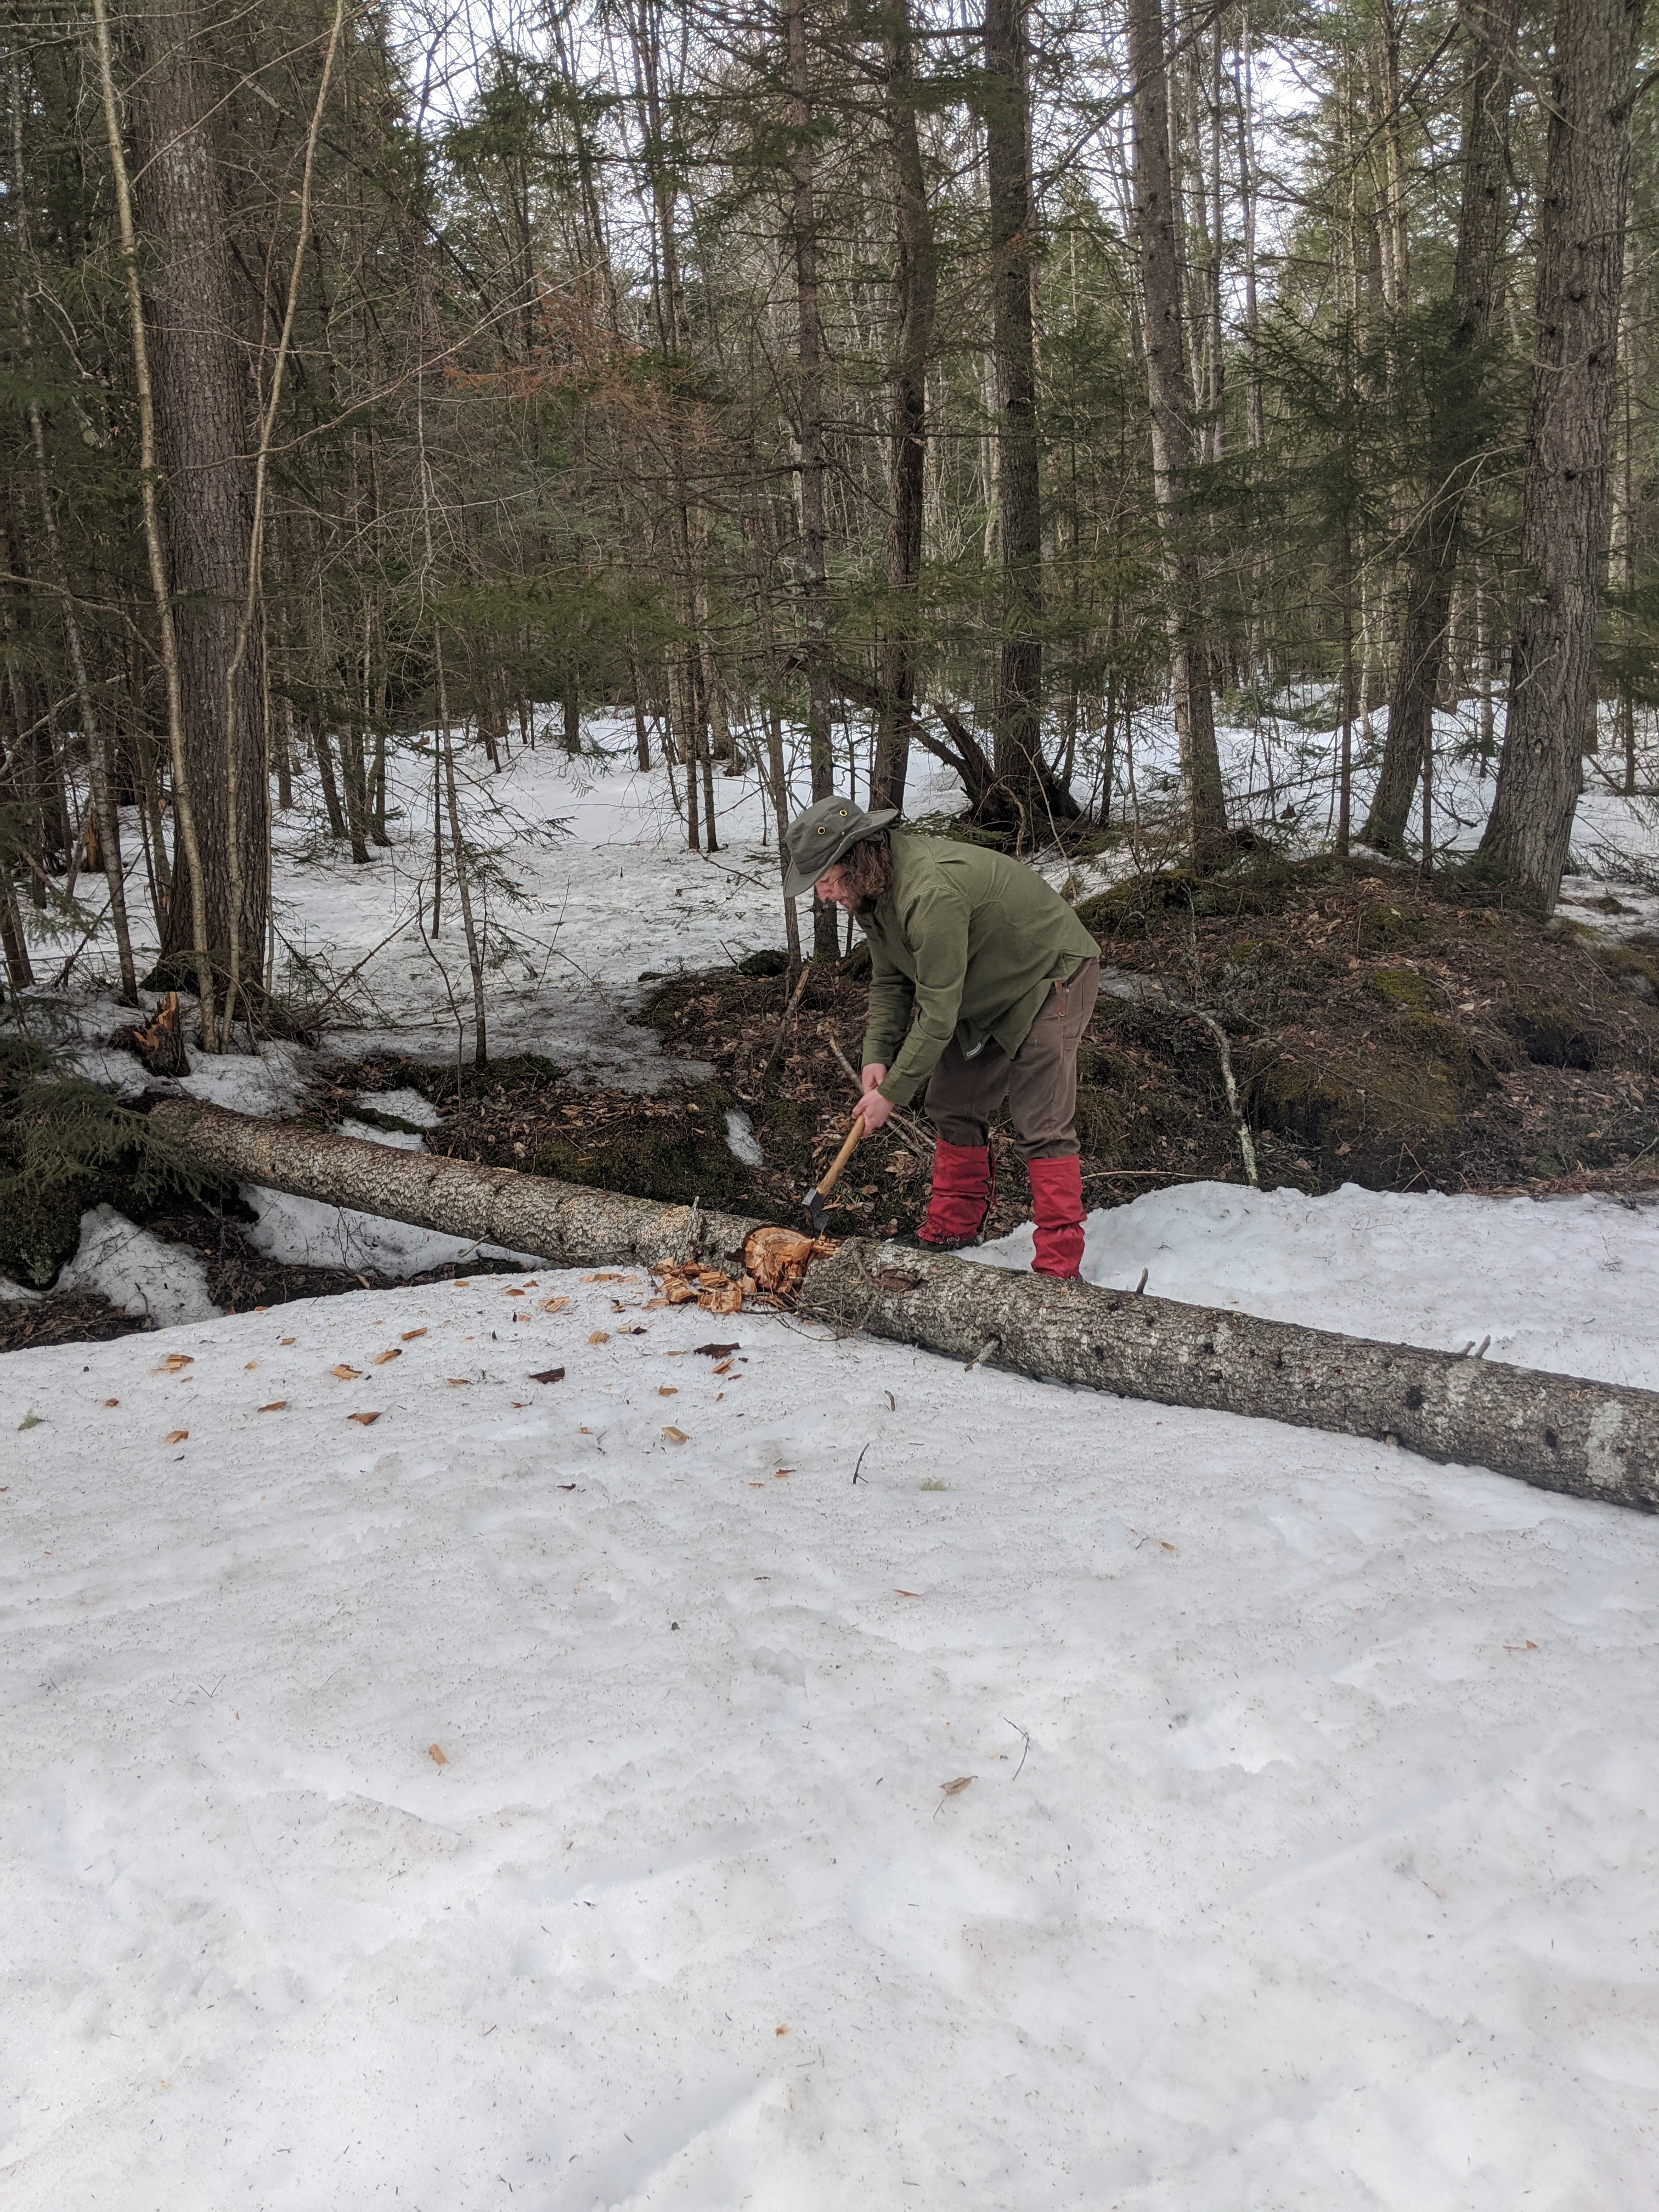
The biggest culvert was in 2 pieces under the road and I ended up crawling in to it and building a mortered stone wall, so we could pour cement from a hole through the road to fill a void that had formed. 3 others had to be replaced. We did one ourselves (replacing it with 2 culverts) but it washed out in the spring, so we ended up getting help from a very nice contractor with an excevator who's been helping us out.
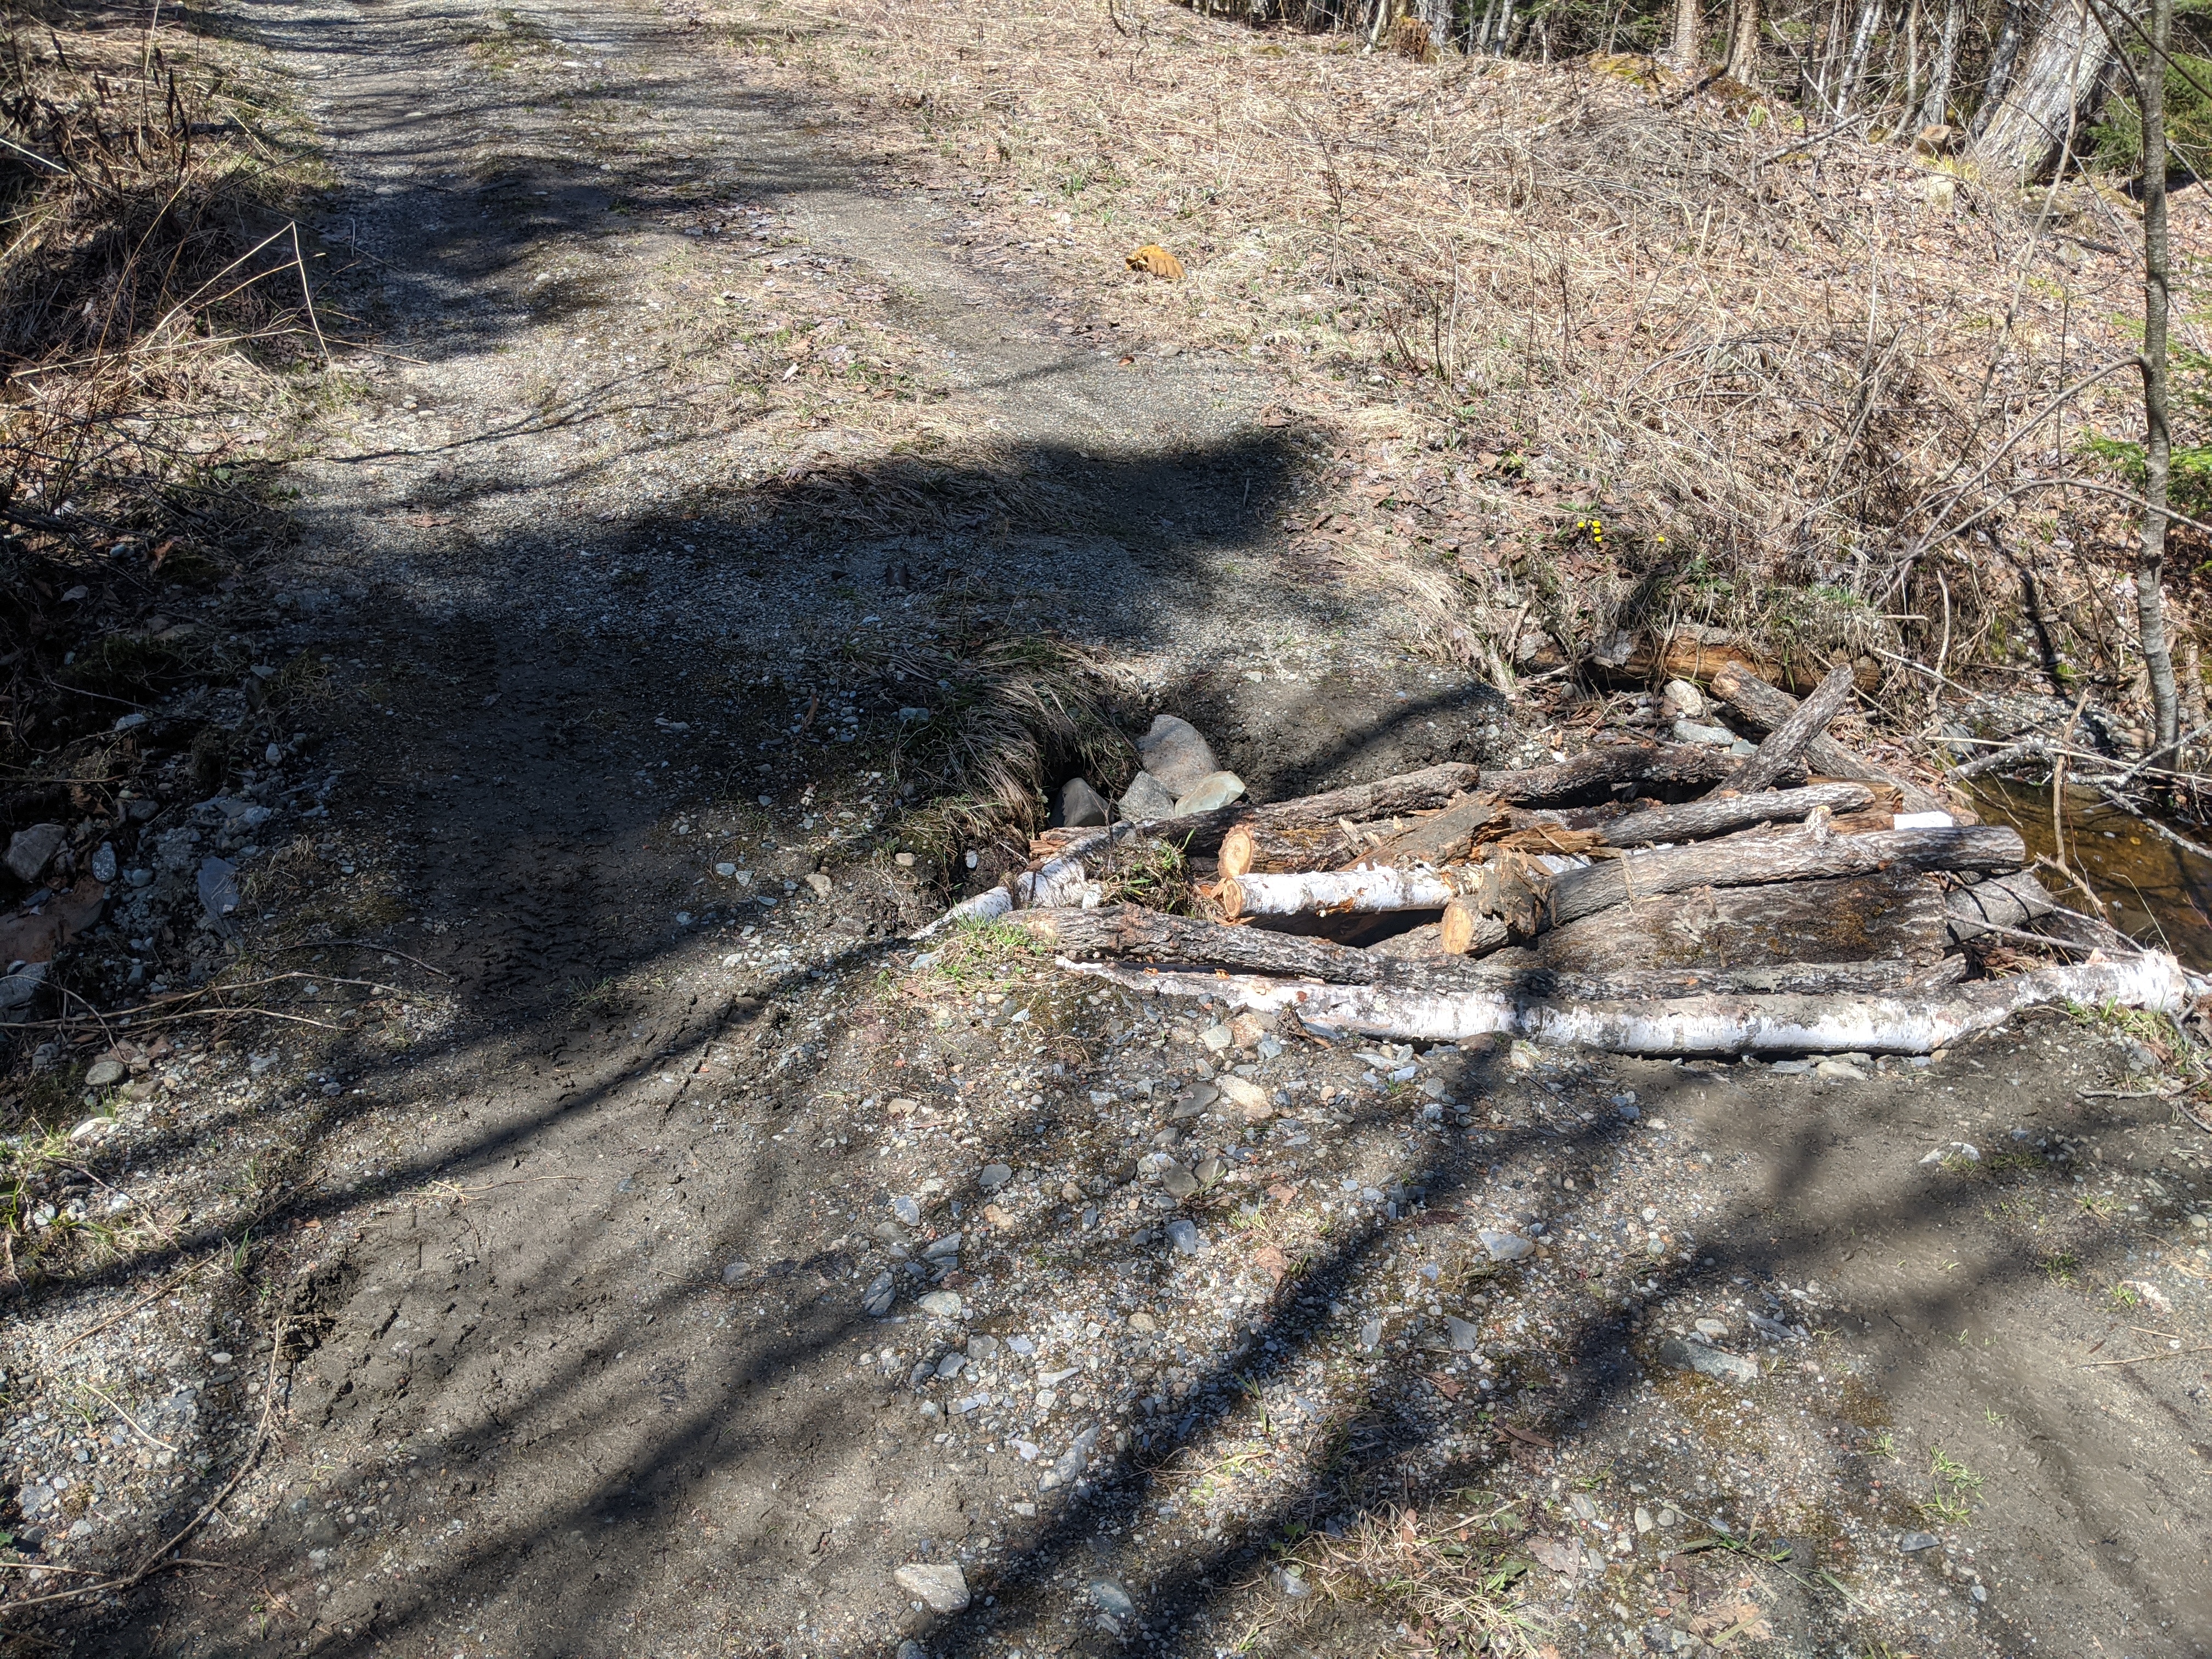
Angie did a TON of work with the tractor to grade the road flat. And we've cut hundreds of trees along the road. You'd think it would look like we'd cleared land, but that was just to get rid of trees hanging in to the road.
 (This post is after we'd stacked all that rock)
The land also came with a poorly build hunting cabin. It was originally insulated, but the insulation was full of mice and mouse droppings (both of which fell out of wall when we ripped it out). We removed it for our health.
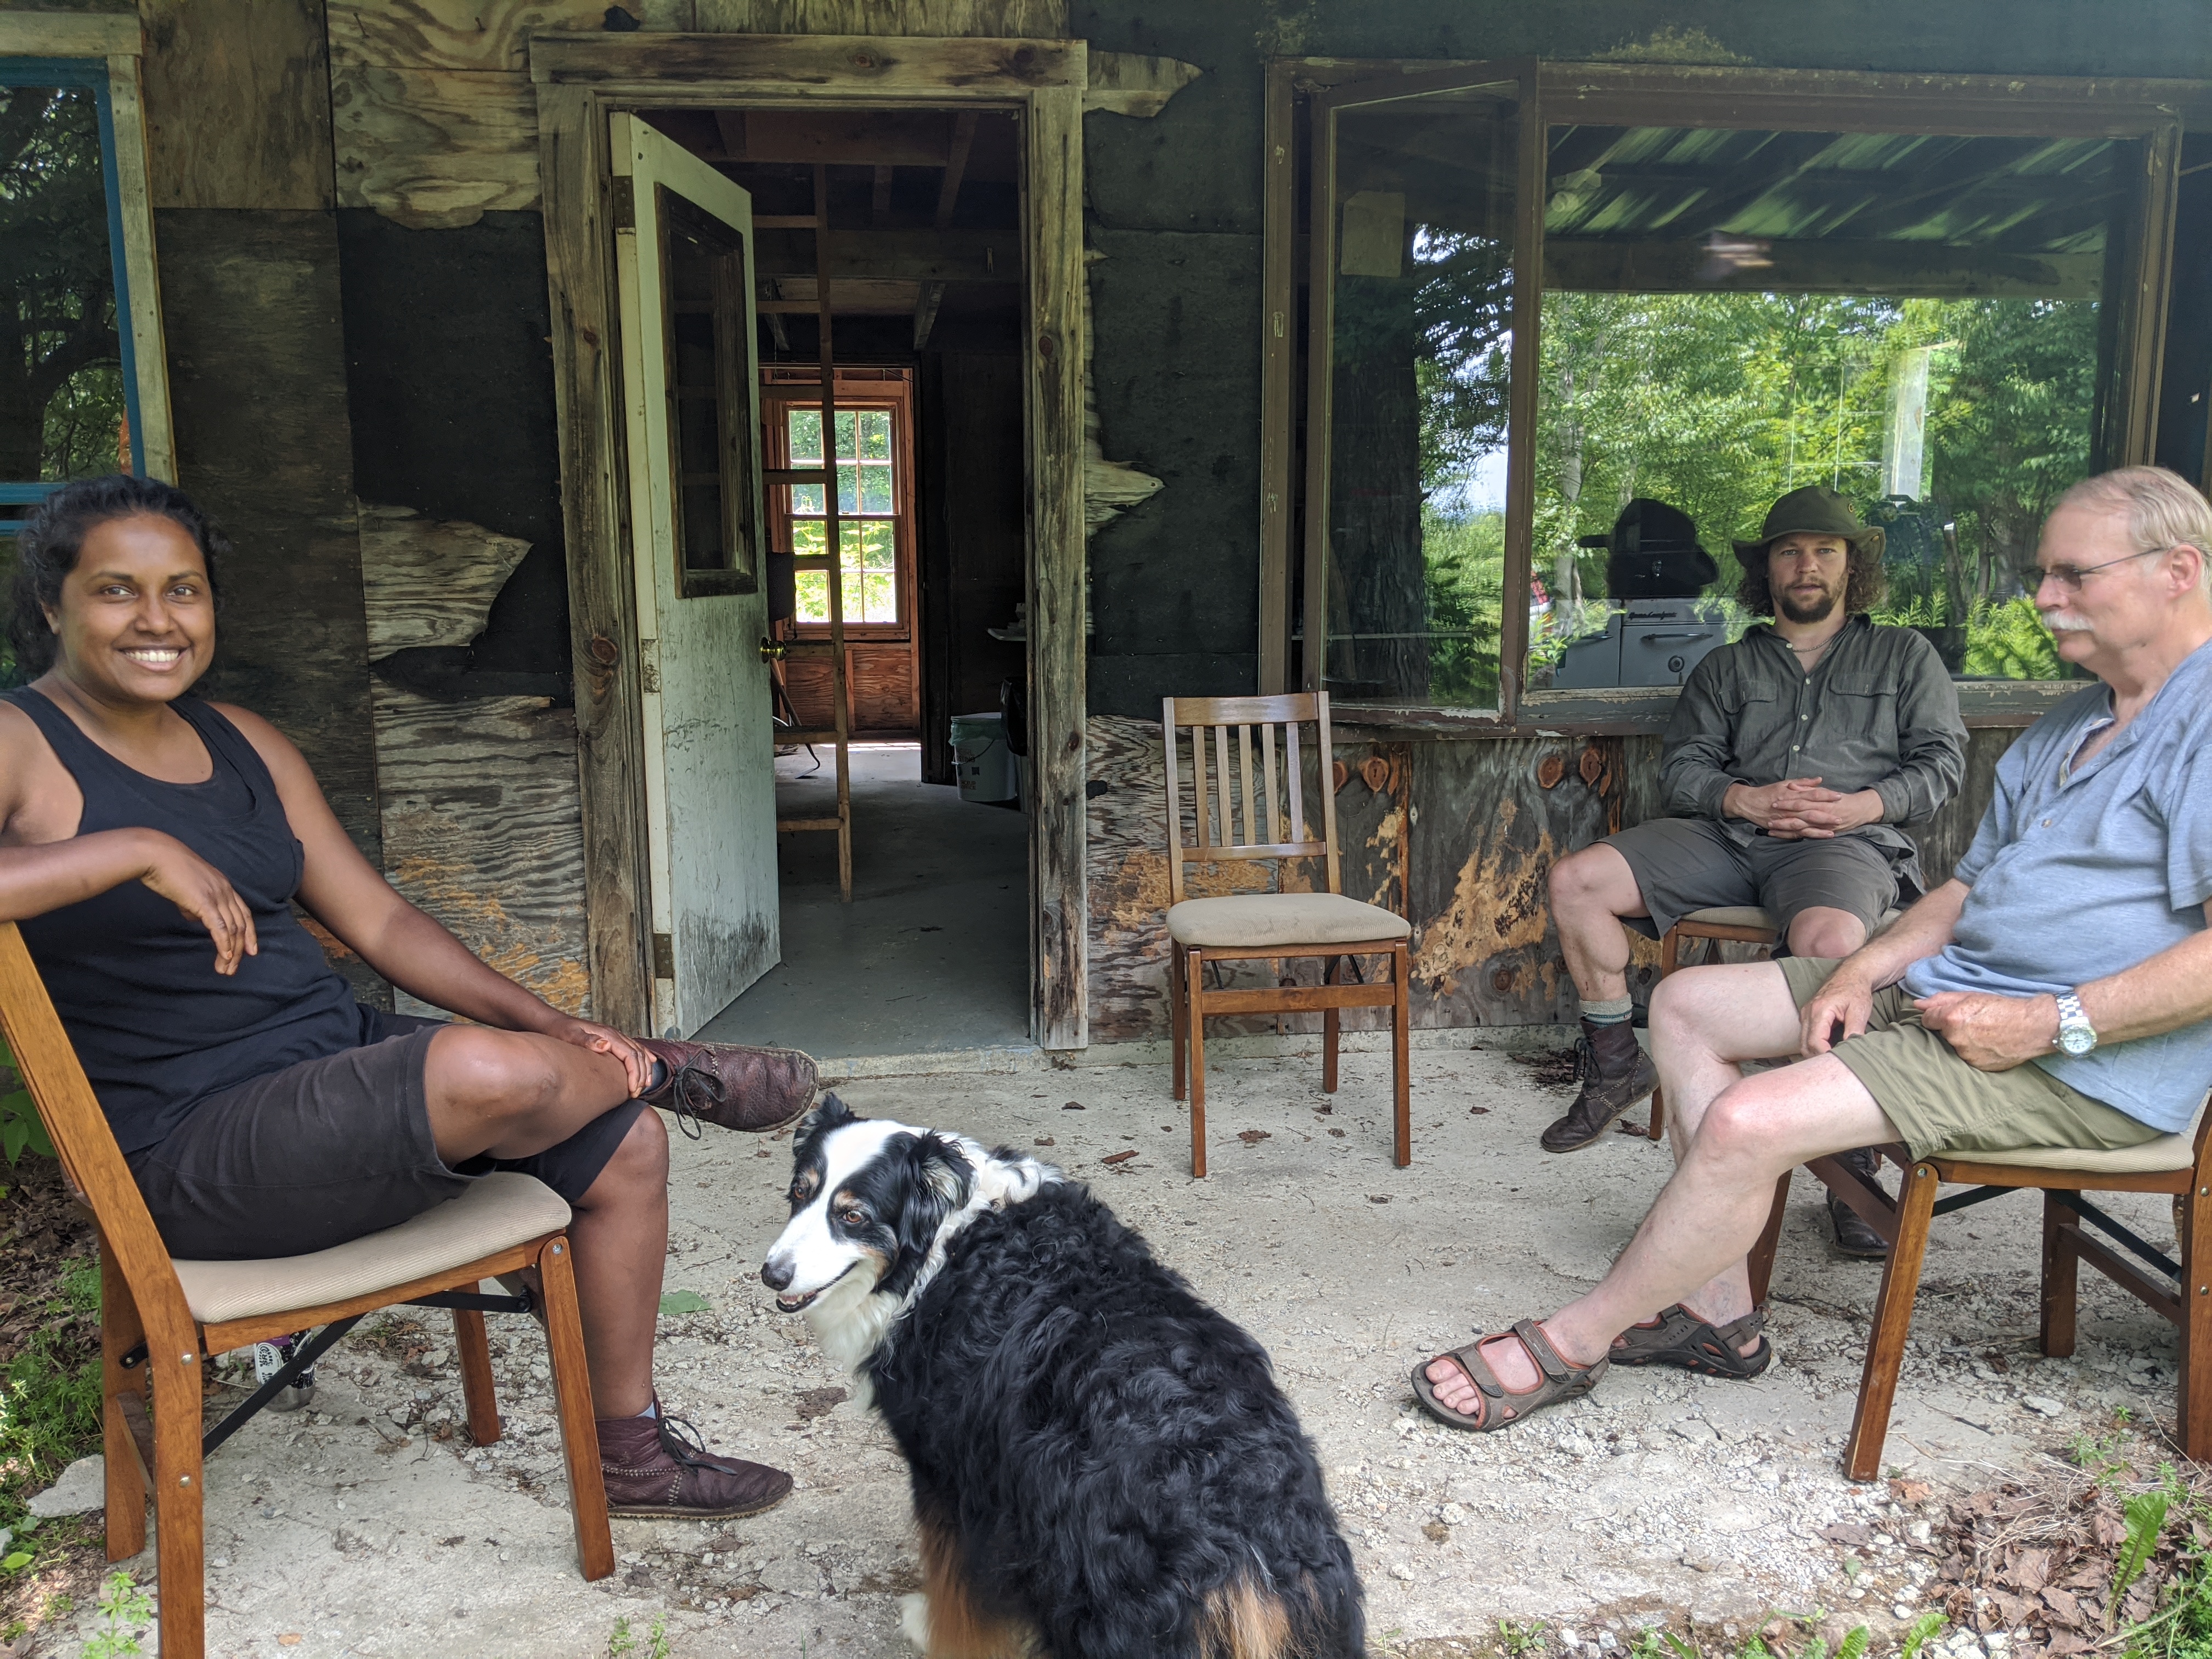
Covid happened, but honestly didn't change much for us. Vermont handled it better than any other dstand and we were busy with the land while I was still working a full-time job from home. It did delay hanging out and meeting other folks, but we still met some really cool people.
I've been trying to learn the plants, there's tons of cool ones and I could post plant photos all day. Probably the coolest is Prickly Ash, which is pretty rare.
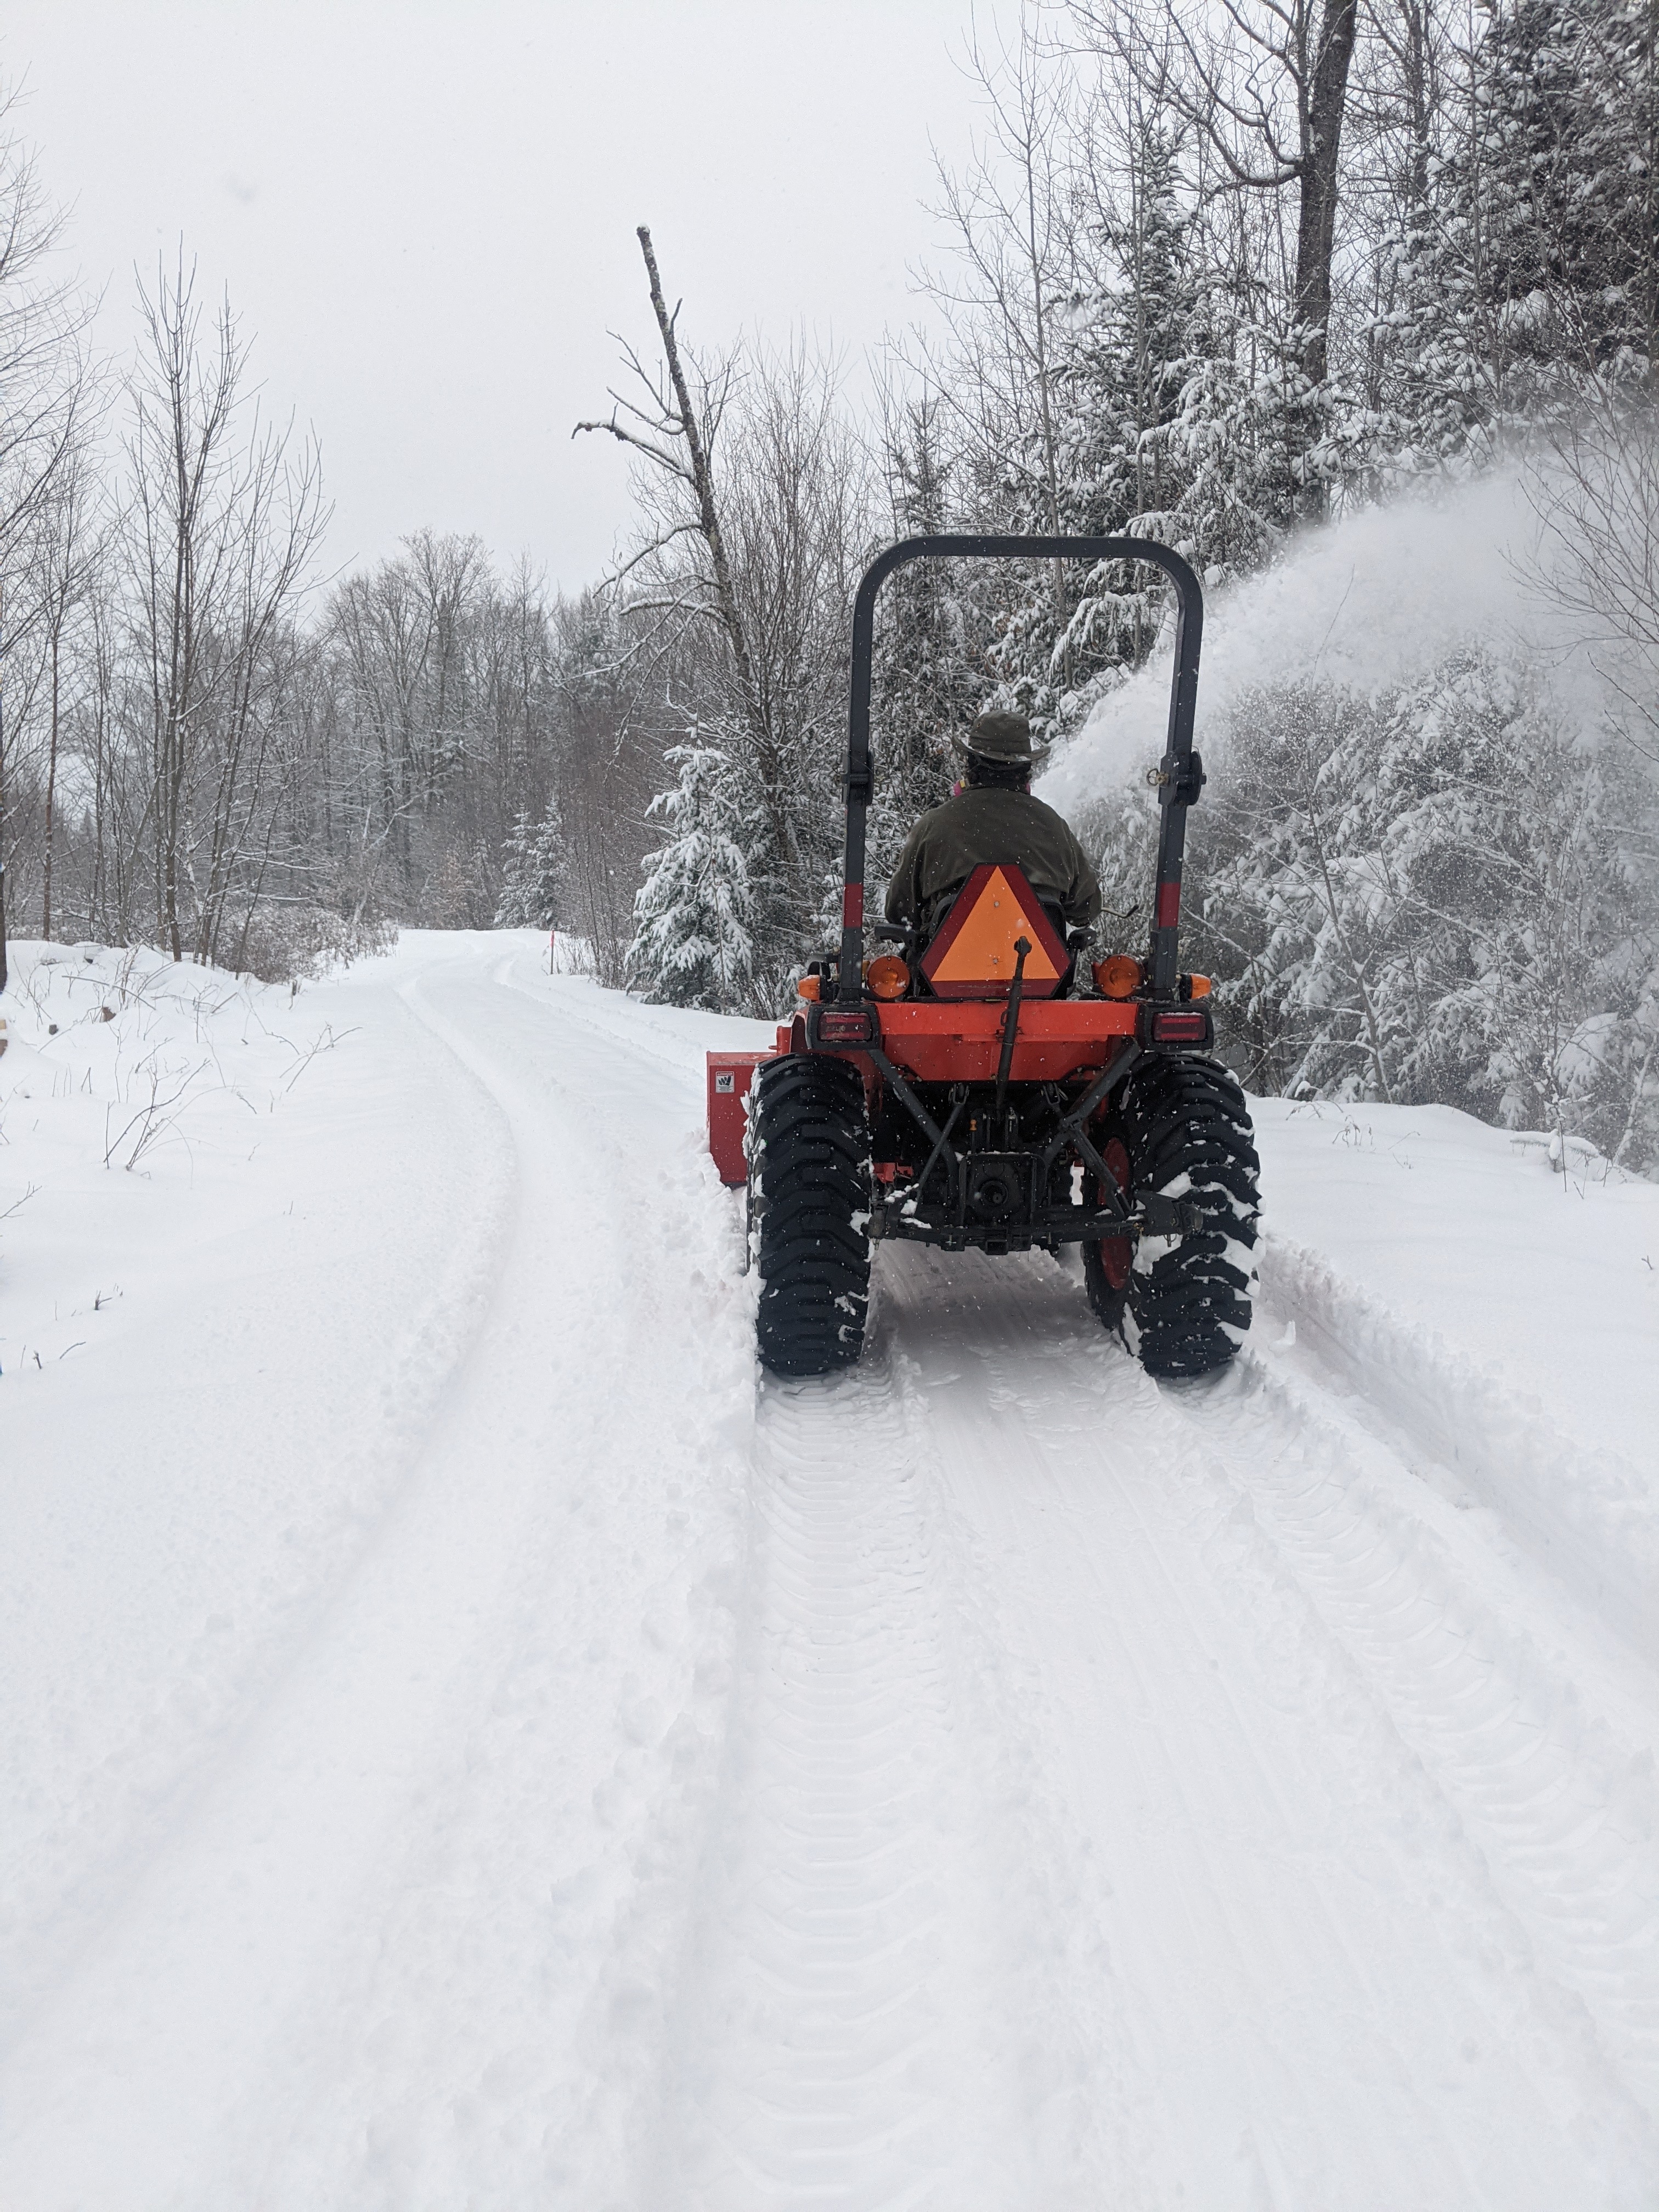
We had to figure out how to snowblow our >1/2 mile driveway.
We had a house built in sections in a factory, and that was just put up last week. We're doing all the rough-in and finish work ourselves. I'm sure I'll go back and post some detail posts.

I hope to start actually blogging with some regularity now, and maybe go back and talk about some of what's happened. We're living the cabin right now and I'm on a leave of absence from work while we try and get heating and ventelation in to the new house so we can move in to the basement before winter hits. Then we can finish the rest through the winter. The plan is to go back to work but just 2.5 days a week, so I'll have a lot more time to do all of the other stuff.
Blog Migration
2018-11-29
I've finally moved the SmallAdventures blog off of blogger to a simpler self-hosted blogging platform. All old links *should* still work, but there may be a hiccup here or there.
If you're curious about details check out my computersarehard blog .
As to why: there are a number of reasons. I first started looking because I was unhappy with how google blogger has treated sex positive bloggers. More recently I've made a bit of an effort just to stop using this sort of fundamentally ad-driven "free" service that is in fact payed for by handing all of your information over to a corporation. I have nothing specific against Google (in fact I worked there for 5 years), but the way data is being gathered and stored in single locations, ready for the taking by whoever can hack in to it or get legal access, makes ne nervous. Lastly of course, this simply gives me more control of my website.
Hopefully you like the new look.
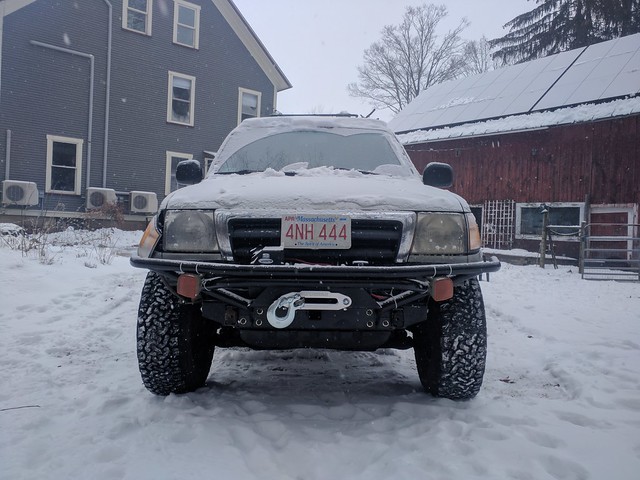
Truck: New springs and a winch
2018-11-28
This was written quite a while ago, and I just found it among my drafts.
It looks like a somewhat interesting post from around December last year.
Anyway, here it is
During the holidays at my parent's house, we wanted to get the truck back in to adventure shape. A mechanic in Colorado told us that our rear springs were "tweaked", probably due to the rollover. As a result our rear axle was actually crooked on the truck, he compensated to make the truck drivable, but noted that we should probably get it fixed.
I've also been wanting a winch for the truck since I first got it. Since the plan was to head back out west and, among other things, do some skiing, I knew I was likely to need it, so I finally sprung for a winch and the bumper to mount it to.
The story
Our old springs were from All-Pro, and were doing *okay*, but drooping a bit and not handling the weight as well as I would've liked, so I decided to go old-man-emu this time, an Australian brand known for good robust overland setups. I found some from Wheeler's offroad. These springs have "overloads" which help keep the spring from bottoming out when carrying a lot of weight. Cool. I also got an exhaust bracket and rear brake proportioning valve relocater. I also got an extra leaf added to the pack for handling the extra weight better without hitting those overloads.
I also ordered a trail gear tube bumper (the lightest/cheapest bumper I could find that'd take the winch) and a 9500 lb rated superwinch winch from Amazon.
Wellll, we ran in to some issues. First, the 3'rd party seller selling through amazon forgot to ship the front-crossmember component that the bumper bolted to. Luckily based on photos dad mailed me I caught this and a new one was mailed. No big deal.
Finally I got to my parent's place, and we had some warm clear weather to install the springs. I jacked up the truck, got things prepped unpackaged them and found this:
Whereas, here's what the other, not broken spring looked like:

It's a bit hard to tell from the photos, but there's a rivet that holds the alignment bracket on the leaf spring, and it is sheared off, the alignment bracket can simply fall off. That's not a good thing.
Wheelers was out of the add-a-leaf springs, so after some dancing about we decided for them to send a new spring without the add-a-leaf, and I would disassemble the leaf pack they had sent and move the leaf over to the new one.
All of this went fine and really wasn't that big of a deal... except TIME was passing. We had some heavy snowfall, and were in a period of record-breakingly low temperatures (literally). I used my mom's greenhouse (an insulated room my parent's built in to the barn), turning on the heat, so I could paint the bumper and crossmember parts. Time was passing, it was still cold, and I needed to get moving I decided I had to get something done, so I started the winch install *anyway*.
On a day where 10F was the high, I pulled just the nose of the truck in to the garage on the side of my parent's barn, and went at it. The rest of the truck doesn't fit, it's too tall. I started taking the truck apart. Turns out that while the front crossmember on the 2001+ tacomas is bolted on, it's welded on the 2000, so after some freaking out about whether I was really getting things right, using a grinder I picked up at home-depot I cut it off. After a couple of attempts, and grinding a bevel on to the frame ends to help out a little, I managed to hammer the cross-member on. What really amazed me is that it bolted right up.
The rest of the winch install went basically without incident... and here's the result:
Once I had the winch and bumper installed, there's the question of the blinkers. I had originally planned to relocate them *inside* the side-marker light. In pulling the side marker light off I broke the tab that holds it in place (partly because the bracket on my truck that it mounts to is a bit screwed up from before I got it). Anyway, after looking at it I decided I didn't like that option. #1 if you use the stock light and drill a new hole for it in the side-marker, the bulb ends up too close to the plastic and some people have seen bubbling/melting. #2 if you use a 2-channel socket (1157 if I recall), then the whole mounting is based on some screws running in to bondo... ick.
So, I came up with what's pictured above. With a suggestion from Angie of how to locate them, I drilled some of the plastic flanges on the original signal lights (now removed from the bumper) and using these holes ziptied them to my new bumper... worked like a charm, and even looks pretty good.
The license plate had to go somewhere, so I did this... but I didn't like it. After much agonizing I ordered a reciever mounted license plate bracket, (and a new side-marker light) resulting in this:
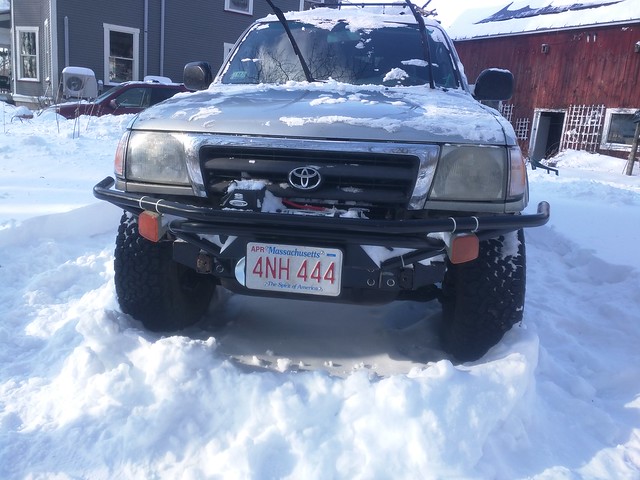
Much better! By now the springs were in, but I had to wait until there was a day where it was at least above 0F most of the day, because I didn't grow up in Alaska.
Happily, when it did, the springs went on no trouble. A little hammering, some grease etc. The only tricky part was pushing the new bushings on, which I did with a large C-clamp and some spacers (sockets and a block of wood with a hole I drilled in it). Then I just readjusted the front until I liked the match, and got an alignment. YAAAY!
Until... Shortly after hitting the road we were visiting our friend's place in Missouri and this happened:
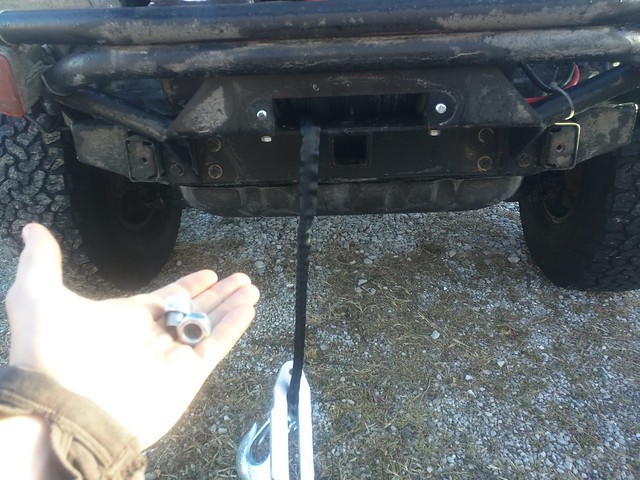
I went to fiddle a bit with the winch, make sure everything was working, and as I was pulling the license plate off, the bolts holding the fairlead on *sheared*. These were hand tightened with a normal socket wrench, these HUGE bolts, there is no load on them, and I had yet to use the winch or even wheel the truck. GAH.
No big deal, one trip to Lowes and we had it fixed, but... seriously? Ugh.
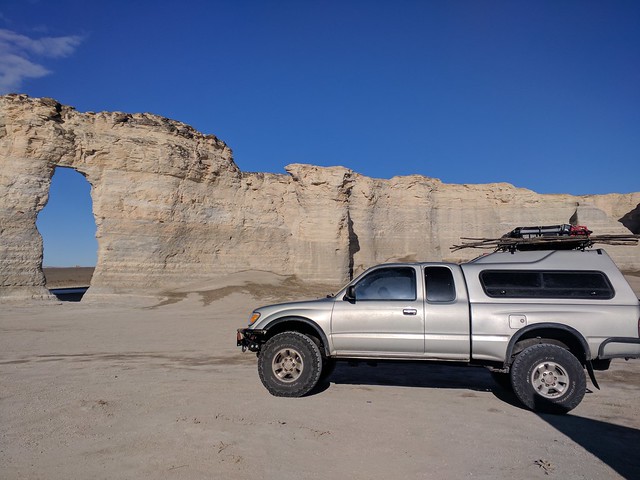
Anyway, I like the final result. Truck is handling well and driving straight, always a good thing. Here's a few pics now that it's done:
Update since this article was originally written (but still before it was ever posted). Just today, before posting this, I actually used the winch today to pull our Subaru out of a ditch. Angie was trying to be polite and let another car pass easily on a narrow road in the park in town. She went just a little too far and the snow pulled her in to the ditch. I ran down and got the truck, one quick winch pull and she was out, no problem.
Retirement Numbers
2018-10-01
I was doing these calculations for a friend recently, and thought I really ought to post them. This post is something of a followup to
https://www.blog.smalladventures.net/2017/04/how-much-does-it-cost.html
. That post was primarily about traveling, but much of the content is relevent for retirement in general.
UPDATE: I was not careful enough when I wrote this post initially and while the concepts were right there were some non-trivial errors. This article was corrected 2018-08-07.
Below is a program encoding a very simple financial model. I'm starting to assuming the 4 percent rule... this is the theory that you can take 4% of your investments out ever year and you should never run out of money, even in a volatile stock market. It's well documented elsewhere so I won't get in to great detail here, but take a look at this
https://www.investopedia.com/terms/f/four-percent-rule.asp
. For our purposes suffice to say that this is a pretty conservative rule.
- "income" is your current income.
- "save" is your savings rate... that is, what fraction of your income you put in to savings.
- "growth" is assumed average growth of your investments. 8% is a fairly common number. Add in 2% inflation and call it 6%.
- "years" is the number of years worked until retirement.
- The amount you now have in investments
- The income you were living on pre-retirement
- The income you were living on post-retirement
Here's the basic program with the input values elided...
sum=0
for x in xrange(0,years):
sum*=1+growth
sum+=income*save
print "income", income
print "save", save
print "growth", growth
print "years", years
print "saved", sum
print "living pre returnment", income*(1-save)
print "living post retirement", sum*0.04
So we pump those numbers in and we get
save 0.1
growth 0.06
years 47
saved 2410986.12095
living pre returnment 90000.0
living post retirement 96439.4448381
So, what if they saved 20%?
income 100000
save 0.2
growth 0.06
years 34
saved 2083675.09192
living pre returnment 80000.0
living post retirement 83347.0036769
So, lets do it again How about 50%?
income 100000
save 0.5
growth 0.06
years 16
saved 1283626.4039
living pre returnment 50000.0
living post retirement 51345.0561562
income 100000
save 0.75
growth 0.06
years 7
saved 629537.823739
living pre returnment 25000.0
living post retirement 25181.5129496
So 7 years. Alright, so what's really going on here? There are a bunch of really interesting properties. First of all, this math works out the same no matter how much you make. The number of years it takes to retire is the same regardless of how much money you make, it's only your savings rate that matters. The reason for this is that people want to retire at the same standard of living as when they were working. So, someone who saved 25% of 200k is living a little larger than someone who saved 25% of 50k.
Obviously if you are barely making enough to live on saving 75% of it is really hard. I'm not trying to get political here, or claim anyone can retire bla bla. I'm just trying help people understand the math.
This makes basically means the secret to retirement isn't just living below your means, but well below your means. You don't only get to save more of your money, but if you can be comfortable at a lower standard of living, you don't *need* as much, this means you need less money while saving more.
Now, all of this is a cute mathematical model... but lets say you *actually* want to retire. There are 2 extra factors I just want to mention.
First of all, most people actually spend slightly less in retirement than they did before retirement. We assume above that your going to retire at the same level of comfort and thus the same level of spending, but lets say you just want to go hang out in thailand? That's a lot cheaper.
Second of all, the 4% rule, while being really good for early retirement, is quite conservative. If you're thinking of retiring early, there's always the option of making a little income again if needed. For those who are older it's *okay* to use up all your money eventually, since people do eventually die. I haven't studied models for the latter case much.
Obviously, I'm no financial advisor... just a computer nerd, so take all of this with a grain of salt :).
Early spring in the Sierra
2018-05-12
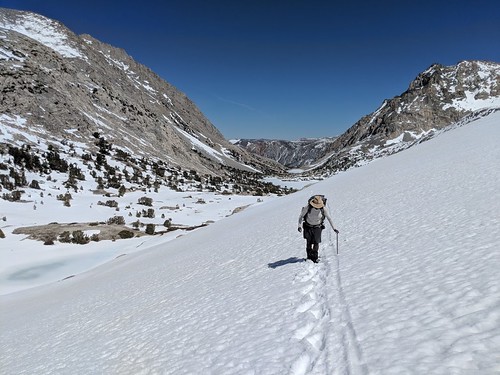
Angie and I really wanted to go backpacking in the Sierra while we're out here. I kind of wanted to take Angie to Evolution Valley in particular, a gorgeous section the JMT/PCT. The only problem is that it's may, which is really early to be up there. We'd been hanging on in Bishop, CA on the east side of the Sierra doing some bouldering and noticed things warming up a bit and a good span of nice wweather over the next week. So, we decided to go for it. We went down to the ranger station to see about conditions and got a permit. The plan was to go up through Piute Pass (11,400 ft), down evolution valley, then go off the main trails and climb Darwin's bench up and over to Lamark Col pass (12,800 ft), then drop down to where we started. All in all it's about a 40 mile loop.
Normally a 40 mile loop is about a 3 day trip for us, but we figured several factors would slow us down. "postholing" (walking in snow where you sink to your knee or deeper) is exhausting. Wearing snowshoes is less exhausting, but still WAY more tiring than normal hiking. Even hiking on hard snow in crampons is a lot more tiring than on normal ground. All the extra gear we needed meant our packs would be heavier, slowing us down further. Lastly, if snow conditions or weather are wrong crossing a high pass can become too treacherous to try or we could even get snowed in. Given all of that we planned for 5 days to do the loop, but packed 6 days of food.
Everyone we talked to told us it was pretty early in the season to do this. The ranger, and the guy at the place we rented our bear canister. The days were expected to be warm though, so while we had crampons and snowshoes, we weren't carrying winter clothing.
So, given that here's what I packed for gear:
- Clothing:
- Cotton canvas shorts
- Cotton button-down shirt
- 3 pair wool socks (varying weights/types)
- 2 marino wool sweaters
- Boiled wool mittens
- Custom knit alpaca tights
- Waxed cotton canvas overshirt
- Cotton canvas Tilly hat
- "waterproof" vivo-barefoot boots
- WWII style wool puttees (leg wraps)
- Wool poncho (also used as part of sleep system)
- Mountaineering gear
- Homemade alpenstock
- Lightning ascent snowshoes
- Kahtoola KTS Steel crampons
- Sunglasses
- Sleeping
- Alpaca fur sleepingbag (augmented by poncho)
- Waxed Cotton Groundcloth (also used to pack gear in... waxed jacket augments this too)
- 3/8" Closed cell foam sleepingpad (from gossamer gear)
- Cooking
- titanium BOT
- Toaks titanium alcohol stove
- Toaks titanium windscreen
- Toaks steel mesh pot stand
- Packing
- Modified kelty frame Pack
- 25 foot section of rope for tying gear to pack
- 2 12 foot sections of rope for tying gear to pack or other uses
- Ditty
- Belt Knife and sparker
- Sunglasses
- repair kit
- pills
- medication
- bla bla bla
The trip:
Day 1:
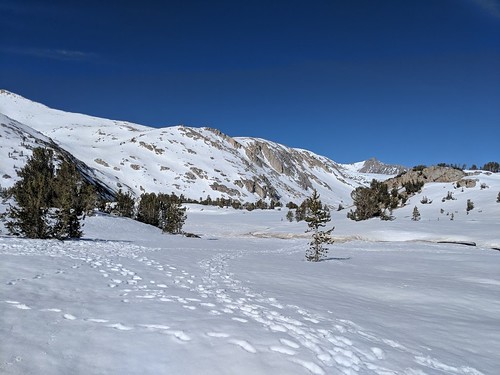
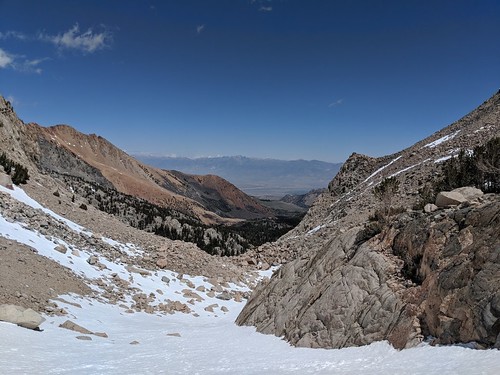
We started hitting patchy snow at around 9500 feet on our way up to Piute pass. Patchy means sometimes there's no snow, and sometimes it's 6 feet deep, often only a few feet apart. If it's early morning the snow is hard and you can walk on top of it using normal shoes or crampons, but in the afternoon you end up with a choice between postholing in normal shoes, or walking on the non-snowy parts in snowshoes. Often no option is terribly good so until snow coverage was over 70 percent, or the snow was nearly impassable (postholing clear to the crotch or waist) we generally chose postholing over snowshoing.
After the pass there was just too much snow to see where the trail was. We could follow it generally using the map, but Angie had the "Hiking project" app on her phone which has this route on it. This app also uses the phone's GPS and allowed us follow the trail much more closely helping to ensure we were on the easiest route.
It was quite a relief when the snow finally got deeper and more consistent and we could just wear snowshoes. We'd been staying at Buttermilk Boulders at ~6000 feet elevation. The trail starts at ~9000 ft and climbs over Piute pass at 11400. Our goal for the day was upper golden trout lake. Along with all the postholing the altitude was making us even more tired. We were pretty tired when we finally hit camp and our shoes were completely soaked, despite gators/putties in my case. The trail was gorgeous though, with only 2 sets of footprints to follow. At the pass even those turned around. It's an awesome feeling knowing no-one had been there in quite a long time.
I ran in to a minor gear issue. I've been spending a lot of time outside, obviously, and I'm pretty tan. I had a hat and long-sleeved shirt on. I figured my beard would protect my chin and neck from the snow reflection. But, I forgot about one thing... I forgot my knees. The backs of my knees got really badly burned. Actually, I forgot 2 things, my lips were bad too, happily I could bum some chapstick off Angie... oops.
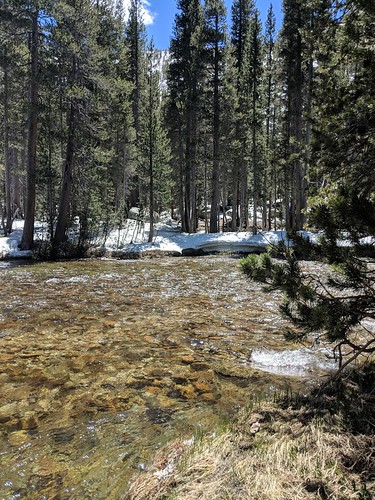
Though the deep snow eased walking, it brings some other difficulties as well, in particular even though the creeks are running they are often doing so well underneath the snow. We found a section of creek that was exposed running in to the lake, and stayed near it. Here's where we slept after we broke camp in the morning.
Day 2
I have some winter backpacking experience and on cold mornings the best plan is to start hiking to get your blood moving and your toes warmed up, then stop for breakfast after a little while. So... we tried that plan.
My shoes were simply ice-cubes. I tried to put them on and walk around packing up, but finally ran over where this photo was taken and sat on a rock and took them off 'cause it hurt too much. Angie finished breaking camp and joined me her toes hurting too. The sun came out and we learned that summer in the mountains is different. It's cold until the sun comes out, then it's suddenly hot. Our boots defrosted while we cooked breakfast and by the time we went to leave they were just wet. Life was good and we learned a new pattern for warm mountain mornings.
While hanging out that morning I attacked my knee sunburn problem. I took the sweater I didn't like much, acquired at a thrift store for ~$6.00 and cut the sleeves off. I pulled the sleeves up over my knees, the wrist part down because it didn't fit around my thigh the other way. Then to hold them up I took some twine. I punched a hole in each to attach the twine and tied the twine to my belt riging my knee covers up like chaps. Amazingly, this worked for the rest of the trip. You've already seen the picture below, but this time look at my knees, and the string running up my thigh.
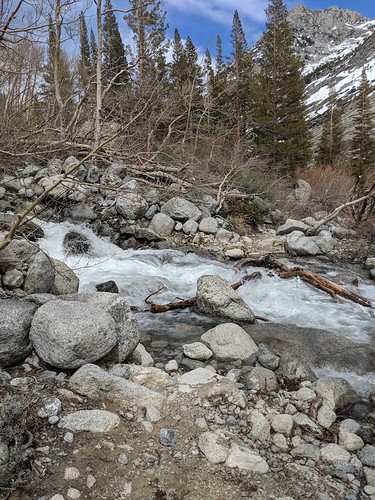
Since the snow was still hard we went with crampons, which served us well for a while. We weren't able to leave the snow before we started postholing though and we had to go back to snowshoes... then it got too patchy for snowshoes and we went back to postholing. It was frustrating, tiring, and slow going. Finally it started to break up though. The rivers were going gangbusters.
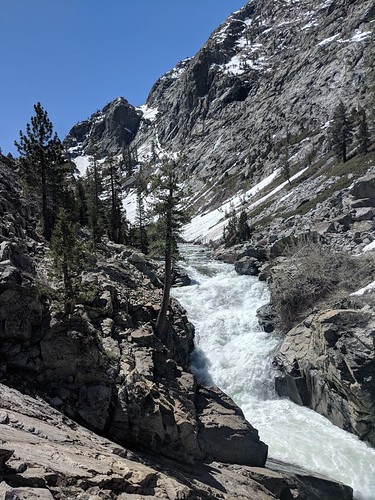
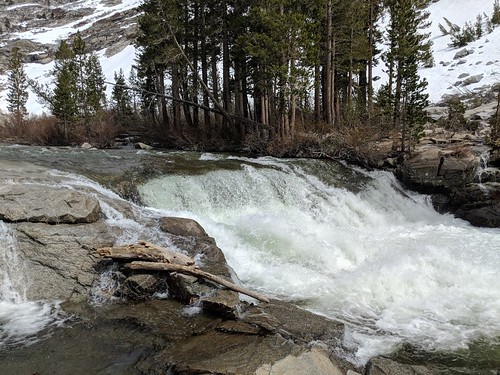
The trail was still tricky though. The trail was steep and made largely of pebbly rocks a little smaller than a fist that rolled underfoot, and all the water meant water crossings. We knew we had several that day and weren't sure how bad it would be with all the flooding. Here's one crossing, for scale this river is ~20 feet across. It actually wasn't that bad, not nearly as bad as it looked. We did 3 or so of these and numerous smaller stream crossings. Or boots were soaked from postholing, so we just went through boots on.
And finally we hit the JMT... smooth beautiful trail, no snow, warm, with good flat camping spots. We took sponge baths in the river, dried out our gear and just hung out. Angie was carrying her kindle with a book we're reading together so we read aloud to each other while we hung out and cooked dinner. In fact, we relaxed so much that we forgot to take any photos!
We were a lot more sore than we'd expected to be at this point. My back and shoulders ached. We'd originally intended to take a break day between bouldering and climbing, but we got overexcited and forgot. As a result in addition to tiredness fro crossing the pass we were still feeling the effects of bouldering from 2 days prior. Since we had an extra day we decided to take it by going to evolution valley Day 3, then up on to Darwin's Bench Day 4, and crossing the pass day 5 to stay at Lamark lake, and finally exit day 6. We were glad we'd given ourselves an extra day.
Day 3
Day 3 was supposed to be the "easy" day... and was easier than the others. The one thing we knew was coming that day was a bad river crossing. I'd done it before when I hiked the JMT, but I'd been told it might be chest deep this time. Here's where we crossed:
It turns out that, after finding a good spot to cross, it was only about thigh deep. No big deal... just VERY cold. Angie wore shoes and I went barefoot. Angie screamed a couple of times when she hit the other side. I followed behind and only made groaning noises and huffed a lot. It took a few minutes for the pain to go away in Angie's feet so we could continue. It sucked, but we were fine, and there was no danger.
After this we hit more patchy snow. Here the GPS phone app became really valuable. The trail winds around through the forest a lot, but then twists up a pretty steep and jagged slope after Goddard Canyon Trail splits off. In areas like this following the trail more closely becomes really valuable, so you don't end up on really bad terrain.
Sadly, the camping sites shown on that app are not great anytime, but particularly in the winter with snowpack. Our site was fine, but not awesome. We had to kick some horse dung out of the way but were able to find something dry at least. It was a little damp that night, but warm enough.
Day 4
This was really our light day. The idea was to rest up so we'd be fresh for the push over Lamark Col pass. All we had to do was climb 500 feet of switchbacks, then leave the official marked trail and go offtrail (there's actually a faint trail there, but not much) up another 1000 feet or so on to darwin's bench for a total of maybe 3.5 miles.
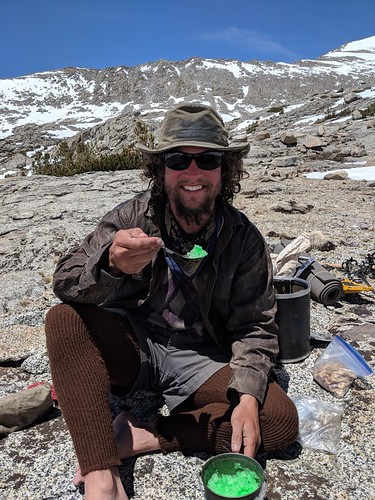
The snow made this tricky, but it was by far our easiest day, and we hit a nice spot to chill by around noon. It was warm and beautiful, and we had lots of time to dry out our gear in the sun sitting on a nice rock. I made "snowcones" by mixing lime jello with snow
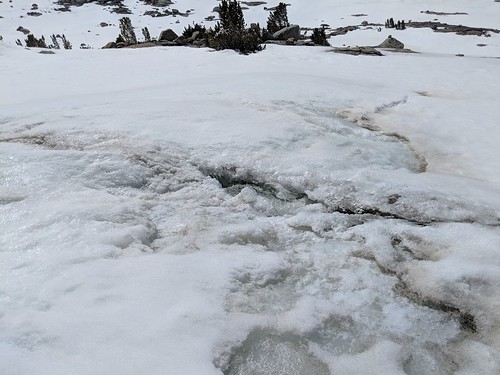
We even had a good spot to get water from.
We were reading and chilling, then Angie noticed the cloud. She pointed it out and my response was just "Shit".
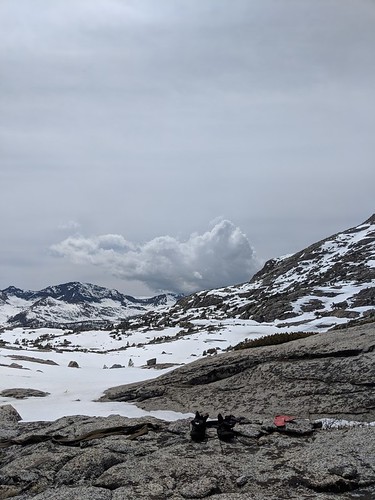
Our tarp had been pitched on the snow and the stakes weren't really holding. A cloud like that meant we were likely to get some decent wind. We might be fine, but we needed to get ready for the worst. We poked around for a better spot and found something behind a boulder with soft snow. Angie suggested a snow-cave... a GREAT idea, except a snowcave would take too long. I modified the idea to a snow-trench (a technique I learned from the ski patrol while in Cal-ESAR), and we built this up against the backside of a boulder:
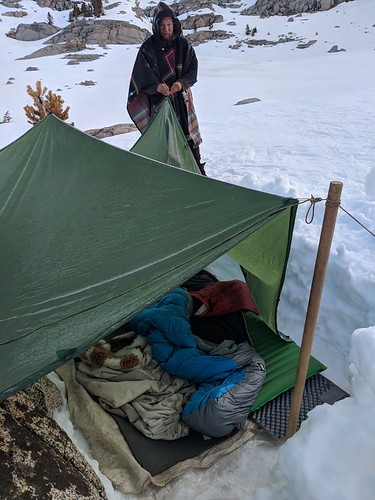
We dug the trench using snowshoes. The "Ascent" snowshoes from MSR have a heal lift hoop you can flip up for steep climbs. Angie noticed that this made a wonderful handle. I also used her ice-axe to hack out some blocks so we could build up the ends a little. I carefully smashed the bottom down by jumping and walking around on it until it was nice and packed. We also built a little door on one end so you could get out and up on to the boulder easily.
The tarp was tied out to a push on one end, and Angie's ice-axe on the other. We used her hiking pole and my alpenstock as poles. For the side stakes we used a bush and actual stakes in dirt on one-side (there was some dirt on top of the rocks), and Angie's snow-shoes on the other.
THIS setup could stand some serious wind with no trouble at all, particularly as the worst wind was likely to come from the other side of the boulder. We were set for the night.
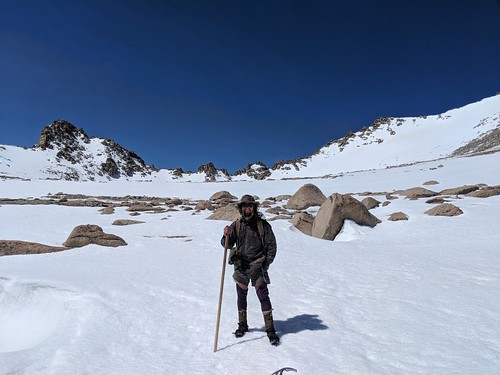
Day 5
Day 5 was the big day when we push over Lamark Col pass. Starting from ~11400 though made topping 12800 seem a lot more reasonable. Only 1500 feet of climbing. We started by skirting several lakes. The lakes were all over their banks of course and my Alpenstock came in handy for checking the ice to make sure we would fall through. We wound our way around the lakes sometimes on the ice, sometimes on the sides, and occasionally on the rocks. Then came the final long climb up the pass.
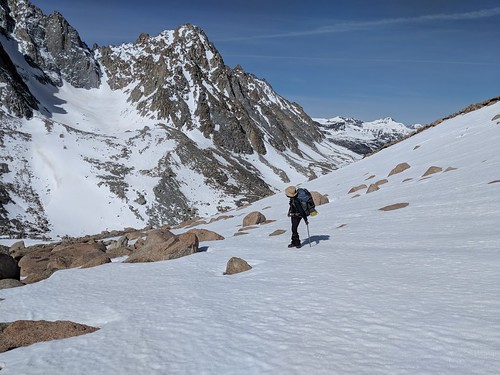
Most of it looked about like this. Steep, with boulders strewn about. We had to take off our crampons a couple of times to scramble over sections of boulder. The snow consistancy was mostly good but a few spots it was just too open. We'd started early so it was frozen solid, but that only helps if the crystal lattice is dense enough. We tried to avoid the steepest spots, or scramble over boulders when it was bad, but Angie did slip a foot. Of course, that is what ice-axes are for, she was able to recover with her other foot and ice-axe without actually having to self-arrest. It was a LOONG climb, but there were rocks in between. So, if you slipped you wouldn't fall that far... on the other hand, you'd hit a rock :shrug:.
The last rock-scramble was pretty gnarly, and the wind came up pretty hard, but we made it to the top. Finally we peaked and came over the other side. It was WAAAY too steep. We both looked at it and were like "Noooope!". Checking the GPS the "trail" went a little farther to the right, so we scrambled our way over there and it looked more reasonable. Still scary, but not insane. On this side, in contrast there were NO rocks, just a straight slide all the way to the bottom. Angie considered glissading it (sliding on her butt), but not having experience decided maybe this wasn't the time to try it. I didn't have gear for that, so we went it on foot.
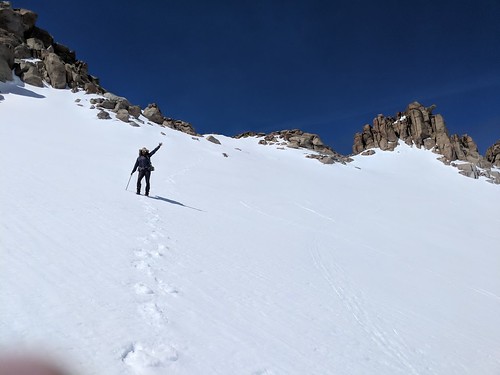
The snow for the first 100 feet was really inconsistent, sometimes frozen solid, sometimes crystals sitting on top, and sometimes just soft. This made it feel a bit sketchy, but we planned the route carefully avoiding steep spots and neither of us slipped. Here's Angie a bit after the steepest sketchy area. Someone HAD come over this pass recently enough that we could pick out the remnants of their steps. These made this stretch of the decent that much easier.
At the bottom we breathed a sigh of relief. This was the pass we'd been nervous about the whole trip, and we were over it, finally. Now we just had to get down safely.
We were 1 mile from hitting a "real" trail at Lamark lake when we hit this.
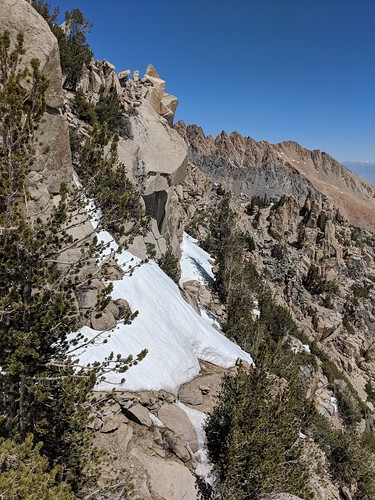
The trail runs horizantally across a vertical cliff face. I mean vertical, even in climbing shoes there was no way around I would've been willing to try without full trad gear. Piled with snow the only way through was to dig. Some spots like shown above looked feasible given enough digging and care, but right in front of us was a 4 foot mound followed by a 10 foot drop off a cliff, we'd have to dig out that 10 feet of snow and still it looked like it was probably a rock-scramble underneath. After some consideration we decided once again "Noooope!" and turned around. We'd take our chance off trail.
So, instead we dropped straight down this avalanche chute. I'd been watching very carefully for signs of avalanches the whole trip, it juts wasn't the right conditions yet. Only extremely steep hills were sliding, so I figured we were okay.
The problem was that this snow was too soft. This is great for us in terms of being really comfortable on steep terrain, it's easy not to fall or slide, if you just sit down you stay in place. The problem is that underneath the snow is a talus field. If you post-hole in the wrong place you could jam a leg between boulders and break something.
To deal with this we bouldered around the edge of the snow as much as we could. I resisted using snowshoes because I thought they'd just sink as well, and snowshoes are hard to work with on steep terrain, but eventually we ran out of other options and at Angie's urging we gave them a try. Happily, they worked. It was a bit like using crampons, a bit like skiing. You had to switchback very carefully and you'd slide a bit occasionally, but you could always just sit down to stop. Using this technique we made it down to the bottom of the chute.
Only issue is, now we're off the trail. I led the way back towards the trail and pointed where we had to go. Angie looked at the hill I said we had to go over and said "Noooope!" once again. It was a steep rock-scramble the whole way, doable, but hard for sure. She wanted to follow the river instead. Her choice meant maybe 6 times as much off-trail bushwahcking, and a chance we'd hit a waterfall we could descend, but she was adament... So, we went her way.
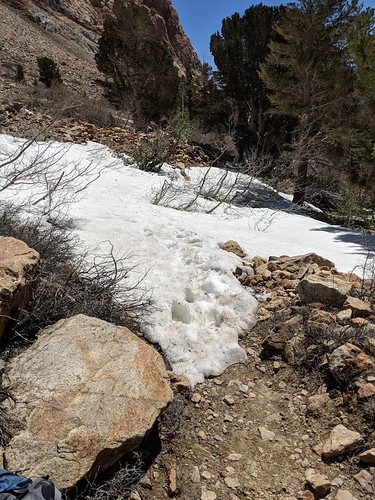
It was steep and rough, but easier than other off-trail hiking we've done (such as in Gila National Forest). We bounced down the creek staying on the left side where there was less snow until we hit grass lake. Then we worked our way around the bog getting a few minor scratches and low and behold a TRAIL!
Our map didn't have a trail here, but it turns out there's a well maintained trail down to grass lake. It even had a sign when we hit the intersection!
Conclusion
All in all this was probably the single most difficult backpacking trip I've ever done. Rough trails, cold nights, soft snow, hard snow, mountaineering, off-trail hiking, we even dug a snow trench. It was exhausting and rewarding and we were very glad to make it out safely. We split a large pizza that night after, then ate a huge breakfast the next morning. We ate well while we were out and came back with a day of food, but I'm sure we still ran a calorie deficit.
In terms of gear there were some lessons learned. As noted above my waterproof boots were not waterproof enough for this. Wet boots are a horrible thing in cold weather. I also learned that carrying *only* a cookpot/bottle on a trip like this is a PITA, and I should definitely carry a bottle as well in the future... just so I still have water while I'm cooking. I cheated off Angie a bit on that one, along with her chapstick. Obviously I need something for my knees for this sort of trip, I'm leaning towards long pants cut off below the knee like a capri pant.
Oh, one other interesting point on gear. I tried to use the "blanket pack" style pack when I was first packing for this trip, http://www.blog.smalladventures.net/2018/03/blanket-pack.html but just couldn't make it work with this gear. The waist part kept sliding down. Maybe someone more experienced with that setup could make it work for a trip like this, but I'm not there yet. So I broke out my old frame which is still banging around in our truck and used it.
Otherwise this gear actually worked really well. The alpenstock was great to have and had quite a variety of other uses. In particular it was very good for checking snow for stability before stepping on it and for breaking through ice to get water.
We're going to take it easy for a couple of days. My back needs a break and we're both a bit sleepy and out of it.
UPDATE:
In the initial version of this post I neglected to note the rather important "3/8" Closed cell foam sleepingpad (from gossamer gear)" I was carrying. I added this bit of gear I don't usually use to make sure I'd be warm enough sleeping on top of snow.
The alpaca works well and I can use it without a pad in most conditions, but I don't think it works well enough without a pad for this use case.