
Truck platform: take 3
2013-01-20
See our first and second attempts at a truck platform:
- http://www.blog.smalladventures.net/2011/06/jack-camper.html
- http://www.blog.smalladventures.net/2013/01/truck-hammock-failed-experiment.html
As noted in the Hammock article, our first attempt was pretty successful, we really liked the platform, both in concept and in practice. It had some downsides though around bulk, weight, simplicity, removability, etc. It's pretty good, but we thought we could do better.
The Hammock fell through... well, luckily not literally, but it didn't work.
And thus comes, platform attempt #3. Here it is folks:
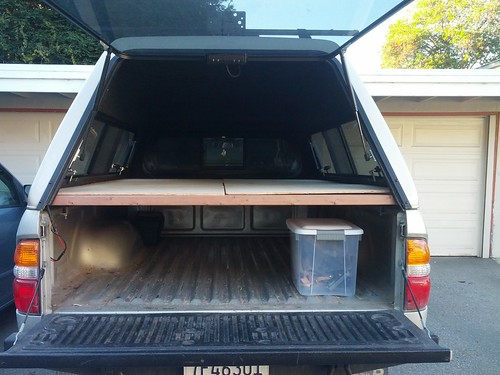
The idea is simple. Build a platform that sits on the lip of the truck bed and cap. This way we don't need any supporting structure. This saves weight, bulk, and construction effort. The platform also comes out a touch higher than our last one, giving us even more cargo space. The box in this picture just *barely* fit under the old platform.
The tricky part is figuring out how to get the platform *in* there. If you make flat solid platforms the width that is needed to sit on the lip, they won't fit in through the door. Because of the angle of the sides of the cap, tilting the platform to slide it in doesn't help. In fact, the window's cause a slight inward bulge in the cap, such that the platform above is completely captive vertically... so what to do?
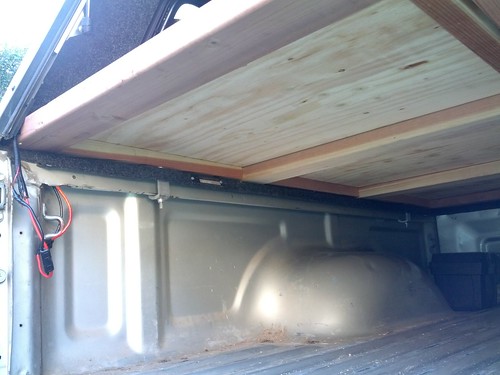
This platform is built out of 6 separate pieces of ply. Each piece has 2 2x2's screwed to it to add rigidity and as spacers. These then sit on 2x4's that span the width of the bed of the truck, from lip to lip.
The idea is simple, to get the platform in you take each 2x4 and spin it into place (around the vertical axis). Once they are in place you drop in the pieces of ply. The 2x2's attacked to the ply keep the 2x4's from spinning, thus locking the structure in place.
As it turns out this worked beautifully. I was able to get the ply to fit in a single 4x8 piece. The cross pieces are from 2 10ft 2x4's, and the spacers are from 3 8ft 2x2s (it would've been 2 10fts but they didn't have any at Lowes). The 2x2 and 2x4's are redwood. It was what they had, and it should have less trouble with bowing due to dampness then say fir would. One bonus is that being made of 6 pieces makes removing one of the back pieces while you're in there somewhat easier, making it easier to reach the stuff in the back.
It all worked beautifully and looked perfect. I took these pictures. Then I went to close the truck to go inside and....
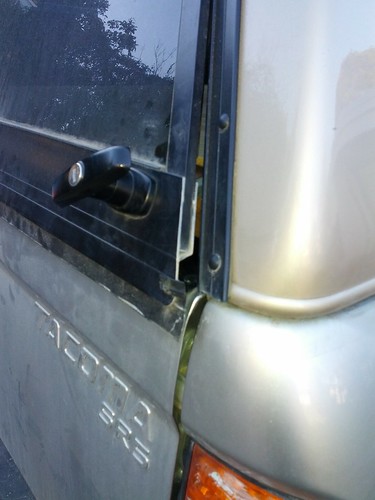 Oops! I completely forgot to save space for the latches! Luckily, Jess has a dremel and using that and my pull saw I cut out a space for the latches. Well, what's a project without a little hacking. Oh FYI: If you want one, I built this one, including purchasing materials, this afternoon. A good saw, square, measuring tape and screw-gun is all you need. Well... and a pencil and paper.