
Homemade shoes
2014-10-05
I've been wanting to make shoes for a long time. I've made gillies, but while they were cool, I never got one that was really useful as a generalized standalone shoe. I've tried a couple moccasin designs, but never quite got it to work out.
Recently I bought a pair of original run-amoc moccasins from soft-star shoes... I just looked at their website, and can't find them, so they must've canceled them. Anyway, I like those shoes enough that I just wore them on a 4 day backpacking trip. They have been my primary shoe since I bought them in the spring.
I looked at the design, and loosely based a shoe on it. It's really just a basic turnshoe, the the trick comes with the heal flap going *under* the toe-piece this allows the lace, which runs around the heal, to pull the heal forward when you cinch it, thus pushing your foot up towards the front of the shoe towards the tongue.
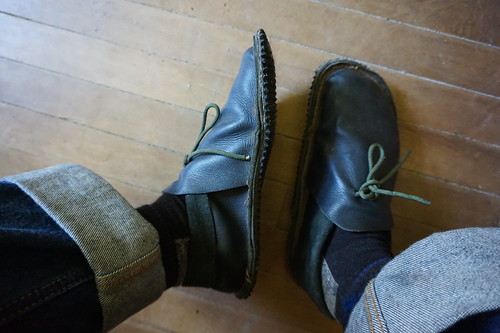
Here's my attempt at a shoe using this idea:
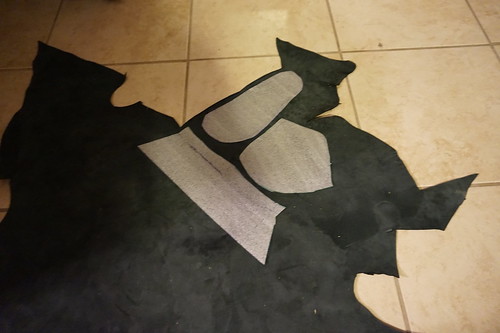
I started by tracing my feet, and adding a seam allowance. The top of the shoe I literally just pulled the material over my foot and traced around the outer edge. For the pattern we used some left-over shipping foam that came from something we'd received.
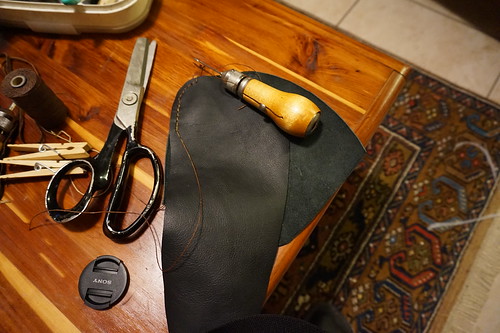
I simply saddle-stitched it together, nothing magic here. Notice that I'm stitching it with the shiny-side out. This is because although the design that inspired my shoe is a turn-shoe I decided I'd had so many failures I wanted to really keep it simple, so I did this shoe as a simple-shoe rather than a turn-shoe. Fewer things can go wrong this way.
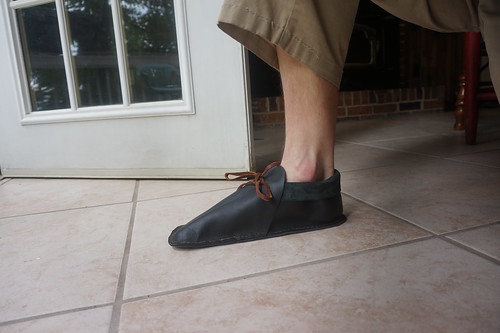
Here's the completed moccasin with the single-layer leather bottom.
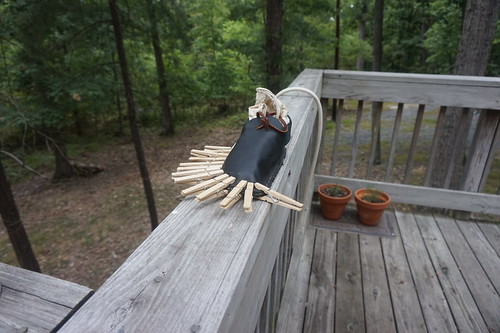
Knowing that wouldn't cut it, I glued a sole to the bottom using some barge cement. To get it to to join properly I filled a bag with beans and stuffed this in the shoe for a little weight. The seam around the edge tends to pull off the shoe, so the clothes-pins here are to hold it on.
That glue-job was sufficient for about 3 days of wear. I took them to a primitive skills gathering in South Carolina (falling leaves) and the sole started to fall off :(. Fine I said, and stitched the sole on using saddle stitch. That worked okay, but I went just *inside* the existing stitching, so the shoe shrank by a half-size. This pushed my heal back a tiny bit. This caused my heal to stretch the heal-cup backwards a little, so now if I take long-strides the seam on the back sometimes lands under my heal. It's also possible that the leather choice is just wrong. This is a chrome-tan thin chap-leather, a different leather might help, prestretching it, etc. I'll have to experiment a bit.
I almost wore them on our backpacking trip instead of the purchased shoes that gave me the inspiration, but I got nervous about the heal-seam problem and chickened out. They are totally wearable, and I would consider the project a success, but before I want to call this a solid design I'd make again, I need to solve the heal-stretch problem so I can backpack in them.
Note BTW, that the entire shoe is only the seam running around the sole of the shoe, and then a second one for the sole. That's IT. The string runs around my heal, and the leather is just folded over over it, and that seems to keep everything in place fine.
A pair takes maybe a day to make, probably less time the next time. that's pretty awesome actually! Notice that the top photo has p-cord for lacing, even though I was using leather initially. Another flaw is that the tension on that cord needs to be pretty high, to hold the heal forward. Because of that I broke on of the leather laces and decided to just switch to p-cord for now.
Not a bad experiment! Jess is still working on a pair made as a turn-shoe, using leather she made herself out of deer-hide. I can't wait to see her final shoes. In the meantime, I'll continue wearing mine looking for other flaws to look in to in my next design.