
Folding Knife handle
2014-05-06
Sometime last year I lost my favorite belt-knife. This is one that I'd done a day-hike once to recover after leaving it in the woods. I loved that knife, but it was pricey. Jess was looking for ideas for me for christmas and discovered that knife blanks made of good steel are surprisingly cheap, so she got me a couple blanks, some wood, and a few other related tools. One's a folder, and one's a belt-knife.
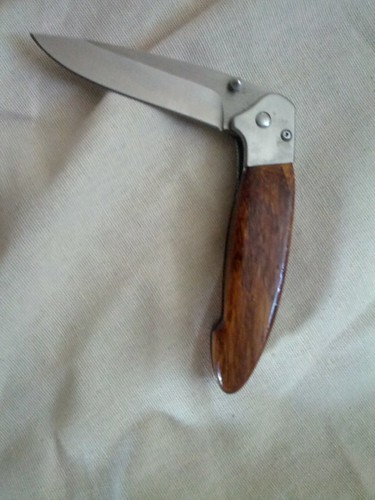
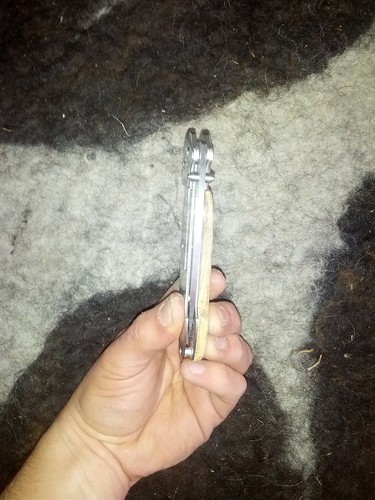
I just finished the folder:
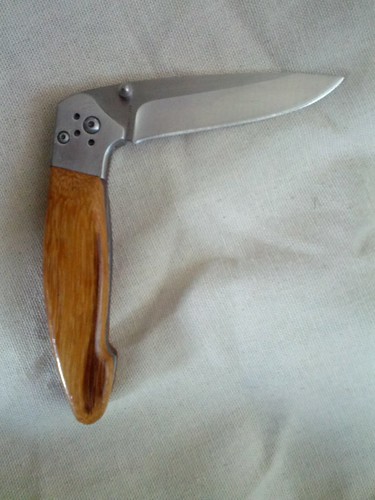
The handle is zebra-wood, which I think is pretty neat looking. It's also a very dense wood which is kindof nice.
I started this knife at my parent's house over the holidays. Stupidly, I didn't take pictures of a lot of the steps, but I'll go through them here anyway. Note that the handle of a full-tang knife, where the two sides don't touch, are called scales.
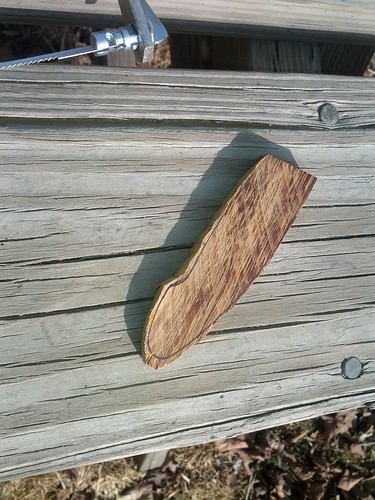
Cut the scales to approximate size
The blocks Jess gave me were maybe 18" in length and about 4" on a side. So the first step is to get something of around the right thickness and vaguely the right size. On the knife above you'll notice a significant bevel to the end of the handle where it meets up with the side of the knife. My first step was to cut this bevel so I could lay the block against the knife tight against that bevel and the knife would be approximately parallel to the block of wood.
Since I was at my parent's house I cheated and used a table-saw. I inscribed the bevel on a piece of wood, then measured it, and used this to set the saw. I then cut a section off the block a bit longer than the scales I wanted, using the angled blade.
Next I straitened the saw blade, set the depth adjustment on the rest and cut off a couple of slices.
Then I lay the scales against the knife and traced the edge of the tang.
And finally I *attempted* to cut it out vaguely. I used the wrong type of saw though, and split my piece... darn.
So I cut a couple more out with the table saw, and moved on. shape
Screw the scale to the knife... or don't
I decided to try again, this time I figured I would screw the scale to the knife *first*, then inscribe it so it came out perfect. The knife blank came with screws to help hold the handle on. If you are astute you've already noticed that my final knife does not have screws in the scales. I carefully drilled holes for the screwed, and recessed holes for the heads of the screws, tried to screw it on, and the screws stripped... oops! So much for that plan. Of course now my scale had holes in it, so I needed yet another one.
cut them to approximate shape
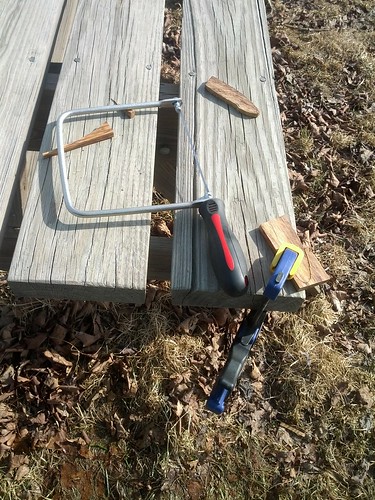
The above setback stalled me for a while. So, after we had moved to Vermont I finally got around to picking up a coping saw. I then carefully traced out the shape of the knife again on the two remaining scales, and cut them out with the coping saw.
Shape them down with a rasp
If you recall the bow I made for Jess some time back, I used a Shinto Saw Rasp. Well, I still have it. So, I took this and carefully shaped the scales down until they were getting close to the precise shape of the knife tang. Then I used the rasp to round down the sides of the handle so it would be nice and comfy in my hand. As it came close I realized they were too thick, so I thinned them by taking wood off the outside of the scales (I didn't want to ruin the flatness of the inside). Finally I had them pretty close.
Repeat steps 1 through 4
When I came back a couple days later to continue work, I could only find one scale. After some poking around I found the other one in two pieces. Placing these together I saw tooth marks... oops! A lot of dogs love to chew wood, and I had failed to take this into account. Usually they like it best when it's nice and thin so it crunches as they bite it - just like my scale.
This time though, I didn't have a table-saw. I first tried to cut the scale blank out with a coping saw, as it's the only fine-toothed saw I have right now. It worked for the bevel cut, but not for making the slice. I switched to a larger toothed saw for that cut and just did it carefully and it came out alright. This time it only took me a couple of hours to get something back down vaguely close to what I wanted
Final shaping
Repeatedly holding it up to the knife, looking at it carefully, fitting it to my hand, and comparing the two sides I worked it down a bit more with a rasp. For the concave section near the back of the handle on the blade-side I used a mix of a round bastard-file and the knife's own blade to carve it to shape. Then I switched to a somewhat fine sandpaper, then to a finer sandpaper.
Coat the scales in epoxy... or don't
I was thinking about using the knife and getting it wet by accident and the like and though that it'd be good to coat the handle in epoxy. This would also help bring out the wonderful grain of the wood. On one of my old wrecked scales I did a few tests. First I tried using a q-tip to spread the epoxy, but it left fibers all in it... ick. Next I tried a stick, but this left some plant fibers behind too. So, I decided to abandon the plan and move on.
Glue on the scales
I carefully mixed epoxy and spread it on the scale that doesn't have the liner lock under it. Then, using two bar clamps, clamped it in place lining everything up carefully. I tried to clean up the epoxy that leaked out, but some ended up on the knife-handle. I then left this for a full day to really set up hard. This scale was very slightly warped, so I was extra concerned about getting a really good bond before removing the clamps.
For the second scale I didn't want to accidentally glue it to the liner-lock. So, I spread the epoxy on the tang rather than on the scale, and again I carefully clamped it really tightly, and left it for a day.
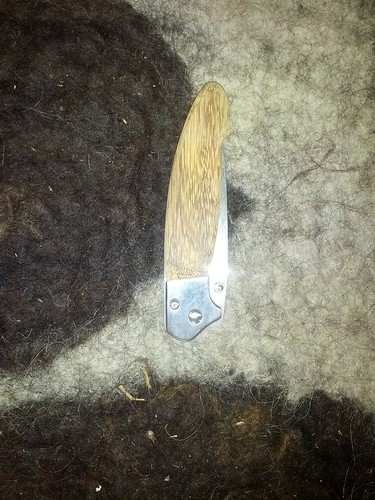
At this point I had a usable knife with a handle! But, I looked at it and I'd gotten some epoxy on the handle, making the appearance look inconsistent and ugly. A shame for such a beautiful wood.
Epoxy the scales
So, I decided to try again. This time I used my finger to spread the epoxy on the handles. It's not perfect, but it worked well enough. I considered sanding it but decided to leave well enough alone, I'm not sure this epoxy set up hard enough to be sandable. That's a good thing for gluing the scales down, but not so good for coating the scales. I think I might use two seperate epoxies for that in the future if I can find a harder-drying transparent epoxy.
I did 2 coats on each side, letting it set up decently well between coats. The epoxy I used is 5-minute (part of the stuff Jess gave me), so I did the handle in about a day and a half.
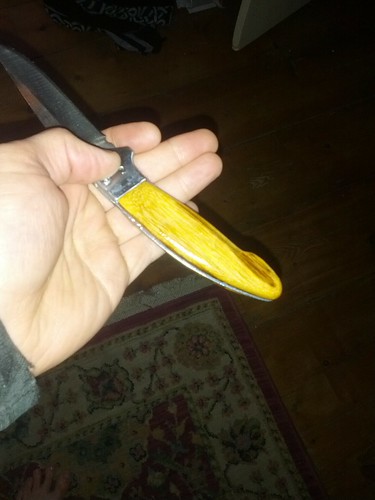
Conclusion
I'm pretty happy with the results. It took a fair bit of time, but mostly because I kept cutting too far out and thus spent way too much time shaping, much like the bow I made. I'm learning through and the last scale I made took a tiny fraction of the time of the others. The final result feels good in my hand, has very good grip, and is pretty. I expect it'll withstand water pretty well, though the part of the scale next to the liner-lock has no epoxy on it, so it'll be interesting to see if that matters.
It's certainly a lot more fun than a normal blade... A lot more work of course, but also a heck of a lot cheaper. As I get better at shaping wood it's taking less time. Someone skilled, even using all hand-tools, could probably do the shaping in a day, and the epoxying with another hour of work over the next day or two. For me, I could probably make this in about 3 days now. The knife I have here represents more like a week... but I got a lot more than a knife out of it.