
Blanket Pack
2018-03-25
While at Wintercount (a traditional skills gathering held in Arizona every Febuary), I took a class from Jeff Sanders on "flat fabric camping". Jeff Sanders taught for BOSS (Boulder Outdoor Survival School) for many years, and more recently has started his own school called "The Desert Dawn". Suffice to say, that he's rather knowledgeable and skilled.
Anyway, the idea of his flat fabric camping class was basically to use blankets from thrift stores for the bulk of your backpacking kit. I've used flat fabric tarps myself as my only backpacking shelters since around 2004... so the biggest thing for me was the backpack, referred to by most as the "blanket pack".
Right now my backpacking sleep system doesn't involve using any blankets, so I decided instead to use my 800 threadcount sheet/tarp as my "blanket" to make my pack out of (I dyed it recently, that's why it's green). I've used this on 2 overnight trips now. Here's how it works:
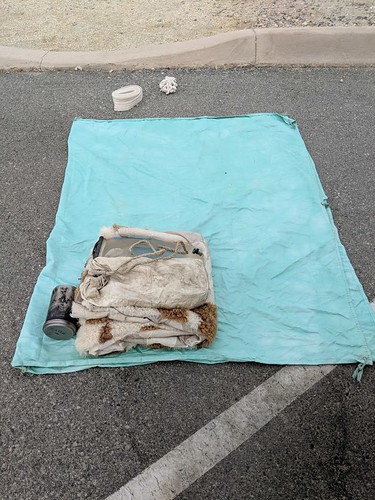
Start by laying out your blanket. In this case I folded my tarp all the way in half. I'm still working out the best folding method for my specific materials, but this worked okay.
Jeff does it a little differently, he lays his fabric out with the long axis vertical, then folds the right side towards the left 1/3 of the way across (like you were folding in thirds, but just the first fold). That fold is critical, you'll see why in a minute.
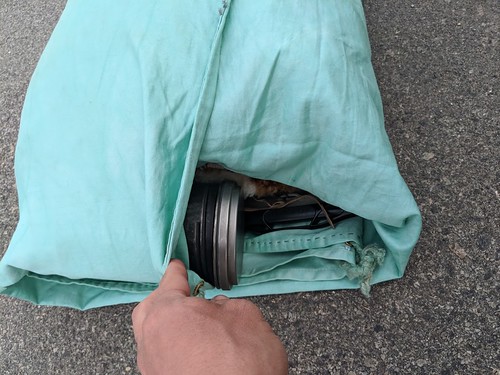
Some of you are wondering where the rest of my gear is... good catch. You'll see I have a 3L bladder, a bag full of food, my sleepingbag, and a 1L waterbottle/cookpot in the image (we were doing an overnight with no available water). Yes I have more gear, you'll see it in a bit.
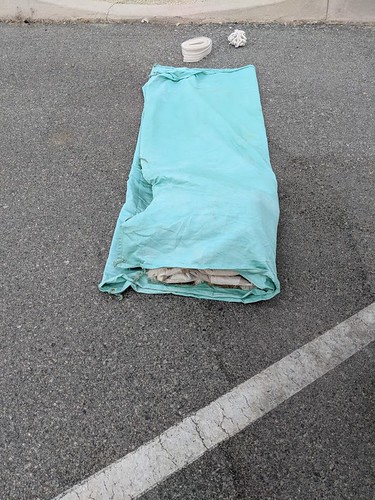
Fold the fabric over the stuff you are packing... it's actually easier if your fabric is longer, than you can fold it up over your stuff at this stage, which helps keep your stuff from falling out in the next step.
Now, you roll the gear up in the blanket rolling away from you. Because of how you've folded the blanket, the end of the sheet is like a pocket, so you can stuff the roll you have in to that pocket forming a pillow shape. Jeff's is prettier than mine... but mine works okay.
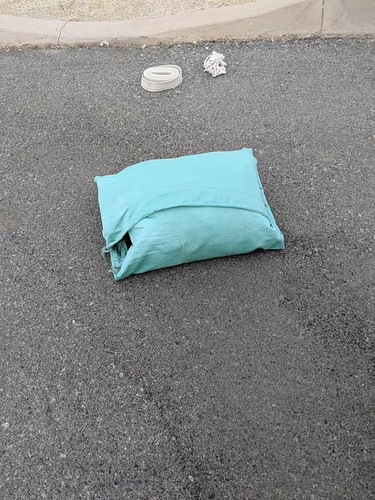
Here you can see a bit better. See how that layer of fabric kind of pulls over the top? That's the "pocket" that it was sort of stuffed in to. In retrospect I should've shot a video of this step, but hopefully you can still figure it out. Anyway this folding makes it possible to get to one or two items on the top of your pack without disassembling it all the way.
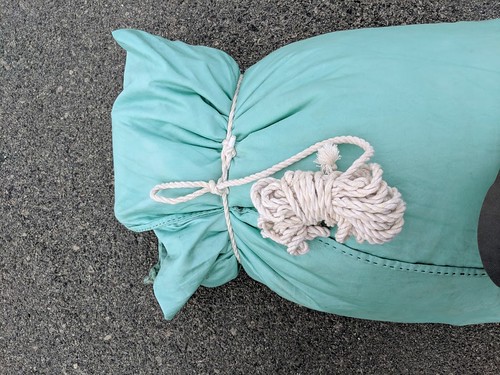
You need ~25" feet of cord. I'm using this 1/4" cotton cord I've come to like. Tie a small bowline in the end to make a loop. Invert the loop on itself to make a sliding loop and slip that over the top of the pack. Tighten it down and tie it off with a slipped half-hitch. Slip a half-hitch over the first to lock it.
Then take a turn around the middle, and a turn around the bottom, tying the bottom of similarly to the first loop.
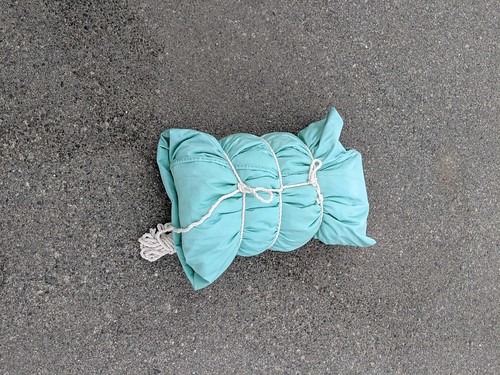
Go under the bottom and around to the other side and tie off to the bottom loop, wrap the cord around the middle loop, tie off again to the top loop. And finally (not shown above) wrap over the top and tie off to the top loop again... your final tie-off point will be the top back of the pack, pointing away from your back.
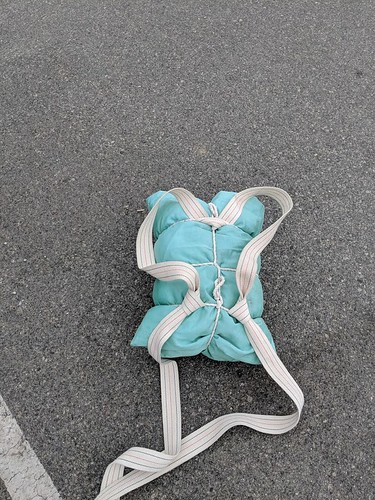
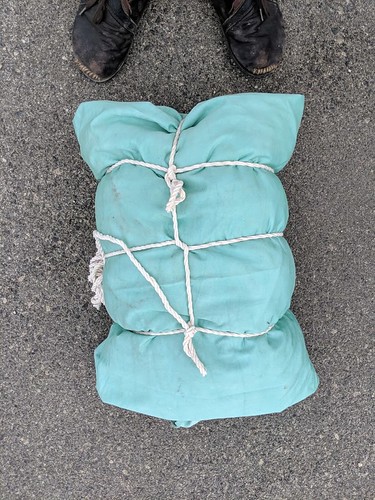
Take ~15' piece of 2" cotton webbing (I cut mine down to 14' after the first trip), and run it under the top loop, over the vertical, and under the other side of the top loop again. Tie off each side to the bottom loop using an overhand. Make sure these are the same length. You're first few times you'll have to do a fair bit of fiddling as these are your shoulder straps. It takes practice to get them the right length on the first try (I'm not there yet). That is the blanket pack itself... which is pretty cool, but here comes the real trick that makes this work so well.
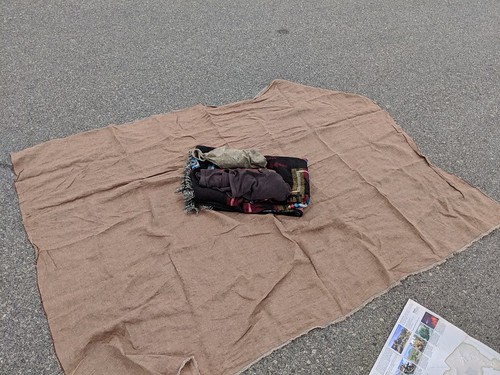
This is a 5'x6' rectangle of linen. I chose a piece that's a little loosely woven so it has some stretch on the bias... this is important for comfort. A piece of herringbone linen (like suits use) doesn't stretch well on the bias, so probably isn't the best choice. The exact dimension isn't critical. Jeff said "a bolt width" is what he likes, I'd say unless you are quite large around just get "2 yards" at the fabric store and you can always cut it down if it's too big. I actually kind of like the extra on this mine.
Anyway, lay that out and place some stuff in the center. Make sure there's a good quantity of soft stuff. This is also where you should put most stuff you want to access while hiking so extra clothing layers are a good option. Here I use a sweater and the poncho I use both for extra warmth when not hiking, and as a sleepingbag liner for my alpaca. I also have my ditty bag with repair gear and the like, as well as my knife in this role. Later on the trip I threw in some snacks as well, a couple manderin oranges, a bar, and a bag of nuts all fit well. It's actually helpful if this is fairly large, you'll see why soon.
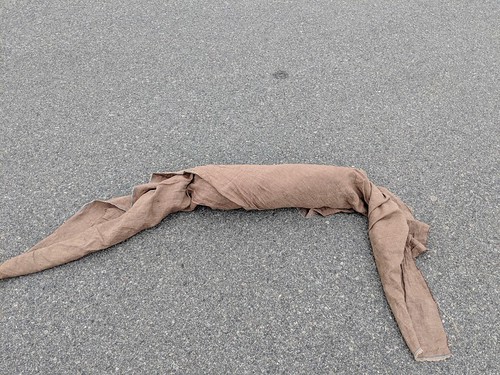
Roll that up as tightly as you can. This roll is going around your waist, so you want the width to match the size of your hips, so it'll sit well. Also, make sure all the soft stuff ends up on one side, so you can put that against your back and have it by comfy.
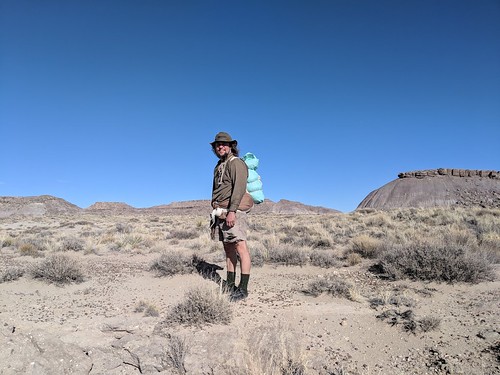
Now with the parts assembled, tie the linen-wrapped bolster around your waist. Then sling the pack on your back (probably taking it off two or three times to adjust the shoulder-straps). The pack should sit *on top* of the bolster to a large extent. Finally, take the ends of the shoulder straps, CROSS them behind you (this is a bit odd, but look at the picture below) run the two straps around your hips UNDER the bolster and tie below the bolster tie off on the front of your hips.
This is what the final result looks like:

Here's the back so you can see just how the shoulder-straps run behind the back:
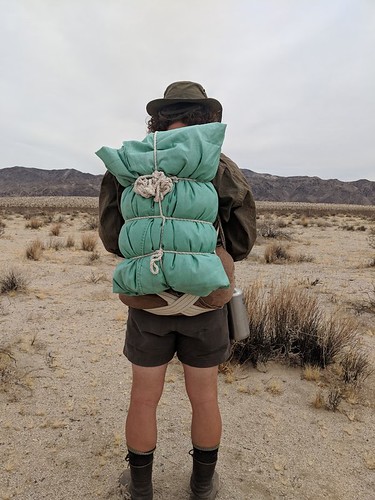
The cool thing about this is that the bolster ends up acting like a hipbelt for the pack. So, not only did you get a good portion of your stuff off your shoulders, AND to somewhere you can get in and out of more easily, that portion then helps hold the rest of your stuff up significantly lightening the load on your shoulders.
Note that the linen has a number of uses once you are in camp. It's quite nice as a ground cloth for keeping your stuff from getting sandy. I discovered (not while on a trip, but I'll use it later I'm sure), that I can wear it like a sarong to let my thighs dry out from chafing. Jeff uses it as a hanging cover on the ends of some of his tarp pitches to help hold in heat and cut the breeze a little. Suffice to say, it's a lot lighter, and more useful in camp, than a backpack.
The strap is all cotton, and makes great charcloth. Otherwise I haven't found a use for it, but it's just the one piece, instead of an entire expensive backpack.
The linen I acquired at a fabric store. The strap is a piano moving strap, which, sadly, it turns out has a small amount of nylon in the middle, despite being sold as "100% cotton"... oh well.
Obviously there are still things I'm working on. Jeff (and BOSS) use a poncho-tarp, which would cover up the pack during a rainstorm... as is, my stuff would get wet. I'm not using down, so it's not a disaster, but it might kind of suck in a 5-day rain out east. So, I need to use a poncho, or work in the piece of waterproof fabric fabric I was using with my external frame pack, or something.
Here's the external frame pack setup I've been using (give or take... this was a trip in the zerkels where I had more winter gear)

The blanket pack is super neat though, and it's kind of amazing to get out there and realize that you only have a few pieces of kit, yet are well prepared. More experimentation to do, but I'm seriously thinking that I might not use a pack for backpacking anymore... one less piece of kit both in the bush, and to store in between!