
Making a hickory bow
2013-07-30
I finished the bow I've been making for Jess. It's a full pyramid flat shagbark hickory stickbow. It's got a near center-cut shelf and a non-flexing handle. I tillered it out to a 30" draw, since Jess' max draw is 29". Note that there are a lot of other ways to make bows a lot of other types of bows, in particular most commonly when you see a "traditional bow" (one without wheels and stuff on it) you will see a laminiated fiberglass backed recurve bow. These bows get their energy from fiberglass rather than wood. They are easier to maintain, often a touch easier to shoot, etc. On the other hand, I made this bow using a matchette, a couple files, and a pocket knife.
I used a combination of different sources. I read the "backyard bowyer", and watched youtube videos on making osage bows, and in the end my primary source was a website http://www.murraygaskins.com/durable.html . That website is specifically for hickory.
Before I launch off into building the bow, a note about hickory. Hickory is well known to be a very easy bow wood. It's flexible and generally won't snap, even if you build a crappy bow. The downside is that it has a lot of "string follow". It's so bendy that over time it just bends and stops snapping back. The reason people love osage bows so much is that it's not impossible to make a bow that doesn't break, and if you can it keeps it's snap really well so you can keep using the bow forever. BUT it's way harder than hickory. Hickory is weird, you can violate the grain all over the place, and it won't generally fail. With something like osage if you cut into the outer grain, your bow will usually snap in half.
All of this is to say that for hickory you can use a board, even without backing the bow. Where most other woods you NEED a stave. I used a stave, but based on my reading you can get away without it.
Okay... on to the bowmaking!
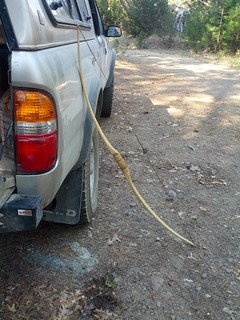
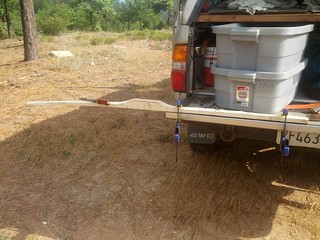
I ordered a stave off ebay and picked it up general delivery in mountain view. The stave cost $30, and I payed a decent amount in shipping. A stave is a split chunk of wood, meaning the grain should be mostly unbroken. This is good since it makes for a stronger bow (one less likely to snap).
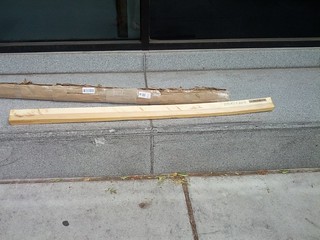
I drew out my rough pattern. Note that I kept the outer ring of the wood. It depends on the wood which ring you want to keep but you generally want the entire "back" of the bow (The side away from the shooter) to be a single growth ring. With hickory it matters less, but beset is for ring to be the outside of the tree.

I highly recommend looking at other bows before you do this. Take measurements of a bow you like, add a margin for error (1/8" maybe to each line, or 1/4" to each measurement). I roughed out my bow far too roughly. If you get it close you can do this entire process pretty quickly, if you don't it takes a LOONG time. Turns out it's easier to take wood off with a machette than with a file. My problem was I didn't know what I wanted the bow to look like ahead of time. So rather than having a picture when I started I built one in my head as I saw it take shape, this meant I had to do most of the shaping with a file.
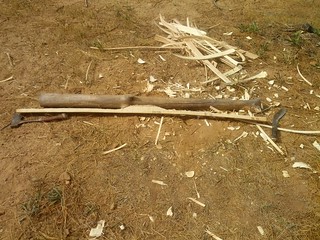
Okay, next I roughed out my pattern with a hatchet and machette. The hatchet was just to help with the splitting, my kukri machette was far more useful overall.
Then, I started filing. I did this with a shinto saw rasp as recommended to me by a bowyer. Another common choice is a draw knife. If you have a non-straight-grained wood a slightly dull draw-knife seems better, since it follows the grain naturally, then a shinto rasp for finishing work.
And filing
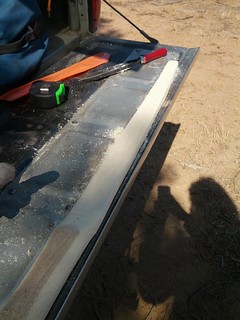
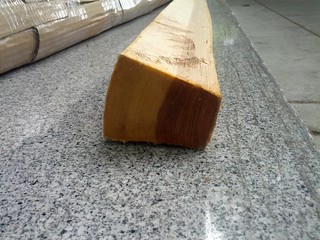
I should note somewhere probably that it came with urathane sealant on the outside of the stave. I sanded enough to take this off, but tried to avoid taking off much wood, I wanted to keep that outer tree-ring as in-tact as possible.
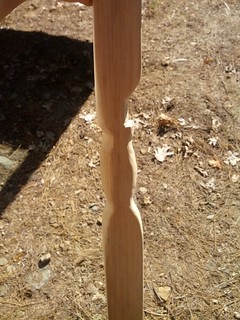
I chose to make the cutout (not that common on a stick bow), and realized the shinto rasp didn't really do concave shapes well, after some fiddling I did most of the sharp concave shaping around the handle with a pocket knife, a little bit of it was done with a flat and a round rat-tail bastard file and the shinto rasp.
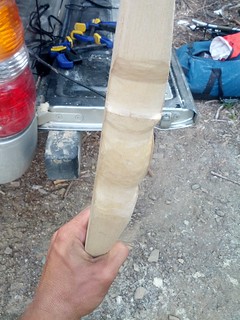
You file until it was starts to bend. Once it starts to bend you watch the bend carefully occasionally as you file, to make sure it doesn't hinge anywhere and that the limb doesn't twist, you want it to bend nice and evenly with the most bend in the middle of the limb and the least towards the tip and handle. Once it's bending a decent amount, you want to make sure both sides bend the same amount. You use a long string at first and put it on a "tillering stick" this is just something to hold it in a partly drawn position at a specific draw length while you look at it. As it gets more bendable you draw it farther and farther. Bend it several times before each time you increase. This "warms up" the bow and everyone claims reduces the probability of it snapping on you.
Once you get it to the draw you want at the poundage you want (don't overdraw it!), then you test fire it a lot. Start by shortdrawing it. Because this bow is hickory I wasn't AS careful as you'd want to be with other woods. I shot 40 arrows at half-draw, 40 at 3/4 draw, 60 at my full draw (26"), And then 40 at 30" draw (1 inch over Jess' draw). For a total of 180 arrows.
I didn't take any pictures of how I made the string. I couldn't get ahold of material for a string, but I had an old commercial one I didn't like 'cause it had too many strands. So I took it apart and rebuilt it. The string I built is 8 strand. I reused the same serving again as well, the trick with serving is finishing. When you get near the end, take a loop, take the rest as wrap it the same direction, but inside the loop. When you are almost at the end, run the tip backwards behind the loop. Now use the loop to continue wrapping as you were before, and simultaniously unwrap what you just did. When you're done you'll have a loop at the end, and a piece of string running under the turns you did with the loop. Pull the end of that string hard and everything is tight!
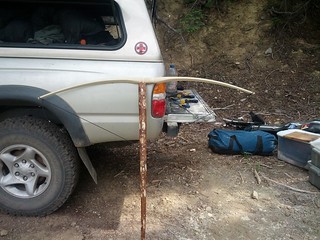
Once I was happy with it I sanded it and decided to coat it with linseed oil. I did 20 coats, and that seems pretty good. Urathane would be good too, but I wanted to make it easy for jess to modify and urathane is messy to take off. I guessed at the poundage, so she may need to sand it a bit to drop the poundage down.
I seem not to have taken any final pictures of the handle. I have just a little heartwood left on the handle and the end of each fadeout adding a really nice accent. The linseed oil brought out a pretty strong yellow in the wood which I really like. So, it came out pretty as well :). Sorry, I also lack any full-draw pictures. I can't take pictures of myself very easily (I need a timed camera app on my phone). I promise you that it's tillered pretty evenly and bends nicely across the whole limb, it could use a little more bend towards the handle, but I didn't want to drop the poundage further.
Another question you'd probably be curious about is how long it took. Roughing it out took about half a day, I think it'd be faster overall if you took a day to rough it out. Sealing and sanding it took a day and a half to 2 days. The rest is filing and shaping. I probably I put in 4 solid days of sanding at least. So probably this took about 1 week of solid work minimum, maybe another day or two. I think I could do it again in closer to 4 days. Sealing isn't continuous either, and I had to take a lot of breaks in the sanding due to sore hands and such arms.
(Image below is from before it was sanded and sealed)
Anyway, it's a bow, and it shoots! It's surprisingly sweet shooting with no handshock. It's 62" which is "too short" for a 29" draw from what I've read, especially since I have long fadeouts and the handle doesn't flex on this bow, so it'll probably get bad string-follow very quickly and lose it's "snap". I've been testing it at about a 5 1/2" brace height (distance from handle to string). At that height it bites my left wrist hard on a fairly minor mistake in my release. The string isn't quite lined up with the handle, it's slightly left. This makes the window near center-shot which is cool 'cause it'll handle misspined arrows better, but it also means it's easy to hurt your arm. The bow feels like it's about maybe 55 lbs at 29" right now which if it's true was close to my target, just a touch high. It also feels like it shoots at the speed of my 45 lb recurve. If that's true, it's doing well... but that's entirely unscientific, just my "feel". I couldn't get a hold of a spring scale anywhere in Ukiah. Jess needs a 45 lb, so maybe I'm wrong and guessing higher than it is, maybe it'll lose more as the limbs get more bent and follow the string, or maybe she'll have to sand it down a little. Any of the above would be just fine with me :).
A few more photos: https://secure.flickr.com/photos/smalladventures/sets/72157632523099653/"