
Tips for spinning up fire
2012-06-07
We're not experts yet, but we've gathered quite a lot of tricks from various people, and we have succeeded in spinning up a few fires now, so I wanted to share some of those tips.
 Regardless of other details what we're talking about here is starting a fire by creating heat via spinning a stick against a board. As you spin the stick you create a fine powder, the goal is to get this powder to compact into a nice little block right where all the heat is, so that that block of powder will ignite (at this point smoke will pour out if it, even once you stop, blowing on it lightly will show a bit of hot red). You then take this block, drop it into a tinder bundle, and blow that very slightly glowing little pack of powder into igniting the tinder around it. Now it's just a matter of basic fire skill to turn that burning tinder into a full fledged fire.
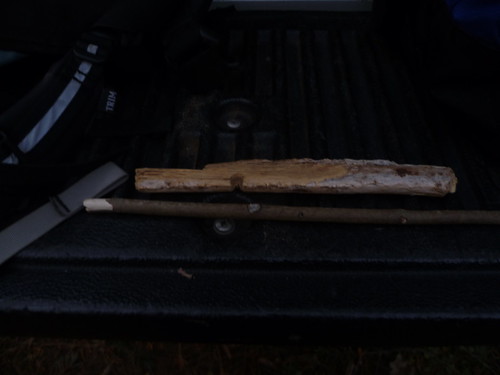
The stick that you spin is called a "drill" or sometimes "spindle" and the board you spin it against is called a "hearth" or "hearth-board".
Selecting wood type
So, How do you make this happen? You need to create a powder, usually you want this powder to come from the hearth-board. This means you usually want the hearth board to be a bit softer than the drill. Here's some of the easier woods to use:- Hand Drills:
- Seep willow (tried)
- Thick walled elderberry (seen it used)
- Buckeye sucker (tried)
- Sojaro rib (seen it used)
- Ceder (tried)
- Bow Drills:
- Sotol (tried)
- Yucca stalk or root (tried)
- Seep willow (tried)
- Hearths:
- Sojaro cactus root or rib (tried)
- ceder (tried)
- buckeye (tried)
- cottonwood root (tried)
Selecting materials
Drill: If you're making a bowdrill, grab something around the size of your thumb or a bit larger. It's easiest if it's straight for 6-9 inches, cut it to this around length. You want it to come ~1/2 of the way up your lower leg. If you're using a handdrill grab something the size of your pinky or a bit smaller. (I'm 5' 6" and have large hands, but midsized fingers - adjust as needed for other sized hands). It should be at least 2 ft long.
Hearth: I'd aim for a minimum width of about twice the diameter of the drill you're using. You'll want it to be a good 8" long or more, so you have some space to put your foot on one end and drill on the other. Note that you'll need to flatten the hearth on BOTH sides,. Flattening the bottom as well as top is really important because if you can't get it to sit totally stably you'll repeatedly disturb the powder you've built up losing both the heat and the powder.
Bowdrill specific stuff:
Twine: need something thick and not too smooth that will grip the spindle. If it's too slick it will slide on the spindle cutting into it.
knuckle: It makes absolutely no difference what you use for this, it just shouldn't have much friction. A rock with a dent in it is great. If your rock doesn't have a dent you can make one given an hour or so of pecking. The knuckle-bone from a ruminant is also a popular choice and a bit easier. Supposedly roots or knots from some trees work well. If worse comes to worse you can just use another chunk of wood, you'll just want to really sharpen the spindle on this end to reduce friction.
Making components
You have all your materials. Now to make them into the components you need - note that you'll probably reshape several times again while trying to spin it up as you realize things are slightly off Drill: Now sharpen the bottom point of the drill a little. You want a pretty shallow point, at probably 140 degrees or shallower. Jess says sharper points work for the earlier steps, so as with all of this stuff experiment. For bowdrill sharpen the other end at a much steeper angle, something that will help it spin smoothly in the knuckle. You can also take a little oil from behind your ear or the side of your nose and rub that onto that end of the spindle. Do NOT put this on the bottom! we want friction and thus heat at that end!Hearth: Take the hearth board and place your spindle on the board just a bit in from the edge. You probably want the edge of the spindle about 1/8" or so from the edge of the board. Wherever this places the tip of your spindle, drill a small hole with your pocket knife or stone blade.
Bowdrill technique:
Bow: For a bowdrill you'll want to make a bow with the twine. Use a clove hitch to tie the twine to the drill, this will let you adjust tension, if it slides too much you can use a constrictor hitch or something else instead, a timber hitch might also be a good choice.Take the drill and push it against the bow-string. With a bit of a spinning motion you should be able to wrap the twine around the spindle one round. The twine should be taught at this point, but not SUPER tight. Note that if it's just a touch loose that'll be *okay* in another minute.
Stance: If you are right handed get down on your right knee and place your left foot on the hearth board with some weight on it. Get yourself up and *over* the hearth. Take the knuckle with your left hand and lock it up under your left shinbone (arm coming around from the outside). This will keep it stable so the spindle doesn't wobble all over the place.
Place the drill in the hole with the whole setup and start it spinning with the bow. Do this smoothly and slowly, don't worry about speed at all. The spindle will no doubt shoot away from you a good 5 feet in no-time. Go get it and try again. Be patient and keep reshaping things. You may need to tweak the shape of the tip, the hole in the board, the back of the board, or maybe dig a bit in the dirt or similar to get the hearth to be really stable and the drill to stay in there. Note that if you are rocking around as you move your spindle will end up shooting out. If your twine is sliding on the spindle you have more friction in the spindle than you do in the twine against the spindle. You can increase the twine friction by holding it so you push a bit on the twine with your right hand. If the spindle isn't spinning check your knuckle, make sure the spindle is straight, oil the top again with nose or ear wax/oil. Use the bow in *long* strokes. Every time you switch direction you stop, which will let it cool down, so a long stroke will involve a lot less work. Keep at it reshaping and tweaking until everything is comfortable and smooth. If you can't get it check your stance from the last paragraph - it really really matters, lock that hand under the shinbone.
Alright, so you've got the right wood, you've got the right sizes and shapes, you've got it spinning nicely, and if it's spinning nicely then by now incidentally you've burned a nice circle into the hearth board. The next step then is to make the powder we need. Take a knife and cut a notch into the hearth right next to the hole you burned. There's a lot of debate about this, so try various differences, but cut a narrow notch going almost but not quite half-way across the hole you burned. Several people have told me to make this notch wider at the bottom than the top - I suspect though that this only matters for hand-drill (where the drill is thin), not so much for bow-drill where you have plenty of space.
If your spindle is pointy, cut the tip of the point off (so it will rub on the edges more instead of sitting on the tip. The wood is moving faster at the edges). If the wood of the spindle is starting to fire-harden and shine, cut it off and reshape the tip again. If you had any issue at all with fire-hardening, take a pinch of gritty soil (preferably silt) and drop it in the hole in the hearth, this will let you wear off the shiny layer as you go.
Now get a surface of some kind. A rock or a leaf works well. Carefully place this under the hearth board where the notch is. This will catch the dust and let it build up in the notch into a packed pile ready to ignite. Make sure you get the hearth-board stable again so that it doesn't rock at ALL. This is *really really* important. If your hearth moves, you basically start over (you will start over a few times, but keep that in mind).
Get back in the stance and start back at it with slow long even strokes, As you go you should be building up powder in the notch. If it squeaks push a touch harder. Keep it easy and slow, but try not to stop. That powder is already warm, and if you lose that warmth you have to get it back, why do that? If you take off now though you'll probably wear out before you have a fire, or more likely not move smoothly enough and all your drill will go flying again. Only speed up if you go for a couple of minutes and are getting no powder, no smoke, no burn-in, and no squeak.
Once you see you have good powder buildup, it should mostly fill the notch, try and speed up a little. Keep it smooth and even with long strokes, but try and get a little more speed without losing that smoothness. Think about form not about power. About now you'll start to see smoke coming from the board. That's AWESOME! Don't STOP! Also, don't breath out really deeply looking at the board, you'll blow all the powder away! Keep breathing, and keep it going, don't speed up, don't go crazy, don't use up all your energy. Now you've got a continuous stream of smoke coming out the whole time. Keep going! At some point you'll have a significant amount of smoke coming out and hopefully you will even start to see red.
Once you see a bit of red in the powder... stop. Very very carefully take the board and lift it off your catching surface. flick the board with your finger to get it to drop the cinder you've made.
Take the cinder and drop it in the center of the best tinder bundle you could possibly have gathered (which I'm sure you were meticulous about with wonderful fluff in the center and maybe some good dry grass or shredded dry inner cambium etc.) Take the tinder bundle and hold it *tight*. You want to make sure a decent amount of material is touching the cinder in the middle. It should be just starting to smoke. Blow on it very lightly but with a thin stream of air. As more smoke comes out blow harder on it (still with the thin stream). At some point you'll start to see flames, you may want to put it down somewhere now before you burn yourself :). CONGRATULATIONS, you've just made fire from nothing but some wood and twine!
If you fail (and you will, if not now than later), don't throw it all away. That powder is a damned good start. If your last hole is going to wear through make a new one, and stick the old powder into the new notch yourself. This may save you a lot of extra work. Go back to all the checks you did before, check your technique, make it smooth and comfortable.
Handdrill technique
Hand drill is all of the same concepts, except now you don't get the mechanical advantage that the bow gave you. Why would someone do this you ask? With bowdrill you need a bow, you need twine, and you need a knuckle. That's a lot of extra complexity. Twine isn't always easy to make everywhere you go. A hand-drill requires 2 sticks, and that's all.A few tips for handdrills though.
- Before you start, try clapping your hands until they are both slightly red. This sounds silly, but many find that it helps stave off blisters... others find it makes no difference. Personally it seems to work for me.
- you'll want to put the skinny end on the bottom, DON'T! The reason we're using a skinny drill is actually a matter of gear ratios basically, you want your hand on the skinniest part of the drill, as the same motion will then move the wider part of the drill farther.
- As you spin the drill notice the downforce you create on the spindle. You'll need quite a bit of pressure. If you focus on pushing down your hands will slide down the stick. Focus on form and push *in* pretty hard, this will let you slide downwards less for the same downwards force. Use as much of your hand as you can, as again this is less work. Some people find they can do it with just their palms, but just like the longer stroke with the bow-drill, you get more cooling time this way. Note that the bottom of the palm continuing into the pinky is the easiest place for most people to get the needed friction ('cause of the muscle structure there).
- Finding a sufficiently straight stick of the right wood is extremely difficult in modern times. Natives used to coppice buckeye and other plants to get straighter sticks, but we don't do that these days. So, find something relatively straight, preferably with a fairly simple bend (not many small bends). If you have a fire already (it's not like you're trying to start one or anything :P) hold the spindle over the fire (preferably coals) and warm it up. With it pretty warm try bending the wood straight. Keep bending and warming. Surprisingly the wood will actually straighten this way.