
First Run: Non-plastic sleeping kit
2016-10-19
Angie and I, at the suggestion of our friend, recently did a float down the Current River in the Ozarks. For the first time I had a fully non-plastic shelter and sleep system and was able to use it all together.
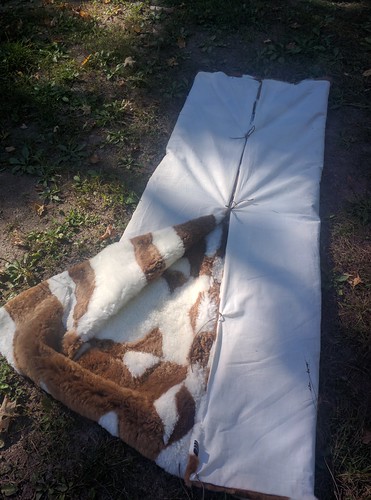
Here we are, chillin out.
- The tarp is a simple 800 threadcount sheet 9x8.5', same one we've been using.
- The groundcloth is an 800 threadcount sheet, 6x8.5', treated with bees-wax, linseed oil and mineral spirits (When I finish and test my new poncho attempt I'll write up the proicedure for making this treatment really work well, but it's close to http://www.blog.smalladventures.net/2016/06/no-plastic-backpacking-continuing-quest.html ).
- I'm lying on my alpaca sleepingbag: http://www.blog.smalladventures.net/2016/09/alpaca-fur-sleeping-bag.html
- The string is a cotton twine I purchased.
- The poles are paddles, which yes, are plastic... but I could've just used branches, or wooden paddles :P
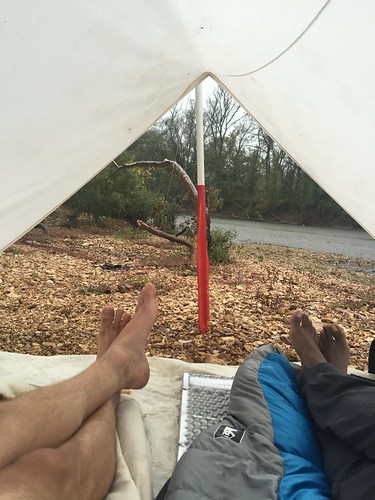
I've used each of these pieces alone, tested it, etc. But this was the first time it really started to come together. The gear shown here is a bit heavy for solo backpacking. I'm currently working on turning the ground-cloth in to a poncho. For solo backpacking my current plan is to use this 6x8 poncho/tarp as my shelter, and then use another smaller piece of treated fabric as a groundcloth.
This was a 3 day float trip, 2 nights, and it did rain one night. Everything worked great. We were quite comfy. Angie was using her more traditional (or is that less traditional? I'm not sure anymore) gear as you can see in the photo above.

In other news, we had an AWESOME float trip, here's some other photos.
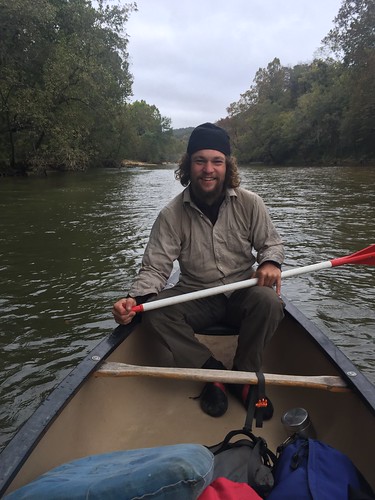
Yes, we ARE in a cave while in a canoe! And yes, it is exactly as awesome as it sounds, well... maybe a bit more so, because it's also a spring and the water we were floating on was DELICIOUS!
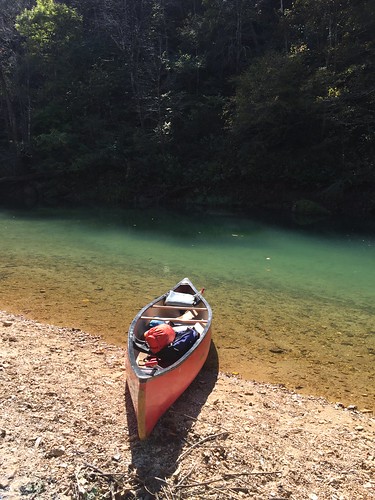

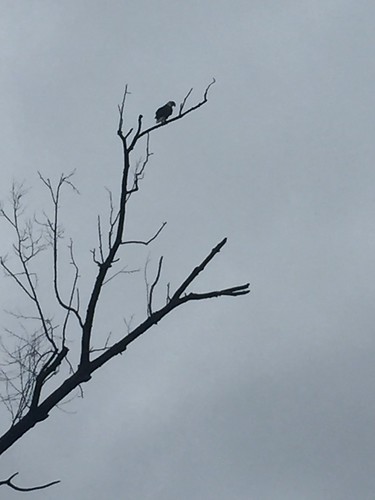
We saw river otters, bald eagles, deer, and tons of king fishers.
We're finding that we really like the Ozarks.
Fire safety and cotton backpacking gear
2016-10-15
Most people are not aware, but most camping gear is required to be covered in fire retardants to be sold in most states in the U.S. This is also true of furniture and other things, but for this post I want to talk about camping gear.
If you weren't aware, back in the eighties a researcher discovered that the fire retardants in children's sleepware was carcinogenic... very carcinogenic. The fire retardants were banned a while later, but companies were still required to make all these products fire retardant. So, they changed the non-active portion of the chemical a tiny bit, so it counted as a different chemical, then that was banned, etc. This has been going on ever since with no meaningful change. So, in short, most things that are flame retardant are a problematic...
That was a bit off-topic, getting back to the point, I've been playing with all of this gear made from bed-sheets which I *believe* don't contain fire retardants, though I could be wrong.
I decided to run a quick test to see how paranoid I should be about accidentally lighting my gear on fire, so here we go:
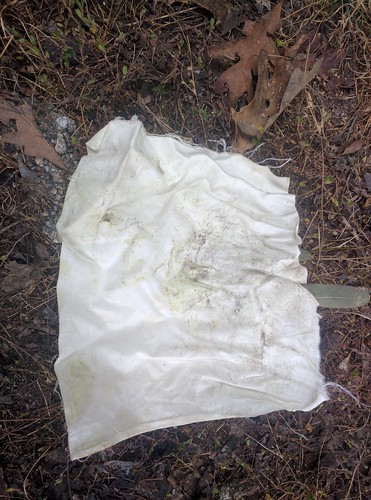
This is 800 thread count egyption cotton which *probably* doesn't have flame retardant. One wastreated with bees-wax, mineral spirits, and a small amount of pure unboiled linseed oil, the other was just the raw material.
First I tried dropping a spark on to both materials, neither of which lit on fire. Here's the treated one afterwards.
Next I got out a lighter and lit both of them, it took a few seconds actually. On the left is the treated one, on the right is the untreated fabric.
I lit the matrial on the left first then a bit later the material on the right (it took me a couple tries).
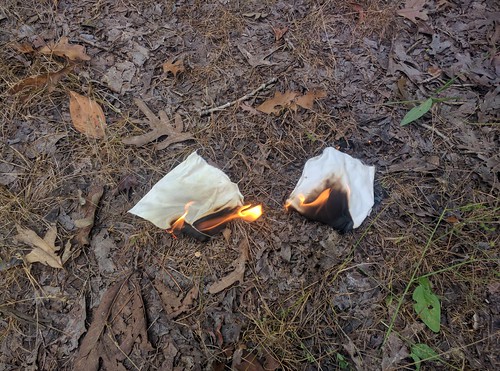
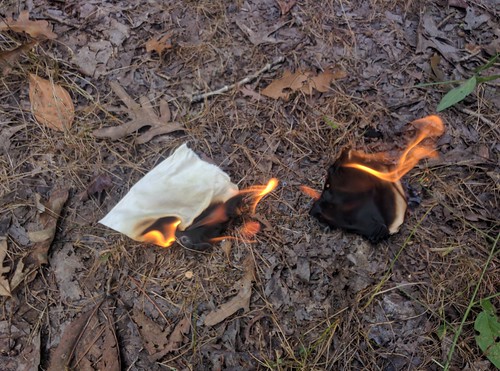
So, contrary to what I've been hearing on the internet, this treatment *improves* the fire retardancy of the material... THAT is pretty interesting. The untreated cotton burned about twice as fast.
Next, just as an interesting cross-check I cut a patch (the inside of a pocket actually) off an old worn-out raincoat. This rain-coat is a fancy membrane style water-proof breathable jobby:
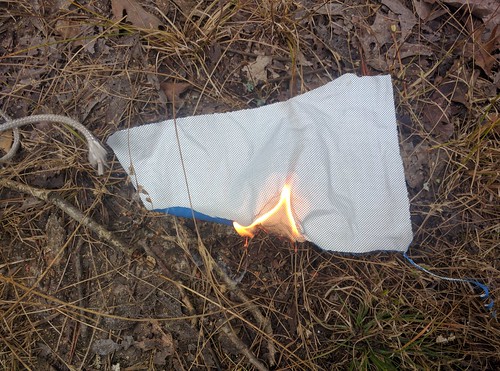
This burned in (by my estimation) about half the time that the raw fabric burned, and lit more easily.
I was pretty surprised by these results, so thought I'd share them. I'm still going to be careful, but now I'm going to be less paranoid about non-flame-retardant treated cotton than I am about flame-retardant treated nylon.
Alpaca Fur sleeping bag
2016-09-29
In my search for a lightweight set of backpacking gear involving no plastic, I've been looking for something that works as a sleepingbag.
My thought had been to go with a twined rabbitskin blanket. There's research showing these are incredibly light, and that one in the 4-8 lb range can likely outperform a 0 degree down sleeping-bag in raw insulation ability (ignoring shape issues). They've been used for many thousands of years (we've found them in archaeological digs from near the last ice-age), so clearly they work. There's only one problem, to make one large enough for me to wrap up in would require ~70 rabbit-skins, and I don't have easy access to that many rabbit-skins. Traditionally people would have plenty of skins just from their regular hunting for food, but I've yet to hunt rabbit.
While I was working on finding a good, ethical (by my standards) source for these hides I went to the Big E (a large agricultural fair in Massachusetts) with Angie, and ran in to someone selling alpaca skin blankets. I couldn't resist and bought this for $400:
Surprisingly, no alpaca are harmed to make these alpaca skin blankets. Alpaca are worth WAAAY to much to kill for their skin (we're talking 10's to 100's of thousands), so these blankets are only made from scraps of alpaca hide from alpaca that have died of natural causes, sewn together in a patchwork.
Alpaca are a species of Camelid. Closely related to Llamas they've been bread in the Andies for thousands of years as a source of wool to keep warm in the high mountains. This is in contrast to llamas which were bread as draft animals. Alpaca fiber is actually warmer than sheep's wool, and most importantly for me it's hypoallergenic (I have a mild allergy to normal wool, sadly). It also sheds dirt crazy well, and basically doesn't slip from the hide at all.
To make it usable as a sleepingbag I took some buckskin I tanned and used that to add some ties so I could tie the foot closed and bundle the rest around me. The idea is to use it like a backpacking quilt, where the joint between the two sides ends up under me so it won't leak much heat. I can open it up of course as well or use it in other configurations in warmer weather. The hide was already backed with a fairly open weave cotton canvas to add a little wear resistance, so I'm leaving that on for now.
So, how does it work?
I tested a couple of nights ago. I slept in it naked and at 3:00am it was 40F and dewy, and I was definitely warm enough. The biggest issue was drafts through the foot box. I think with a little more fiddling to bundle the footbox tighter and seal out drafts it'll work down below freezing pretty well. I'm guessing I can take it to ~25F without trouble, which is good enough for my purposes.
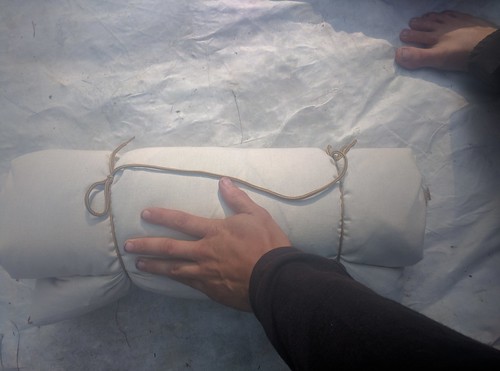
I'm about 5'6" and I bought one just barely long enough and wide enough for me to keep the weight down. I also bought the lightest one the lady had (made apparently with juvenile hides, which are thinner) The whole thing weighs just a bit over 5 lbs, and rolls up to about the same size as my current 5F down quilt. Here's a photo of it rolled up, with my hand for scale.
For the test I ran a couple nights ago I used a normal closed-cell foam sleepingpad on top of an oilcloth tarp I treated. Along with fiddling with the footbox I need to do more experimentation with pads. Depending on how badly it absorbs water, and how insulationg it is to lie on I have to work out whether I need a ground cloth, a ground pad (and what material to use for that), or both. That'll have a big impact on my final weight.
In other news, the oilcloth worked great as a groundpad, and when we took it up in the morning the fabric was a touch damp, but it hadn't wicked much of anything through. I need to run more tests on it still, but hopefully I'll have some good news to report on that front as well in a couple of months.
So, I'm going to say I've solved the problem of a light enough sleepingbag for my "no plastic, AT-style backpacking kit" project. Woot!
Oh yeah... and it's SOO COOOZY!
UPDATE:
I've added draw-strings to either end by simply punching holes in the backing fabric and running twine through. This lets me draw the foot up nice and tight, and draw the top up around my neck, making it MUCH warmer, this probably gained me 10F worth of warmth.
UPDATE 2:
I've now actually slept in ~28 degrees, and a bit windy. I wrapped the alpaca in my waxed cotton poncho, and used no ground-pad, though I did wear a hat, warm tights, and a sweater (I took off my second sweater and put it under my hip, for extra insulation).
Surprisingly I was actually quite warm, particularly for my toes. The draw-strings make an enormous difference.
Overall, This should be plenty good enough for an AT kit.
Backpacking in the Aderondak High Peaks
2016-08-30
Angie and I decided to go out backpacking in the high-peaks. It ended up being an awesome 5 day trip, with one zero day due to a minor sprain to Angie's toe, and a sore knee.
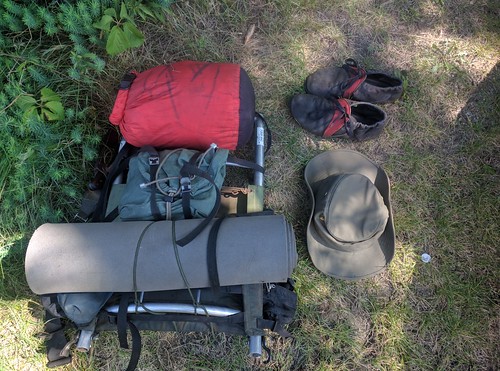
Just to give it a try I decided to skip the sleepingbag and just bring puffies, and see how that went. I also decided to go with only 1 pint of water capacity, just to give that a try on some non-trivial mountains (well, for the east-coast anyway). Here's the gear I carried:
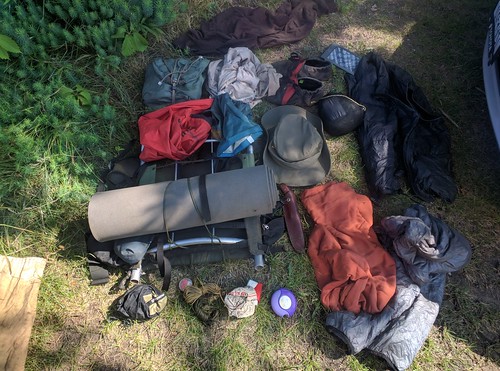
I have a sleepingpad because we were staying in the Adirondack shelters along the way, though we did have my poncho as a backup/emergency shelter should it be needed (and Angie had an emergency bivy as well). Here's the gearlist:
- Sleeping:
- Puffy pants
- Down vest
- Linen sheet
- Closed cell foam sleeping pad
- Pack
- External frame pack
- drysack
- belts/twine to tie things to pack
- Food/water
- ursack (they require canisters)
- 1 pint kleene-kanteen food container
- folding spork
- ... food
- Clothing
- Sweater
- shorts (worn)
- cotton dress-style shirt (for bugs/sun)
- Tilley hat
- silnylon poncho (with a mesh bag)
- run-amocs (minimal leather moccasin with rubber sole)
- 1 pair wool socks (worn)
- bug headnet
- Other
- bandana
- benadril, ib profen, and pill case for them
- inhallers (I'm asthmatic)
- kindle (with drysack)
- Belt knife (tied to pack)
- Headlamp
- Pocket altoids-tin kit (not shown, carried in shorts pocket)
- Keys with backup pen-light, himilayan rock-salt in pill container, and mini leatherman
Before you're all impressed with how little gear this is... It didn't quite work. There were 2 flaws.
First, it was colder than I expected, dropping in to the 4's. I would've been *okay* with this gear for sure, but I got a little cold and borrowed a corner of Angie's sleepingbag most (but not all) nights so I could really get a good nights sleep.
Second, they don't allow fires in the high peaks region! We were not expecting this. Luckily, angie had packed a more normal cookset including an alcohol stove, so we did all the cooking on her stove, and pot and never used my kleene-canteen.
As it turned out 1 pint of water was plenty for the high-peaks, even running ridges most of the time we were out... we didn't treat which helps. We would "camel up" before going up a mountain, just drinking water straight from the stream.
Gear Disassembly: Climbing harnesses
2016-08-30
My climbing harness was looking pretty worn, and it's pretty old, so after much research I gave up and went out and got a new one.
After buying the new one, I started looking the old one over more carefully as to how it was built. I had my suspicious, but I wanted to see for myself, for sure. Seeing how it's built makes it a lot easier to see what spots really matter, and thus evaluate a harness for wear. So... without further ado, here's the photos I took as I disassembled the harness.
Note that this is just my muddling through, thinking, and playing around. As always don't take anything said here as advice, and certainly not EXPERT advice. Make your own decisions, I just thought it'd be interesting to share.
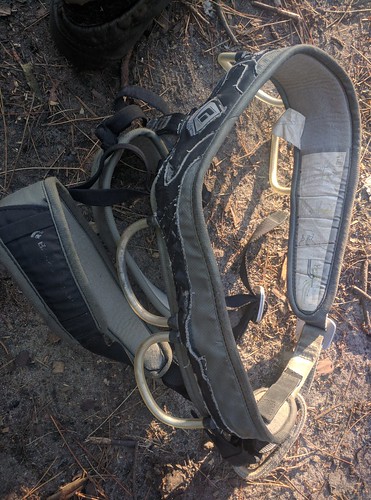
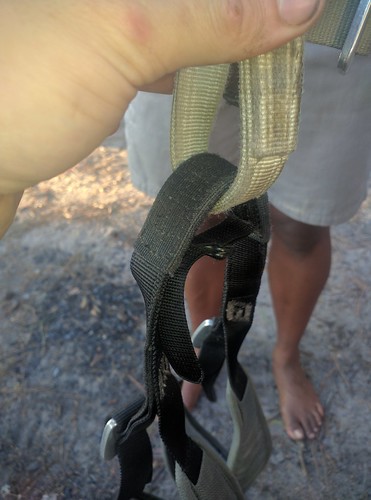
Here's the harness prior to disassembly (well, I'd cut a few stitches, but you get the idea):
Here's the most interesting image. Fundamentally the belt is one piece of webbing with stuff sewed to it. The rest is just padding:
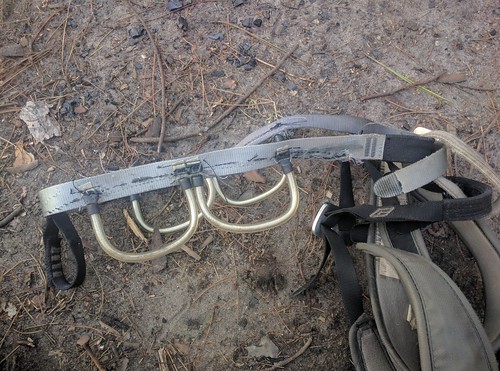
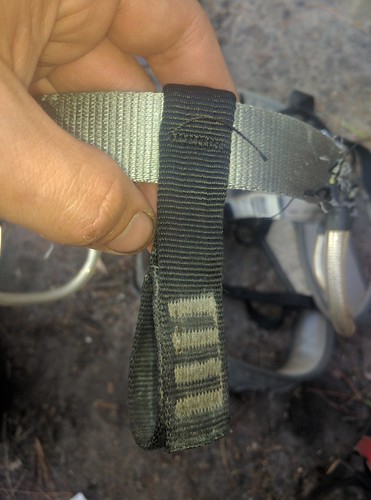
Here's how that's assembled (or disassembled in this case).
Note the single bar-tack holding the gear-loop in place. The gear-loop is really just the webbing inside the plastic tube.
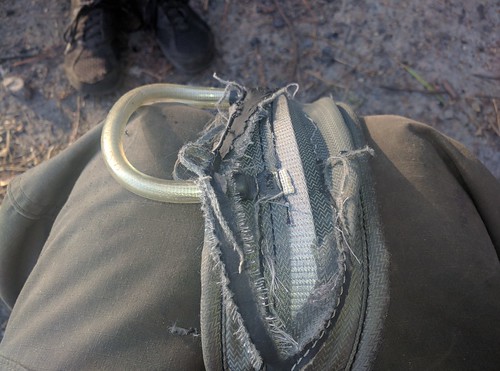
Before this time I had never throught critically about the structural integrity of the belay loop assembly. Note the webbing is wrapped with another layer of webbing at the critical point. Until that outer layer is worn through it seems pretty hard to wear through the webbing beneath. I'd seen stitching wear where the protective layer is sewn to the structural layer and gotten worried, in retrospect I could see how this was built and should've seen it was still sound.
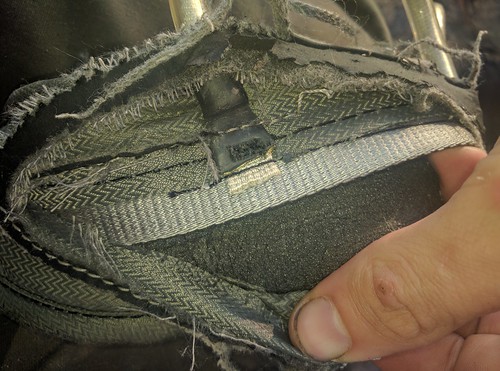
I was surprised at how well the rear haul-loop was attachaed. 4 bar-tacks and it goes fully *around* the belt. The bar-tack to the belt is just to hold it in place, and is fundamentally non-structural... interesting!
Overall I think if I'd sat down and really *looked* at my harness I would've kept it a lot longer before replacing it, there really wasn't anything wrong with it yet. Oh well... that said I got a good deal on a new one, and the new one is sweet and comfy, so at least I didn't waste all that much money.
Again... this is just my own analysis of my safety, and of course other harnesses may be constructed differently. My intention is simply to help other people understand how their gear is built so they can make educated decisions as to when to retire them (or maybe even what to purchase in the first place).