
Primitive Leanto
2016-08-30
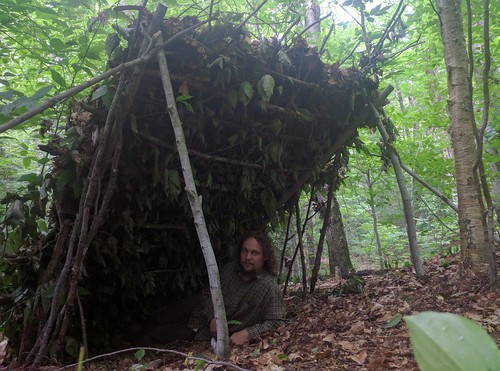
Angie and I decided to try building a primitive shelter. I've built a couple of debris shelters before, but, it being warm and not needing to block wind or similar we decided to try a leanto. The thought was that if we could build the angle low enough, the leaves might stay on it better, and thus not require quite as many leaves as a standard debris shelter.
Before you go copying this shelter, note that it didn't really work... but probably could. More detail coming.
Construction
Step one was to put up the main frame. Sorry I didn't take in progress photos. Using an axe I felled one tree carefully chosen way off the beaten path, and as being too close to another tree. There was deadwood, and most of the construction was done with that, but we needed 2 large beams for the main structure, and those just weren't to be found.

Using a folding saw we cut a couple of vertical poles with forks in them, and then using the axe I sharpened one end to a point and hammered them in. We cut the main trunk of the tree I'd felled in to the two main beams running from the ground and sitting in the forks.
Next came the cross-beams. Most of these were deadwood (those that weren't were limbs of the small tree). We considered lashing these on and tried several approaches, but then realized a better method. By breaking sticks with y's in them to the right length and placing them against the ground we could use the y to hold the cross-pieces in place... Here's a close-up to give a better idea.
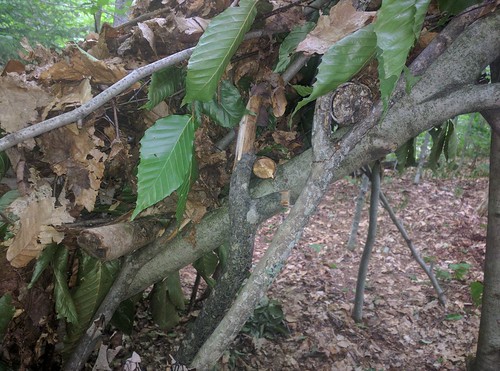
This method took a lot more pieces of wood, but we could use some real junk wood and didn't need twine of any kind. Pretty cool.
Once we had all the cross-pieces in place we started laying on the leafed branches from the tree we'd dropped, trying to cover the whole shelter with leaves attached to branches. This gave us a layer that should shed water better than normal leaf-litter, and gave us a base on which to pile litter so it wouldn't just fall through.
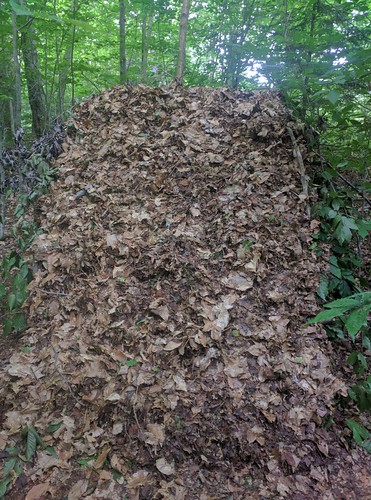
Lastly, we started piling on leaf litter from the surrounding area, spreading it evenly across the roof.
Time to build
This was surprisingly fast. We're guessing maybe 5 hours? Knowing how to do it though I think we could get what we got done here done in about 3 hours. I was very excited about this. Most shelters I've seen would only be useful on your *second* night out, because generally you spent most of the day getting to where you now want shelter.
Tools
Gransfors small forest axe and a folding bow-saw.
We could've easily done it with just one or the other, without much cost to time. The saw would be my first choice in that situation, but the axe would work fine too.
Results
There was a light rain early in the evening and it was working mostly okay, but dripping a little in the middle. After some thought I realized why. Since branches well... branch, the center of the shelter is necessarilly more layered with branches than the edges. I think what happened is that we tried to make it nice and even when we were *done* resulting in a fairly thin layer of leaf-litter over a thick layer of branches in the middle, and a thick layer of leaf-litter over a thin layer of branches on the edges. Thus the edges are more water-proof than the center.
After dark the rain hit *hard*, we're talking serious buckets of rain. After a bit the shelter started leaking all over, it wasn't long before we saw this was not going to cut it and we abandoned the shelter to sleep in the truck like usual. The flaw was predictable... not enough leaf coverage. I've heard before that you need 3 feet of leaf litter. We were hoping the leaf covered branch layer, with all those leaves layed on flat just right to shed water, we could get away with less. That was probably accurate, but not with THAT much less. Another foot might've worked, and 2 more feet would've been a sure thing.
If you've ever built a debris shelter you know how hard it is to gather a lot of material. Initially it goes quickly with the material being right near the shelter, but as you exhaust that resource you go farther and farther afield until you've cleared 50 foot diameter circle around your shelter of leaves, and you're hauling them in from the edges. We spent maybe 1-2 hours covering this shelter with leaves, because of the distance from the shelter this time isn't linear with the amount gathered. So we're looking at about 6 hours hard work (given experience) to get a good shelter. That's on-par with a standard debris shelter... BUT, I don't think we actually had to get as much debris, and the shelter was solidly usable/re-usable by 2 people. The area we were in had a fairly thin layer of leaf litter, and in an area with thick leaf litter you could probably cut the leaf gathering time in half. I'm hopefully this method could yield total construction times of 3-4 hours... but I've yet to test it.
Oh, and lastly... dropping a tree was crucial to making this a relatively fast project. Doing it entirely with deadfall would take a REALLY long time. As it was we were foraging for wood 1/4 mile from our build site. So... pretty cool as a survival technique, but not something you could do routinely while out on trips.
Anyway... this was a pretty fun project. Some of the techniques I'd be very interested to try again.
Bedroll Backpack
2016-08-07
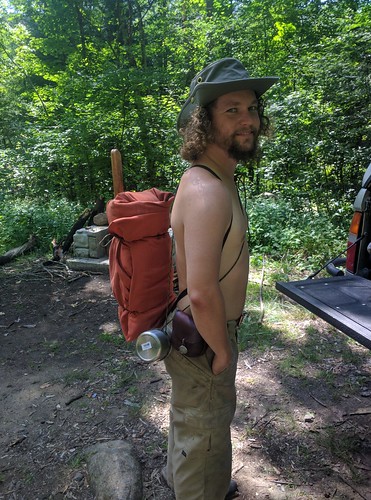
Angie and I are hanging out in the Adirondaks, and decided to play with bushcraft. So, we went on a little backpacking trip. To make it interesting I decided to try a really minimal kit.
Here's all the gear I carried: It's a linen sheet underneath (mostly because I'm allergic to wool) and a sheet of wool felt on top (left over from the wool coat I made a while back). The stuff off the blanket was all carried seperately, mostly on my belt. The pot/water-bottle was carried on a string slung over my shoulder.
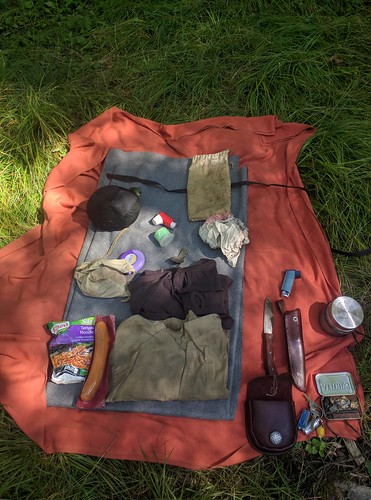
The only plastic here is my fly-fishing kit, my drugs, my flashlight, my poncho, and food packaging... pretty cool!. I wore a pair of pants which are part nylon as well, and leather shoes with rubber soles. I also used to nylon straps as shoulder straps (because I didn't happen to have leather straps lying around at the time).
Here's what it looks like packed up (with a saw tucked in as well, we thought we might try and build a shelter, rather than using the poncho).
The trip didn't work out so well, it was solid boggy swamp, perfect moose habitat (as demonstrated by the moose dung and moose prints virtually everywhere). We got pretty wet and gave up when we realized we had to ford chest deep mud to continue...
BUT, back and camp, I slept out with this gear anyway. To make it a bit warmer I slept next to the fire, and since the fire was in a car-camping camp-site the ground was solid, so I used a foam pad. It was neat using a fire to stay warm overnight, and worked surprisingly well. I had tried it before, and have a hole in my backpacking quilt to prove it, but using wool I could actually be close enough to really stay warm without worrying about that problem.
I think I'm going to try this setup again. It's getting really close to an ultralight backpacking kit that I could actually use. It's not warm enough to handle cold nights without a fire, but it definitely opens some new possabilities
Arrow Fletching
2016-08-07
Long ago I wrote this post on Arrow Fletching
http://www.blog.smalladventures.net/2013/09/archery-building-arrows.html
Getting that type of fletching is kind of expensive, and I'm a cheapskate. It's also a slow and laborious way to fletch. Matt Graham at Wintercount, and later another Matt at Rivercane Rondezvous taught me a different fletching technique that's faster to do, and only uses 2 feathers, yet gets the stability and helical spin of a 3 feather fletch. I was refletching arrows recently and running low on commercial split fletch, so I decided to try this more traditional method on commercial type aluminum arrows.
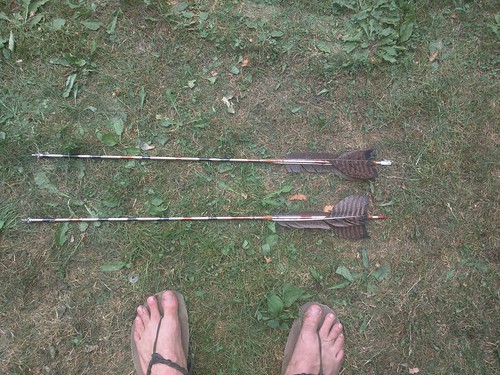
One really neat thing about this method is that it works with tail feathers, not just wing feathers, while at rivercane this last time I traded a backpack for some mushrooms, tinctures, and a turkey-tail, so I had some lying around already.
Here's an image up-close.
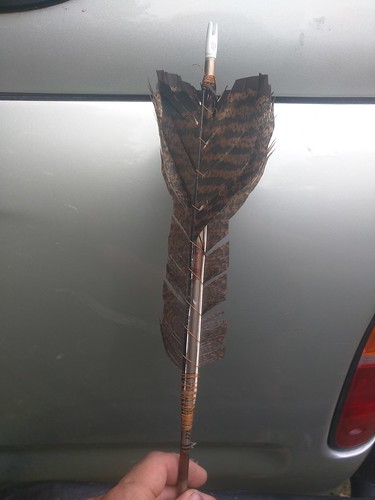
Sorry I didn't get any in process. Here's a quick rundown of the process. You can cut feather with a sharp knife on a cutting board, or scissors (I used a knife). Select two similar feathers. cut them approximately to size, leaving a some of the shaft of the feather at the top. Partway down your feather (say 1/3'rd of the way) cut halfway through the shaft, then split your feather from there down to the tip. removing one half. Do this in both feathers the same.
This part is a bit harder to explain. That bit of shaft that sticks out past the top end of the feather, you want to bind that bit to the shaft of the arrow, next to the knock, but pointing the wrong way, then you fold the feather over and bind it again (after binding the tip of the feather down).
To do the binding traditionally you use sinew in hide glue. Since these are not traditional arrows anyway I used cotton jeans thread and elmers... it worked surprisingly well. You'll want to make sure to wrap it all of the way down the tip and on to the shaft, so that no part of the feather tip sticks out. This is particularly important if you shoot off your hand, so you don't stick a feather shaft through your hand.
Once I have both ends of the feather bound down I wrap another length of thread all the way down the shaft, spaced maybe an inch apart.
Lastly take glue and smear it over all your bindings, this will help make it smooth and ensure it's solid.
I actually *really* like how these arrows fly. Notice how when you do this you naturally end up with a slight twist to the feather (since the flat side of the feather is against the arrow shaft at one end, and the split side of the feather shaft is against the shaft on the other). This is like a perfect helical fletch, except with no work needed to align it. I also noticed that the arrows I fletched this way are quieter during flight. Lastly, I suspect that when you accidentally skip the arrow off the side of a tree or similar this fletch is less likely to strip off than the normal archery glue fletch.
Stone tool in the Whites
2016-07-25
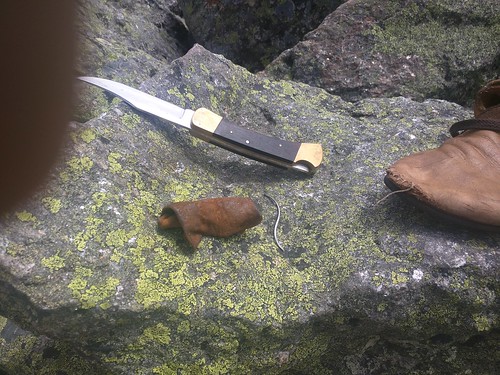
While I was doing the presidential traverse, I also found this stone:
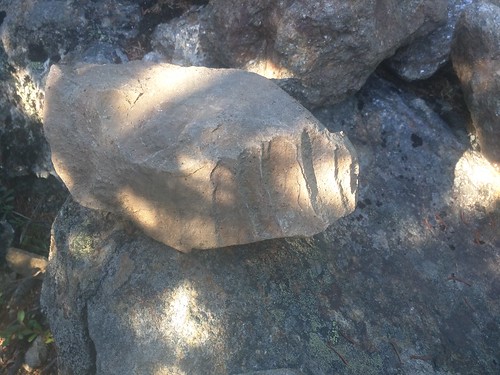
You can see about 5 prismatic blades have been knocked off this stone. This pattern, broken one next to the other in exactly the manner you would use to make a sharp edge, as I understand it, is very unlikely to occur "naturally" meaning, without a deliberate attempt to make a tool by an animal. Given the location (the white mountains) Chimpanzees or similar are pretty unlikely, so I'm going to assume it's Human made.
I'm by no means an expert in this, but it's fun to consider what it might be given what I do know. The stone is maybe 10" long, so a largish cobble. You can see from the picture that it's a bit granular. The first question is whether the stone or the flakes (the pieces broken off this stone) were what the person was making, or the cobble with a sharp edge was the goal.
It's hard to know. If it's a blade core it's monfacial, and apparently wasn't that great because they stopped before using up much of the stone. I'm more tempted to think that it's actually a hand-axe. It seems large/heavy for that, but it is in the range I'd want to use to cut down a tree.
I just thought it was a neat find, and wanted to share. If anyone has better guesses as to what this artifact is, I'd love to hear.
UPDATE:
I've been reading books on archaeology (as I do occasionally). I hadn't realized how often natural breaks have historically been misidentified as human made even by experienced/trained Archaeologists. That doesn't mean I'm wrong, but it does lower the chances this is actually a human made tool..
Presidential Traverse
2016-07-25
Angie and I spent about a month hanging out in the white mountains. I wanted Angie to get above treeline to experience the amazing views. Angie got the idea of doing a presidential traverse... but then she was having trouble with her arch, so she decided she couldn't do it. Well... it sounded like a fun challenge anyway, so Angie dropped me off at the head of Pine Link Trail and went off to hike Washington on her own, while I started my traverse.
Lets start with the photos! Technical details later.
Photos
These are in chronological order, looking ot forward and back from each peak. The whole traverse is incredible views, but I thought the photos forward and back from each peak might be illuminating to someone trying to do it. (I left out Washington peak because it's so busy up there I didn't want to hang out to get photos).
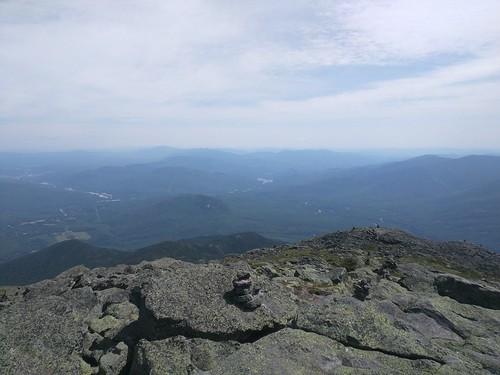
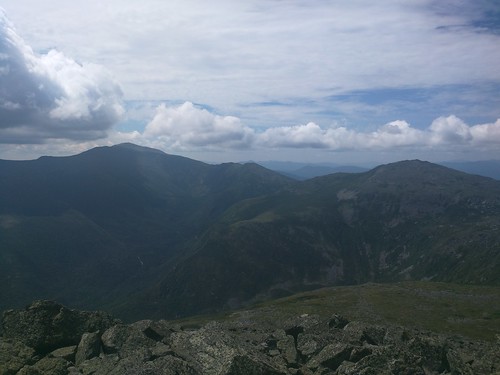
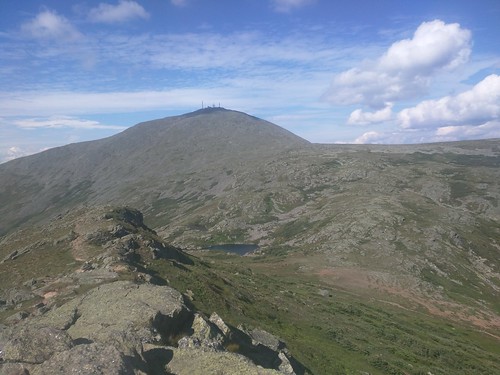
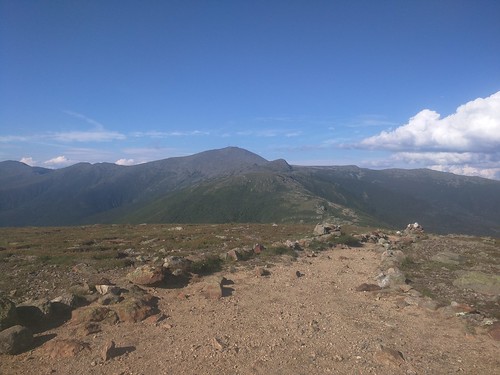
View backwards from Madison.
This shot is looking down Hawker Ridge trail towards pine link trail where I came up. The first hills you can see just behind the mountain I'm standing on is the trail, the cliff in the center of the picture that's part of that ridge is "blueberry cliffs" which is probably a bit over half-way up Madison
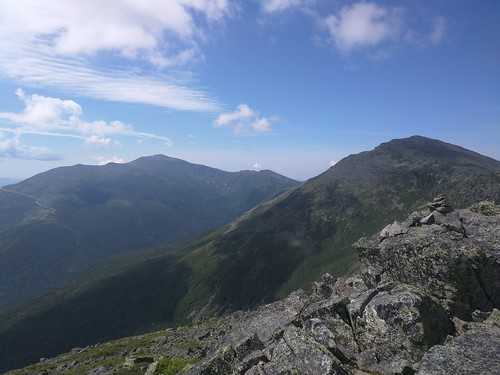
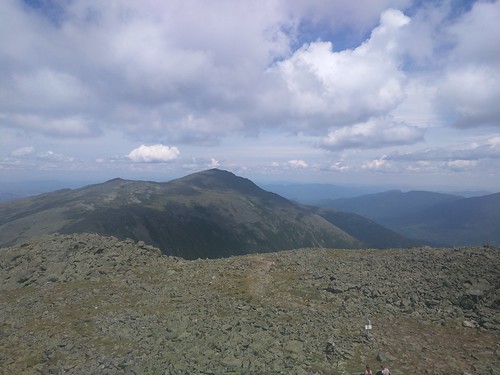
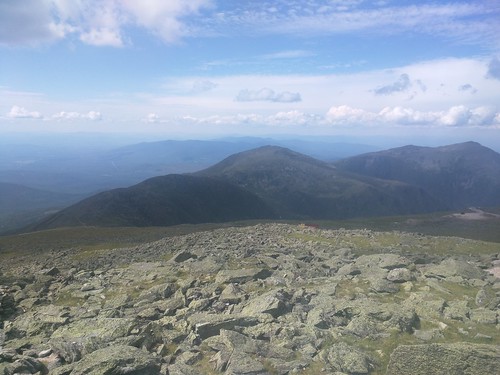
View of Adams and Washington in the background from Madison
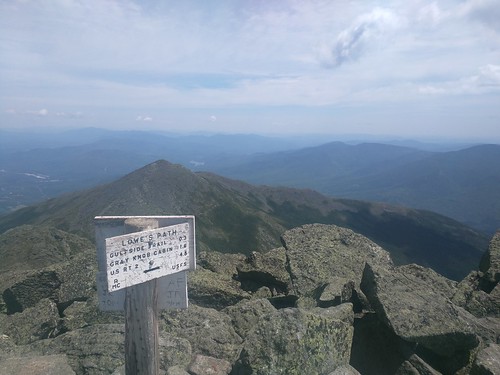
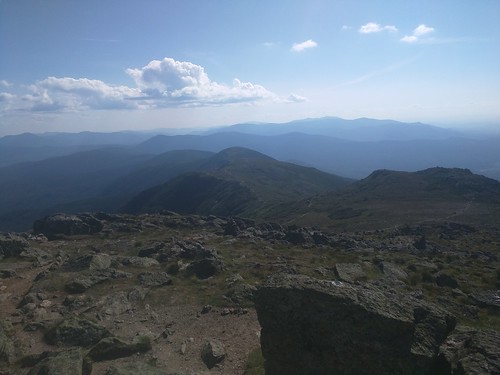
View backwards of Madison from Adams
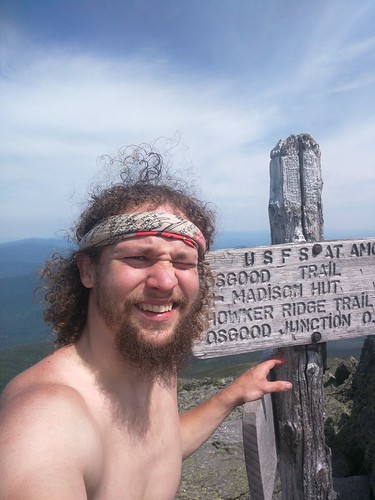
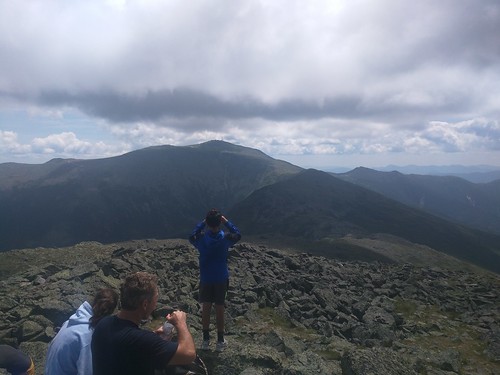
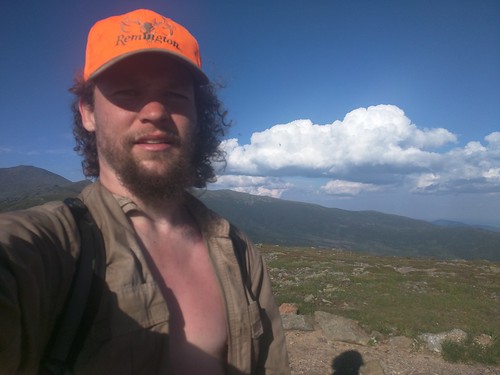
Me, squinting in to the sun on top of Madison... Wondering if I've really got the juice for another 6 peaks
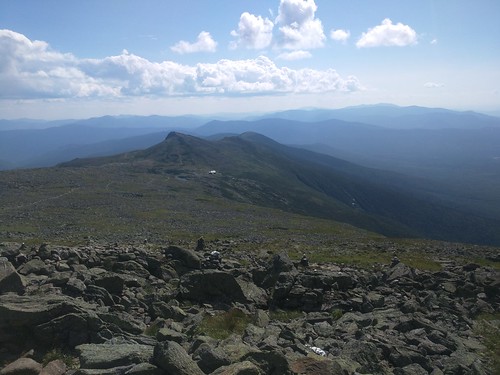
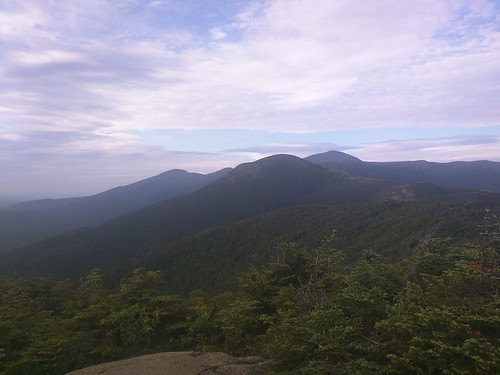
View of Jefferson and Washington from Adams
View of Adams from Jefferson
View of Clay (technically a minor summit) and Washington from Jefferson
My shoe had a small hole in the toe when I started and it was getting larger, so I decided to patch it up on top of Madison. An S-shaped leather needle and a little linen twine are invaludable for this sort of thing... This patch held for the hike, and a bit more use as well. The string wears out quickly, but It'll hold for 50 to 100 miles, and you can do it about 3 times before the shoe just loses too much structural integrity.
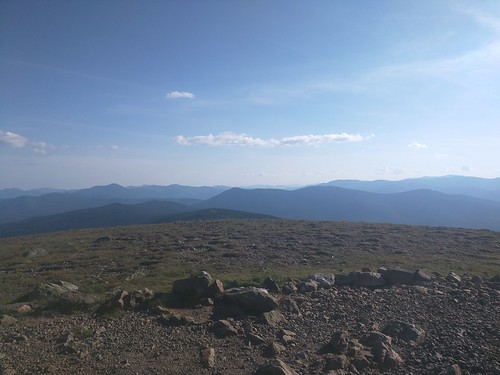
 View of Washington from Clay (technically a minor summit)
View of Clay and Jefferson from Washington
View of Monroe from partway down Washington
View of Washington from Monroe, you can see the lake of the clouds in the middle of the ridge between the two, the hut is hidden from view in this image
View of Eisenhower from Monroe. The run from Monroe to Eisenhower is long knife-edge ridge, absolutely beautiful... and long.
View of Monroe and Washington from Eisenhower
View of Pierce from Eisenhower
I'm starting to get pretty burned by now, I put on my shirt and hat on the way down Washington, but I couldn't stand to button my shirt and my chest just kept burning with the low angle of the sun.
View of Eisenhower from Pierce (a bit below the top actually, there's no view from the top)
There is no real view from Pierce down to Crawford, so I don't have a picture of that.

I got a little sunburned, and a little tired, and had an amazing time.
The Route
A presidential traverse hits all of the mountains named after presidents in the presidential range. Some people do it as a 3 day trip, and some do it as a long one-day day-hike. The trails are very rough, with a lot of clambering over loose talus, so it's hard to do as a 1-day hike... but awesome. The mountains are Madison, Adams, Jefferson, Washington, Monroe, Eisenhower, and Pierce. Interestingly Jackson (past Pierce) isn't named after a president, so isn't required for a "presidential traverse". They say the traverse is 23 miles and 9000 feet of climbing, but that's before you hit every peak on the way (which I did). Peaking adds a little mileage, but a lot more vertical.
Gear
I carried hiking poles, my waxed 5.11 shirt, a sweater, my hunting ball-cap ('cause I'd lost my tilly hat, I have a new one now though), a 40 oz water bottle, some nuts and energy bars, and my normal ditty bag with repair kit, headlamp, iodine, compass, etc.... and of course a map.
Time
We guessed that I'd move at about 3 miles per hour, probably just a touch faster... and thus starting at 8:05 (when I actually walked away from the car... on my second try as I'd forgotten something), going 23'ish miles (maybe a couple more due to peaks) I should finish at about 8:00.
I walked out of the woods on to the street at 8:05... no kidding.
I'm bragging a little, but I want to make sure this is clear to anyone planning to do this hike. The white mountains are very rough terrain, and folks who know the area often will say things like "I generally figure 2 mph for backpacking... except in the whites". I was the fastest person on the trails that day... no-one passed me, and many balked at how fast I flew past them. On the AT I did 4 mph while hiking, 3 mph average for the day, with a backpack. To keep 3mph total average here, with a daypack and no need to hike the next day, I was pushing. The northern end is much much rougher trail than the southern end, so it did get easier, which was nice. Up until Clay or so the rare opportunity to walk at 4 mph on flat or half-jog down a lazy slope was an amazing chance to rest... usually I was clambering over rocks trying not to hurt myself.
Water
I filled up at basically every water crossing I passed, drinking my fill and topping up each time. As a result water was no problem. There was water on the way up Madison, at Madison Hut between Madison and Adams, then a trickle between... I think it was Jefferson and Clay, then a water fountain on Washington, again at lake of the clouds, and there's a spring between Eisenhower and Pierce. I didn't find I needed more on the way down Pierce.
Still, I ran in to some trouble with running out of breath, heat, dehydration and hyponatremia. For running out of breath and heat, I'd slow down just a little... usually not stopping just dropping from maybe 3 to 2.5 mph while rock scrambling up talus... for example. For dehydration I always had enough water, I was just sweating it out, so I was drinking as regularly as I could. For hyponatremia I was carrying a block of Himalayan rock salt that I would suck on occasionally when I felt like I needed it... and of course was eating salty snacks as well.
Ride home
Angie agreed to pick me up in Crawford notch (thanks Angie!), and she even brought Pizza! To synchronize I texted from the top of each mountain, where I was, and the current time. They didn't go through until I was almost to Eisenhower, but at least when she got them she could predict when I'd come out.
Conclusion
Amazingly I actually felt okay the next day. I was sore for sure, but I was only out of commission due to sunburn (my own screwup), and not from the hike. I'm not a hiking pole fanatic, but I love them when I know I'm pushing my abilities, and they were invaluable on this hike. I ended up using them till 2/3'rds of the way up Madison, then stowing them on my pack. Then, when the trail got smooth between Jackson and Clay I pulled them back out, and kept them out for the rest of the hike (there are other sections of talus, but it wasn't worth putting them away again for these shorter sections). This worked perfectly, and my knees weren't sore at all the following day.