
Pot Hanging Methods
2016-07-11
So, while I've been cooking on fires for some time. Being out east again is making me experiment more with how to cook on fires. I wanted to share a few interesting experiments.
I mentioned a while back that cooking over a fire in the eastern U.S. often means cooking with wet wood. Wet wood needs more air to keep it burning, so you need a good open fire to make it work well. There are a lot of methods for accomplishing that.
Pole and Arm
There's a pole that's been hammered in to the ground. In to this pole I cut a notch, then I lashed the arm into that notch so it would stay in place. Note that a forked stick would also work, I just happened to have a nice green stick that wasn't forked, and some twine, so I did it this way. There's a notch on the end of the arm (very hard to see in this photo) for the pot to sit in so it doesn't slide down the stick if you raise or lower it. There's also a piece of twine tied from the far end of the arm to the base of the pole using a rolling hitch on each end, to adjust it you just tilt the arm and re-adjust the rolling hitch a little.
This was my first time trying this setup and it worked better than we expected actually. It's convenient if you don't have a lot of wood available, but note that if you're fire is of any size you'll need the wood to be green. It's also nice in that there is no twine over the fire, which has a bad habit of burning up.
Tripod
I've posted a lot of photos of this setup before. It works well with one catch. The string above the pot will melt or catch fire (depending on material) if the fire licks up over the pot too much. Using a metal or wooden hook (you can carve a wooden hook pretty quickly) can help some though. This is actually what we use most often.
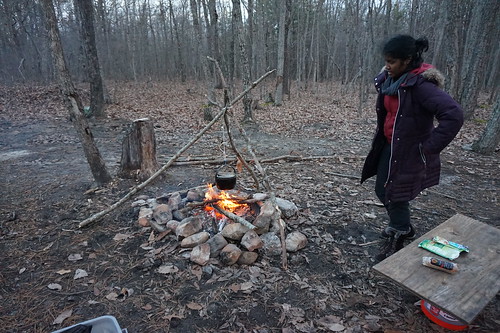
Two poles and arm
Sadly I lack photos of this one, we did this on a recent backpacking trip on which we didn't bring a camera. Someone else had actually set it up and left it, so we used it with our own pot hangers. The idea is simple. It's like the pole and arm, but with two forked poles both hammered in to the ground, one on each side of the fire, and the pole goes across them. Now you have a similar problem to the tripod, you need a way to adjust how high your pot is. Take a stick with a small side-branch so it'll hang over the pole. Now, cut it to length, and carve notches in to the stick so the pot bail will sit in the notches. You can adjust the height of the pot simply by moving it from notch to notch... this is how we cooked after a heavy rain while backpacking, and it worked very well actually.
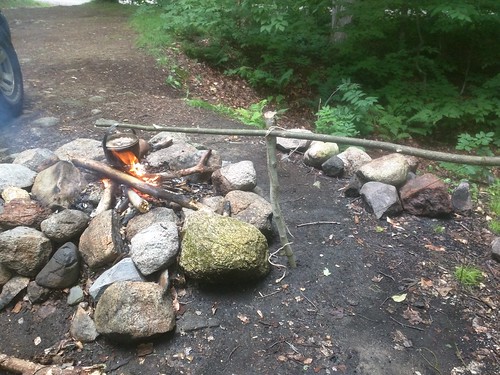
3 rocks
If you have a plethora of rocks, and a larger pot or frying pan this method can work well. It does tend to take more fire-tending though and is more of a dry-weather method usually. Take some 3 rocks and place then so you can balance your pot on top, the space between then can then be laced with sticks and fed ongoing as things burn. You'll need to use smallish sticks, but it lets you very tightly control fire temperature and can work very well for more complex cooking. Note that stakes work very well in place of rocks
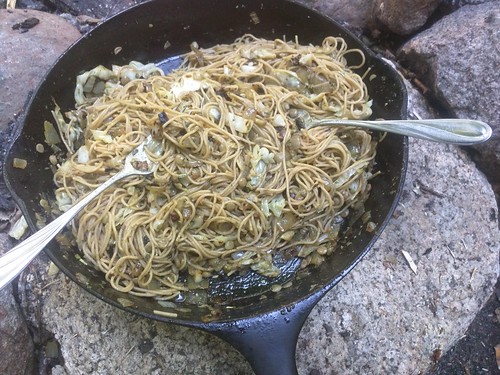
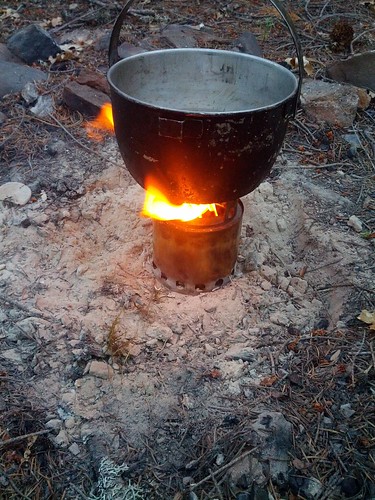
Burn it down to coals first
When it's a bit dryer I do this a LOT, because well... I'm lazy. This dish was cooked this way in fact:
I've been looking for a picture that makes it obvious but basically I burn it down until I just have some of the larger logs left, then shift them around until they are lined up well to hold the pot over the fire. Note... sometimes you can do this even over a full-fledged fire as well, by balancing logs across the sides of the firepit, but be ready for your logs to burn out.
This is ideal if you have a frying pan which can't be hung... but burning the coals down is going to require more wood for sure.
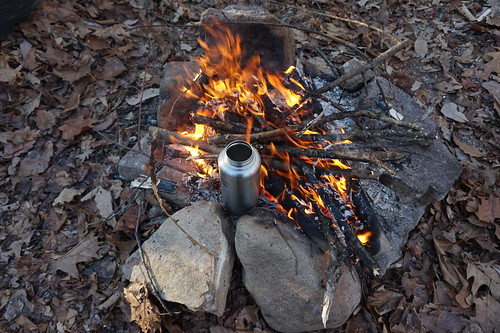
Put the pot on the side of the fire
The simplest of all answers really. This is great for boiling water, but if you try and cook something, be ready for it to burn on one side and stay raw on the other. For pots of boiling liquid whatever is in the liquid will tend to burn to the side of the pot. That said... It works, and I've used it to cook all sorts of things.
A stove
I'm throwing this in just because people forget it's an option, it's a wood stove. They are really silly in some areas, and absolutely awesome in others, it all depends on what you have to burn, and what your other options are. I love mine and used it tons on the west coast, but have barely used it on the east coast. I suspect it'll get plenty of use again once we make it out west again.
Last notes
There are many more methods, but that's a quick tour of stuff I've tried. I'd love to hear if anyone else has other methods they've tried that did or did not work.
Update: Here's another one http://www.blog.smalladventures.net/2017/02/more-pot-hanging-methods.html
repair and recovery
2016-06-19
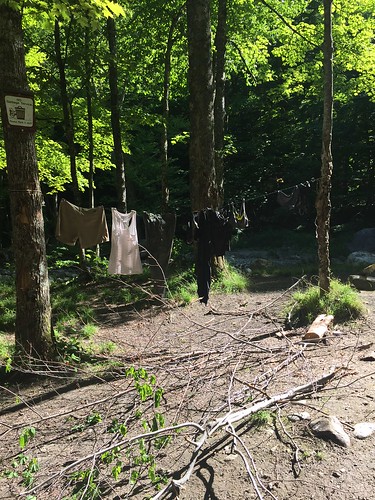
Break day! We were feeling pretty exhausted so yesterday after 3 days of consecutive climbing and backpacking, so we we decided to just go chill. We both had minor injuries that needed healing and were just generally beat up, check out Angie's hands after climbing the day before.

We went up to a boondocking site we'd found earlier with a river right next to it. We spread out gear and dried it (we'd left the wooden box out in a light sprinkle and a bunch of my gear got damp).
We did laundry in the bucket using water from the river (using a minimum of soap, and tossing the soapy water far from the river).
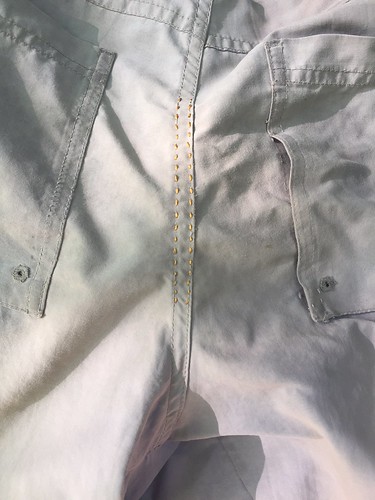
I repaired the butt of my shorts which I found a huge hole in while doing laundry.
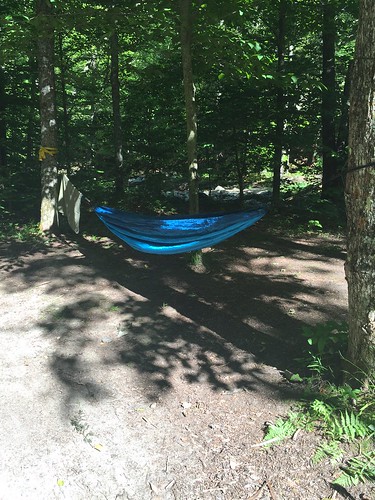
We took baths in the river (with no soap, just a little vinegar in our hair), and we relaxed and read. We finally set up Angie's hammock.
It was a great day. Today, Angie wanted to try a recipe for "Bannock" which is a baking-soda based bread, which she made for breakfast. Delicious!
In general it was wonderful, though a hairy woodpecker got very upset at me at one point when I went to the woods to dig a cathole... I have no idea why, but so it goes, he got another hairy yelling at me, a jay, a chickadee, quite the ruckus! He chilled out again though.
Oh, one odd thing, some folks seem to think that felling live trees on public land near boondocking sites is reasonable and ethical... what the heck. Someone had recently dropped a decently sized tree only about 10 yards from the site, and it was on a dry stream bank no less, the spot it was in not being that crowded either. To all you other boondockers out there, treat the forests right. I *might* even consider taking a live tree illeagally like that, but only from the right place, far from a campsite, and where it would make the woods *better* and *healthier*. Spend time learning to care for forests properly and be careful. Please care for the spaces so we can all keep them.
no-plastic backpacking, the continuing quest
2016-06-19
About a week ago we decided to go backpacking in the green mountains for 4 days around the Stratton pond area. Angie's ankle was sore, so we kept the milage fairly low, doing between 4 and miles each day. We basically did loop-de-loops from lake to lake, covering virtually every trail in the area. We expected it to rain a lot, but we only really got rained on once. To make it interesting I carried the 800 thread-count sheet as a tarp and my newly treated 5.11 shirt
as a raincoat (though I had the poncho as backup), and no sleepingpad. I got pretty wet in the shirt, about the same as a cheap/bad raincoat. Not bad actually, I was quite happy with it for this purpose, and never did not pull out the poncho. I had two marino wool sweaters and that overshirt, which I slept on at night for a pad. I *did* cheat though and we used a plastic groundcloth Angie had brought in her pack to sleep on.
This was a pretty cool step in the "backpacking without plastic" plan.
Going through my gear it looks something like this:
- Clothes - My clothes were wool or cotton, a few pieces were nylon blends but replacing those with cotton/wool blends would work.
- Shelter - My shelter was all cotton. My groundcloth was silnylon, but I think I can use the bottom sheet from the 800 count sheet-set and treat it with wax for a ground cloth.
- Backpack - My backpack has some plastic on it but not a lot, and I think I know how to make a similar one without it.
- Cooking - My potset and stove is all metal, my fuel bottle is plastic, but I've used a tin one in the past.
Later, as a rest day in-between rock-climbing we decided to take a quick run out to the forest again, just on an overnight. This time since it wasn't going to rain I slept *on* the sheet, which was very very comfy. The next day we hung out reading until after noon (reading kindles, which are plastic... but it's not backpacking gear really).
I'm targetting something I could sanely hike the AT or PCT with, and trying to get everything set up by next year if possible, just to get myself to really make progress.
My First Trad' Climb
2016-06-03
First, some quick climbing terminology. There are 5 major types of climbing
- bouldering
- topropping
- sport climbing
- traditional climbing
- free solo'ing
Sport climbing is where there are periodic bolts in the rock with rings mounted to the top. You drag a rope *behind* you. As you climb you snap carabiners in to the bolts, and then around the rope. If you fall you fall past the last bolt you clipped in to, then keep going until you use up the rope slack. So, if the bolts are 8 feet apart and you fall while clipping to the next bolt, you drop 16 feet plus rope stretch or 20+ feet. 30 foot falls are not unheard of.
Traditional climbing (usually shortened to trad' by climbers) is where the goal is to get up the rock. It's possible no-one has been up it before, so there is nothing already there to help you, and you can't walk to the top (conceptually at least). People used to ram pitons (basically flat'ish railroad spikes) in to cracks, but that was banned and is no considered bad form, as it damages the rock. Instead, as you climb you place "pieces" the most common being nuts and cams in to cracks in the rock, and you tie to them like you do the bolts in sport climbing. Thus if you fall, there's something to stop you from dying... hooray!
Thing is, in trad climbing, if you don't place the gear right, or if you just get unlucky, a piece can pull out (this *can* happen in sport too, but it's much more rare). There's a lot of detail to what you place where and how, and if you don't do it right you don't live very long.
What we did
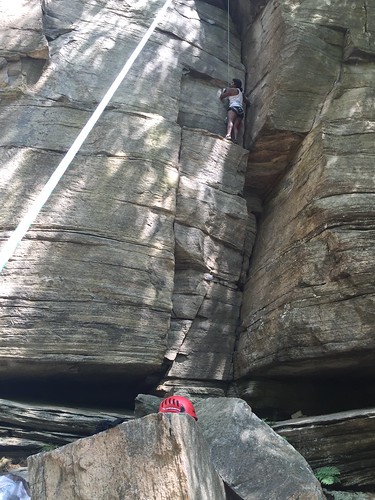
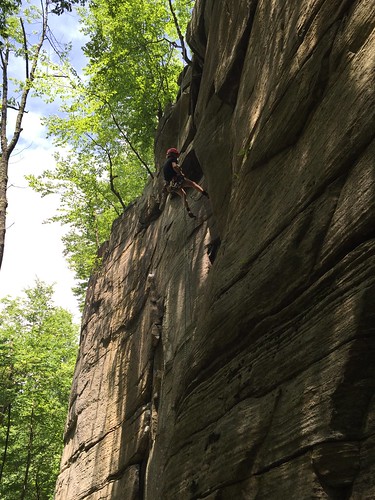
So, yesterday, Angie and I completed our first trad climb. I "lead" the climbed (meaning climbed up dragging the rope behind me and placing pieces), with Angie belaying me from the bottom, placing "pro" - short for protection, that is, sticking things called pieces, in cracks in the rock and clipping them to the rope with Carabiners. When I reached the top I set an anchor on a tree (meaning put some webbing around the tree with Carabiners) and Angie lowered me down. Next, I belayed her from the end I'd been lowered on, and she climbed the same route, following the rope as it snaked through the Carabiners. She removed the pieces as she went. This is called "cleaning". When she reached the top she removed the anchor and pulled the whole rope up to the top. She then found the middle of the rope, slung it around the tree I'd used for an anchor and rappelled down. Lastly, we pulled the rope by one end until it fell - thus ending up at the bottom with both people, and all the gear.
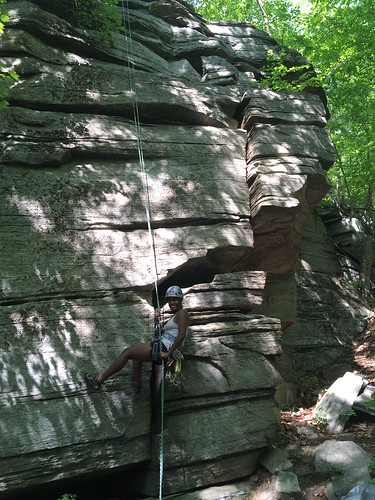
The route we climbed is actually just to the right of where Angie is rappelling. It's a fairly easy route at a 5.4 rating... perfect for our first trad climb. I needed to be thinking about putting pieces in properly, not whether I'd make it to the top.
Earlier that day we'd done another route where I was on a top-rope, but was setting pieces *as if* I was trad climbing, dragging a rope and clipping it in. I removed them when Angie lowered me down. On that practice run I realized I hadn't placed enough pro and had I really been trad climbing there was an opportunity for me to fall and hit a ledge... oops! That's why I was practicing though, to figure out those details before my life was on the line.
Being our first trad climb, and after the previous experience, I was pretty conservative, placing 5 pieces on this short stretch of rock. As I get more confident, take some falls, and learn what I should and shouldn't trust, I'll be able to use my pieces more judiciously. For now, safety was the goal.
What did it take to get here?
I did not take the fastest route to get here. I've been climbing off and on since 2003. A friend taught me how to clean clean and a bit of placing pro in 2008. Another friend showed me more in 2009. I tried to join a SAR team and learned self-rescue techniques, and more about pro placement and anchors ~2010. I took a high-angle rescue class in 2013 where I learned more anchors and placing pro again. Recently I finished reading Climbing Anchors to really solidify what I know. Last month while Angie and I were climbing at Seneca Rocks I did a route practicing placing nuts (still on toprope). And lastly, just a couple of weeks ago I finally finished building up a full rack.
A lot of people go and take a class, but that's just not my style. I like learning from books and the internet, and having already learned bits and pieces from half a dozen different people I figured I could put it all together.
It might be noted that this was also my first lead route, I'd never actually lead a sport climb before this. So, I also had to watch things like back-clipping, and z-clipping... but again, I'd learned about these issues already from friends and such. So, I decided to just go do it, but just be ultra-careful.
The gear
Here's the gear I have now:
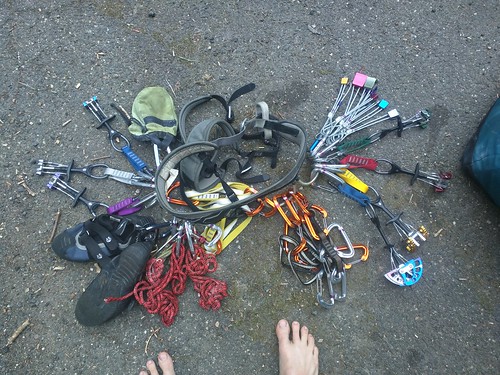
There are many websites covering what you need, and I read several. What I have is:
- 4 quickdraws
- 4 alpine quickdraws
- A set of black diamond stoppers (nuts)
- 7 Black Diamond Camelot cams
- 2 purcells, an autoblock and 4 ultralight locking beaners (self-rescue kit)
- 1 ATC and a good belay beaner
- climbing shoes
- chalkbag
- harness
- Helmet
- 60m 10mm dynamic Rope
- 1 20ft cordelette
- some spare locking beaners for setting anchors
Obviously to climb with a belay you need two people. Angie also has a self-rescue kit, belay device and beaner, shoes, chalkbag, and harness.
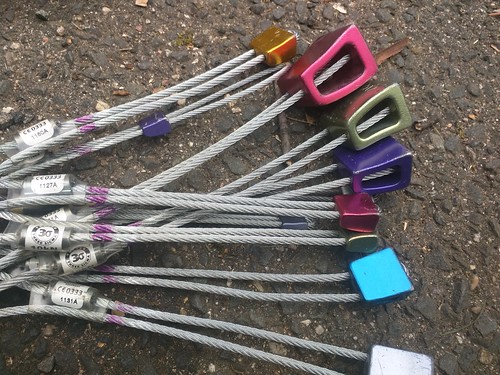
The "pieces" I was placing as I climbed were those nuts:
And cams:
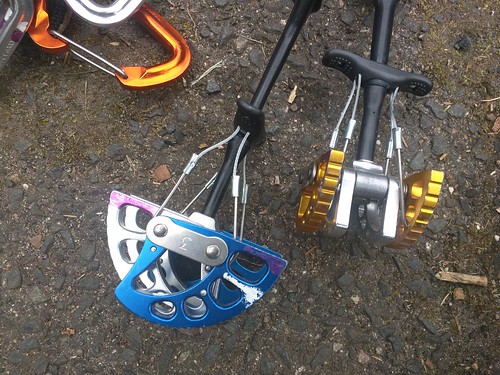
Nuts are cool because they are SO simple, there is just nothing there to fail, but they are also hard to place in that they have to fit in just the right indentation, and only work in smaller cracks.
Cams are cool because you can place them even in slightly flaring cracks, because they hold themselves in place... and indentation is still better, and contrary to popular belief you *do* need to be quite careful placing them, but they are a definitely more forgiving.
I honestly don't know how much the whole kit cost, A full set of camelots is ~$430, beaners and slings add up fast. My alpine's were built my disassembling some normal quickdraws a friend got me some years ago and replacing the webbing with slings. My rope and nuts were also gifts. The harness purcells, chalkbag, and belay-device I've had quite a while (I did inspect them, they're fine).
Why is this exciting?
There aren't that many sport routes around, a lot of people think it's marring the rock and ruining things to put in bolts. There are also a lot of cool routes you can't climb to the top of, so being able to trad opens the door to a lot more cool opportunities.
The next step is "multipitch" where I climb partway up a route, set an anchor, and I belay Angie up from there to where I am, then we climb again. This is even cooler routes, and gets in to all-day climbs and the like.
Obviously there's also pure free climbing skill, that is, the skills of going up the rock, and getting better at that will keep opening up new opportunities, but getting in to trad is a big hurdle that we're finally crossing and I'm pretty excited about it.
Conclusion
Weeee! Yeah, that's pretty much it ;-).
Here's some other photos from the same day:
Magnetic curtains
2016-05-31
We wanted curtains, so Angie took on the project. We went down to goodwill and found some cheap material there (~$10 total), next we went to the hardware store to look for velcro, but we saw magnets while we were there and got excited.
The first attempt was to buy magnetic strips and magnets, well it turns out that magnetic strips are magnetized that way, they are not north on one side and south on the other, rather they are magnetized in small chunks changing direction every few millimeters, this means they stick to ferrous materials, but not to magnets, oops! So we took them back and picked up some sheet steel.
Angie cut these to shape using tin snips, rounded the edges using a file, and epoxied them in place (I helped her a bit as she hadn't used any of these tools/materials before). She cut out and hemmed the curtains and sewed the magnets on (which have a hole in the middle).
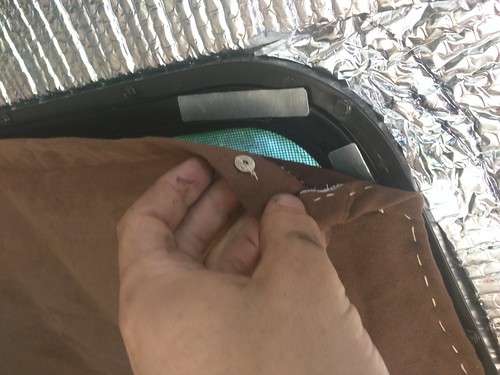
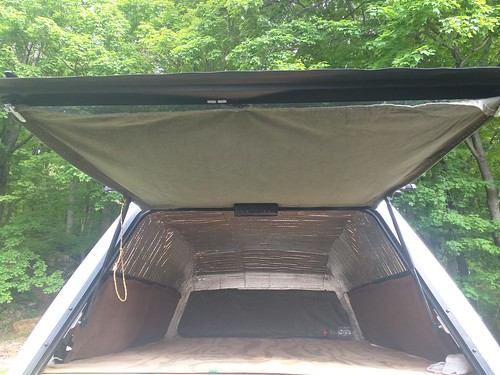
Note the curtain hanging from the rear window. Most of them are glued to the frames, but the metal strips for the rear curtain are actually glued to the window itself, this way we can open and close it. It did require some extra magnets to get a solid enough attachment, but it works great and we can actually get in and out now without pulling the curtain down and putting it up again.
The material we found is very opaque to light, so we can stealth and know we won't bother anyone else with lights shining out from the truck. Hooray!