
Update: More preperations
2016-05-31
Angie and I have been at my parents for a few weeks. Here's some of the stuff we've been doing
- Paperwork
- Changing residence to MA
- Registering the truck
- Registering the trailer
- Applying for health insurance in MA
- Truck
- Replaced lower radiator hose
- Changed the oil
- Added extended bumpstops
- Made curtains
- Added a "sling" to hold gear
- Projects
- Tested my 800 thread count sheet/tarp
- Chinked the top of the wooden box so it's more water-resistant
- Made a new waxed rainshirt (my old one died)
- Repaired a bunch of my arrows
- Spined out Angie's bow and she got a new set of arrows
- Learning more plant stuff from my mom
- Angie read a bushcraft book and I taught her some orienteering.
- Other
- Replaced a couple other bits of worn out gear
- Purchased cams so we can trad climb
- My right foot got a little injured, so that's been recovering
- Backed up my laptop to an external harddrive that I'm leaving here
- Went hiking with a friend out near Boston
- Went to an art festival (and chatted with a bowyer there!)
If you recall http://www.blog.smalladventures.net/2013/07/homelessness-and-paperwork.html , I went without a real address last time. This time I decided having figured that out, I'd be lazy and use my parent's place. Thus why we were re-registering everything here. It's simpler this way... but it's still a lot of paperwork. Moving the truck alone means getting it inspected, getting it insured, canceling the old insurance... lots of steps. But, we're basically done now... yay!
So, that's what we've been up to... LOTS of posts coming!
MYOG: New Waxed Rainshirt
2016-05-31
You may recall I made a rainshirt a while back:
http://www.blog.smalladventures.net/2015/12/diy-raincoat.html
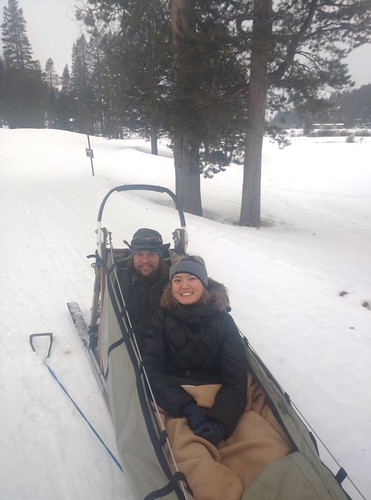
Well, now it's been pretty well tested. I've used it in rainstorms while hiking or hanging around in camp, I used it winter backpacking, skiing, and dogsledding e.g.:

With a layer of wool under it, I found the shirt works in light to moderate rain. In a really heavy downpour I still get wet, but it's still VERY useful, so useful that with this and a poncho I'm completely satisfied with my rain-gear.
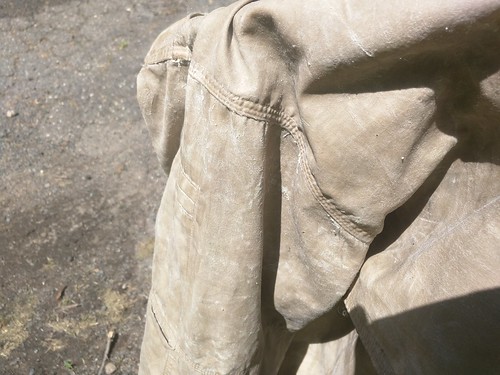
It does have one issue though. Because I didn't trust that I would like the result, I used a very old worn out shirt to do it (bought used ~2009 or so by the person I got it from about 3'ish years ago), which is now torn on very nearly every seem. I also really didn't like the method I used, so more experimentation was needed.
If you've seen my experiments with linseed oil
http://www.blog.smalladventures.net/2015/11/linseed-oil-for-homemade-oil-cloth.html
, I was pretty nervous to try that again, and that's what most of the directions I could find online said... But after some digging I found some other recipes, and some more detail. Bees-wax is more waterproof, but very stiff, linseed is more flexible, but not as waterproof, thus people mix the two to get the ideal balance they want. That sounded a lot better to me. I also learned that some folks mix it with mineral spirits to get it in to the fabric, simplifying that whole process. So I decided to give it a shot. This recipe also uses pure linseed oil, not boiled, so I could be assured it was the pure stuff. It's maybe 50% mineral spirits 50% wax, using about half a pound of wax, and then a couple tablespoons of linseed oil (flax and linseed are the same thing).
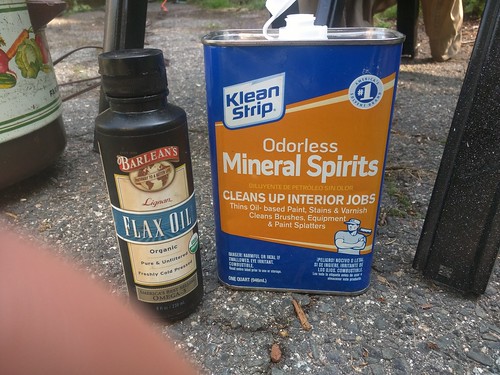
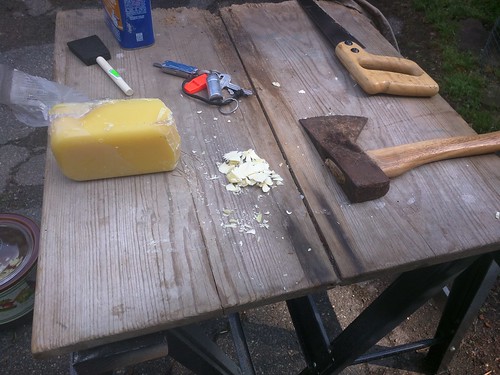
All 3 ingredients are pretty flamable, so I wanted to be careful. After considering a lot of options my mom happened to have an old crock-pot she was going to get rid of anyway, so I went with that... allowing me to do it outside and keep all the fumes outside. Note that this probably *could* be done over a fire, just be very careful (easy to do, since you know... it's a fire... outdoors).
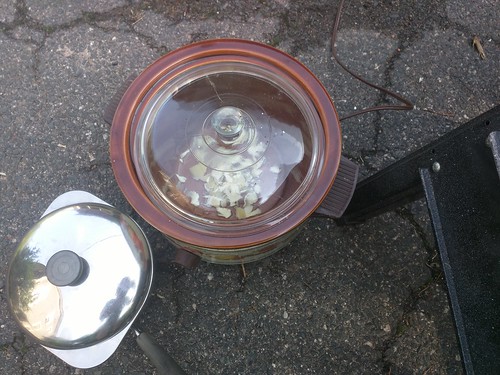
The mineral spirits make it more of a soft paste, and while hot it's quite liquid, this way I was able to simply paint the stuff on, and it soaked in to the fabric a bit instead of becoming clumpy on the outside like the otter wax did.
The picture above is just after waxing. I then let it cure in the sun for a couple of days... interestingly with the mixture I used the wax flowed a bit and soaked in a lot more, darkenning as well probably as the linseed oxidized. Now there's almost no clumpyness at all and the wax is well embedded. After ~4 days the linseed smell is greatly reduced, but still a little more than I like. I'm hoping that after more cure time (maybe a couple of weeks) it'll fully resolve. It is yet to be seen if this mixture works as well or better than the otter-wax, but I have high hopes!
Extended bumpstops
2016-05-31
When I ordered my lift-kit I didn't realize that the new shocks were too long for my bumpstops... oops! This is *okay* for the most part, but if we hit a bump really hard, it's always possible we could bottom out the suspension and damage the shocks.
So, I finally got around to extending my bumpstops so that wouldn't happen. I purchased some hockey-pucks at a local sports store, and some JB weld at a local hardware store, and made these:
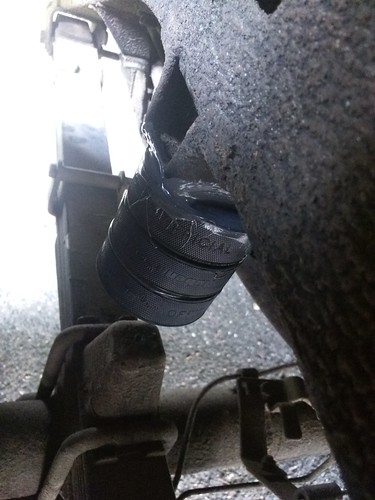
Strictly speaking this is actually an extension for the landing pad the bumpstop hits.
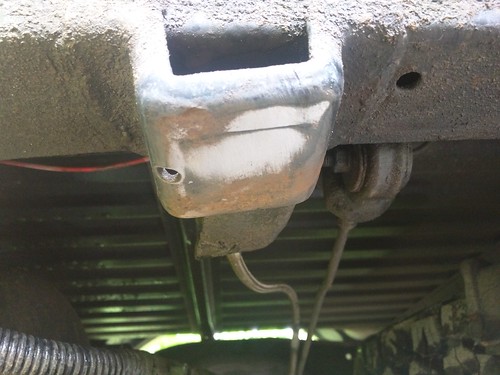
I wanted a firm bond so first I wiped off whatever gruck I could off the landing pad. Then I used mineral spirits and a rag to wipe off more cruck, then I sanded it down to remove the undercoat/paint layers, then I wiped it with a cleaner rag and mineral spirits again. Here's a photo partway through the sanding.
I also cleaned the pucks with mineral spirits, figuring it couldn't hurt, and after letting it all dry a little I glued the pucks in to place. Each puck is about 1" thick. I did some testing and decided that 2 pucks might *barely* be enough, but might not and 3 pucks should give me about 3/4-1" of travel left in the shock, just to be safe.
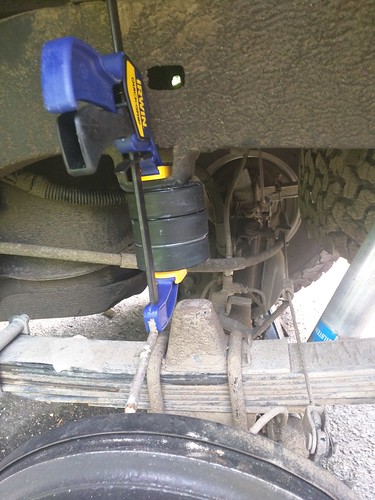
I don't know how long they'll hold, but JB weld is pretty good stuff, and having properly prepped the surface there no reason it shouldn't hold well. One advantage to this over using a bolt through the pucks is then the bolt would hit the bump-stop instead of the rubber pucks.
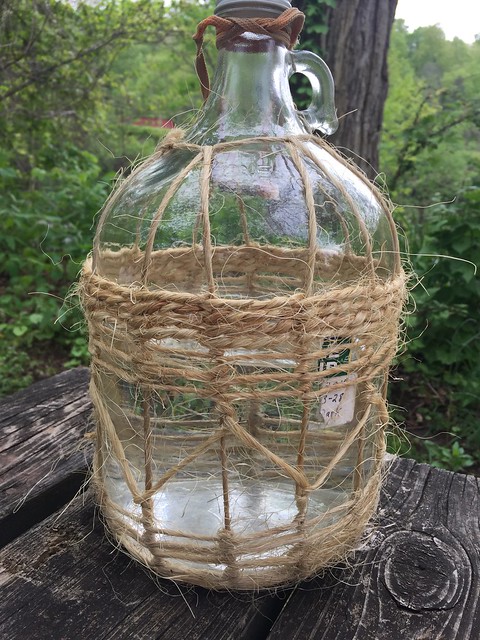
Making a water jug
2016-05-09
We had a jug of maple syrup I bought from Samuel Thayer last year (the noted Herbalist, that's another story). Well, we finally used enough of it (Jess has some of it too) that I could dump the remainder into a different jar, and yay, we had a jug!
Well, I was a bit worried about carrying a glass jug around, what if it hits something and cracks or shatters? Several years ago I saw someone getting water from a spring using large jugs that had been covered in basketry done probably from willow, and I thought gee... that's a cool solution.
Last week we were out on a hike and walking down the road to a trailhead. A farmer in a flatbed pickup (with 2 round bails on it) stopped to chat and tell us he was impressed that we'd stayed out through all the rain. He was sweet and we talked a bit about his scouting career and local news. The next day he stopped by our camp and handed us a pile of jute bailing twine (stuff he probably cut off his hay-bails) to use a tinder.
Well, we didn't really need it, and I came up with another use:
I was having fun and got kind of artistic... by which I really mean lazy. The bottom is started more like a classic basket, then goes to a twined basket as the spokes get too far apart. I was making the whole thing up as I went along... so it's not the prettiest, but I still thought it was kind of cool.
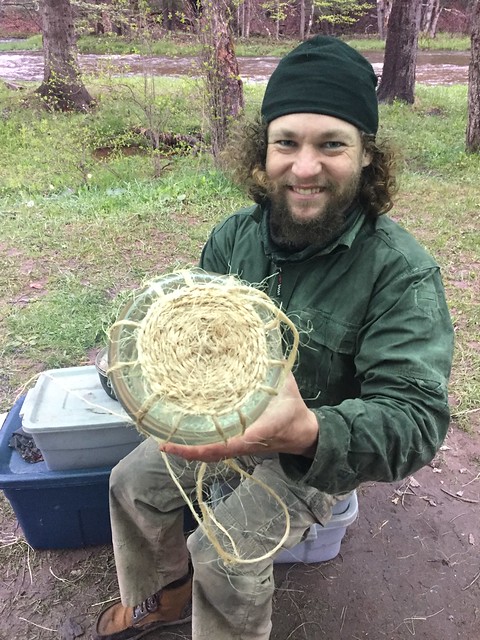
Note that if I did this again I'd use more of a knotted net method (diamonds)... I realized that would probably be a lot faster and easier, but trying basketry with bailing twine was fun. It brought back memories of my childhood when the default twine that was always available for a kid to do stupid things with was bailing twine.
We finally retired my trusty old plastic Hi-C jug that I've been using for several years. The handle stuck on the top of this jug in the first photo is actually one I made out of need for that jug in 2013 or so.
Tarp pitches for car camping
2016-05-09
After a quick stop in Pennsylvania to visit Angie's friends we went out to Seneca rocks for some climbing... or well, mostly for camping in the rain. We used the experience to learn a bit more about comfortably car camping in the rain - something I've done with my parents, but not spent much time developing a system for myself (since when I did a lot of car camping, and had a car, I lived in CA, where it doesn't rain)
Here's some articles from the past on tarp pitches for backpacking, something I have lots of experience with:
http://www.blog.smalladventures.net/2010/03/tarp-howtos-and-tips-even-for-tenters.html
http://www.blog.smalladventures.net/2012/06/super-simple-tarp-pitch.html
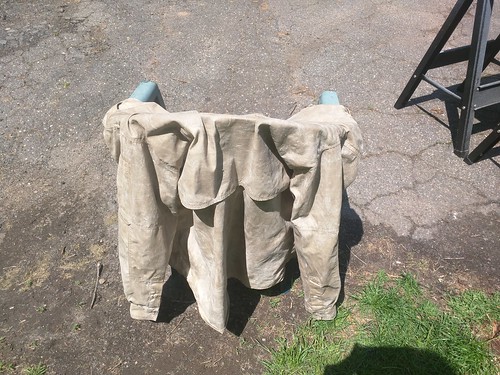
Here's what we've found to work best so far:
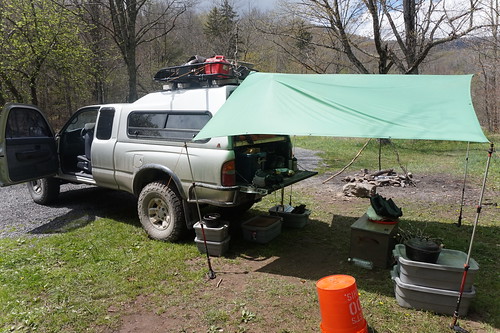
We tied the center to the back of roof basket, then the other end of the ridgeline is tied to a tree using a length of line.
Next we take angie and my hiking poles, extend them to full length, and place these at each corner (This was actually Angie's idea, and it's great, it saves a lot of hunting for sticks). My old tarp (this is the one I used on the AT), has loops tied on each corner already, so these simply go over the ends of the poles, then a line is tied from there out to the ground at a 135 degrees from either edge of the tarp (pulling away from the center of the tarp). This tar is siloconized... or maybe I should say "was" siliconized, and could use another treatment, but it still worked fine, except where the back window touched it causing it to drip a little.
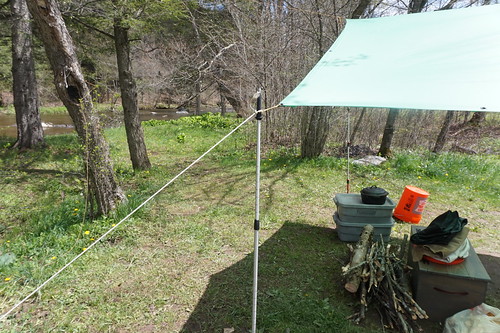
Note that with what is shown in this picture the tarp will fill with water and collapse (which it nearly did actually). To complete the pitch tie the middle of the two edges to the ground with line, pulling down and out from the center of the tarp (just like the ones on the poles, but without poles). This creates "drains" where the water can escape the edge of the tarp.
I'm going to call this the "house" pitch. In essence it is nothing but my favorite backpacking pitch (the pup-tent pitch as I usually call it), but up on poles.
Because of the placement directly over the back of the truck, if we get it tight enough and square enough to the truck we can leave the rear window and tailgate open and get only the most minor of dripping. This is great, because it means accessing our stuff and getting in and out doesn't get everything wet!
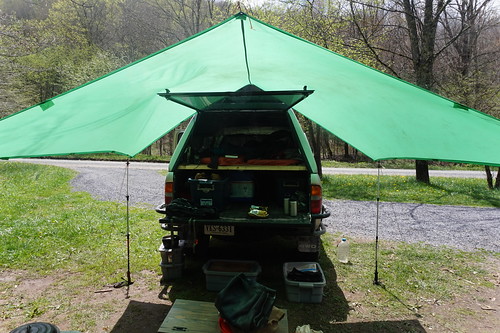
This was the second tarp pitch we tried. The first was down the length of one side of the truck, tying to the rack at one end and to a stick or just over the cab on the other, then using the poles for the other 2 corners. That pitch worked fine, but didn't cover the back entrance. At one point someone (probably me) left the back open for a bit in a light rain and the open cell foam mattress we were using got soaked... That mattress got trashed as a result. I'd always heard open cell foam was a bad idea, now I've seen it in action.
I'm going to call this pitch the "awning" pitch.It's fundamentally a lean-to pitch on poles.
The other problem is just that due to the dimensionality of the tarp the space was kind of hard to use. I think because the tarp ends up folded along the long instead of the short axis, the resulting space is more long and skinny. It's also lower overall. In the house pitch the center of the tarp is the highest point, so the part of the tarp that stays dry also lets you stand up. In the "awning" pitch the highest part is up against the truck, where you get drips down the truck all the time, and where you can't stand ('cause there's a truck there).
Using the house pitch made our time in the rain a LOT more comfortable. We were able to use the wooden box you see in the center as a chair or table. We could prepare food for cooking, and eat it, without being rained on. We were still cooking on the fire in the background, but it's just a short run out in the rain to fiddle with it. My tarp is an 8x10, and I did find myself wishing for a 10x12 (we have one, but it's on the trailer right now), so I'm curious to give that a try in the future.