
Metal Working
2015-03-28
For christmas Jess got me a metal-working class. 4 3 hours classes in a metalshop learning from experienced folks. As it turned out it was basically open ended "so, what do you want to learn?" With 2 guys running the shop, 2 of us taking the class, and maybe 1 to 3 other folks hanging out in the shop and getting help occasionally, there was lots of 1-1 time. Here's some of the stuff I did.
I decided to touch on blacksmithing, but I have a decent idea how to do a lot of things with blacksmithing. So I wanted to focus on getting welding to the point where I could actually go out and buy a welder, and weld something that mattered. At that level of welding, MIG is what you generally want to use, so that's what we learned (though a lot of it applies to other welding as well).
Day 1
We spent the first day just getting a run-down of the shop, how to use a coal forge, figuring out the welders, loading in a new wire spool, making a few beads, and covering the basics.
Day 2
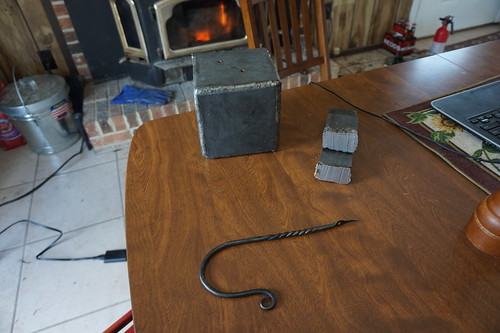
Both of us decided to get in our blacksmithing. So I made the hook you see on the bottom left. The process goes like this (skipping all the heating it up parts)
1) pound out the tip to make a square
2) roll it on the anvil as you pound it to make it round
3) start the curl on the anvil horn
4) finish the curl by holding the straight part flat on the anvil and striking far down on the curve towards you. Then bring the bar up a little off the anvil, and correspondingly strike the curve a little closer to the tip and a little lighter. Repeat until the bar is vertical instead of horizantal and you are striking down.
5) make the "hook" on the horn
 6) hammer the segment you're going to twist so it has flat sides or grooves or something, so the twist shows up
7) grab it with a vice and twist it!
6) cut the end off in the right spot using the... thingy who's name I forget (it's basically an edge you set the rod on and hammer *almost* through, then you brake it off with pliers)
7) make square tip at the other end
8) hammer it flat
9) drill it
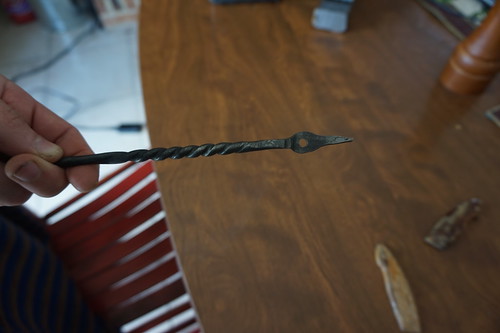
Oddly, getting an even twist is actually easy, you just do it not too hot. it's a bit harder to make it *uneven*. This is true because we were working mild steel (as most blacksmiths do these days), that means it is very consistent in it's carbon an allow content. Traditionally blacksmiths worked wrought iron, which is far less consistent and thus to get an even twist you have to work it unevenly, so you have to do it very hot and it takes a lot of skill
Day 3
Down to business on welding. The goal was, making a box that will hold water. In a more serious class for professionals the goal would be to make that box hold 100 psi for 24 hours. We're just mucking about though, so didn't go that far.
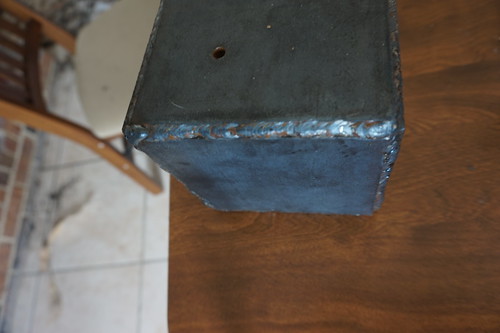
I decided to do this by sitting the box corner-to-corner, welding the inside first, and then filling the space on the outside of each crack. I did this to build 2 half-boxes of 3 sites making a corner, then attached the two together (welding only the outside at that point of course).
The idea was good, but I missed one KEY step to really doing it right. The right way to do it (besides cutting more carefully) is to *tack* weld before you make the real welds. I could've tack welded the 3 sites together seperately and checked that everything was really going to fit *just* right. The inner welds I did weren't of much use. If I did this again I'd probably skip them and simply tack-weld the 2 3-sided pieces together at that point and make sure it all lined up *perfectly*... if not cut it apart and try again. Then you fill the outside.
That said, even though I had a huge gap I filled it in well enough and the end result does hold water without leaking. Pretty cool.
Note that what looks like a good weld might not really be a good weld. Prettyness is a sign of skill and thus a proxy for knowing technique, but not necessarily a sign of good binding. It's possible to make a bad weld look pretty. Good binding has to do with avoiding gaps, how much you heat up the metal, and how well you get the metal to blend together, and mostly... prep.
Most of the time spent building this box was spent not with a welder, but with a grinder. We cut the plates first. Then I had to grind all the faces to ensure I'd get a good binding. Being new to a grinder this took quite a while, but no matter how good you are... most of welding is actually grinding, not holding a welder and laying a bead.
Day 4
Now comes the real challenge, taking BIG pieces of metal, and joining them with a tiny little MIG welder. This is done by cutting V-notches in to both sides of the metal then slowly filling in the space one bead at a time. You start with the pieces not quite touching and fill in the almost touching points, then flip it and do that on the other side, avoiding ending up with any air gaps. Then you work your way up filling in the V cut.
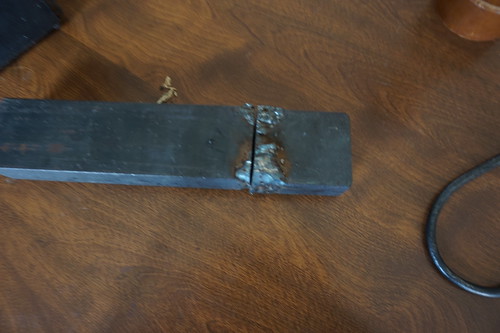
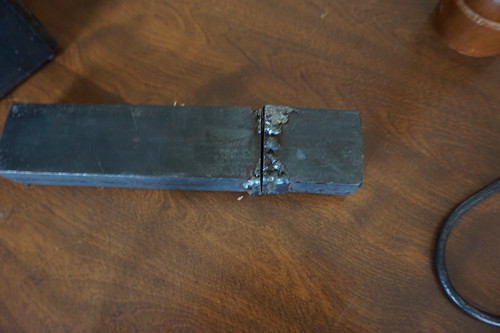
If you are anything like me, this probably looks like a pretty bad weld to you. This weld represents about 1.5 hours of grinding and a half-hour of welding. We didn't want to waste time, so I didn't grind it out to make it all pretty, and I didn't add a cap-weld (though the bottom side of the upper picture was cap-welded by our instructor, just t show us how it's done).
Interestingly, while this weld is far from ideal (the root pass is pretty bad), it's a lot better than you might expect. Unfortunately we missed the real center of the weld when we cut it, but still, it shows that this metal really is bonded together.
What you see as vertical ridging is just marks from a very sad band-saw. If you stare at that image really closely you can see horizontal marks. At first we thought those were showing lines between my beads of weld, but after staring at them and considering how I was welding I'm certain that's not what they are, I believe they also are a side-effect ot he band saw.
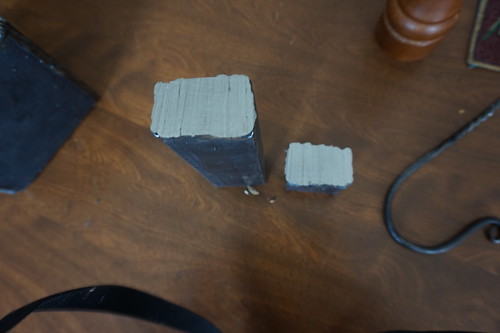
BUT if you look really carefully at the outer 1/4' of the cut on each side (the part that cut through my actual weld), you can see that there are little pits in the metal. These are air-gaps due to poor technique on my part, and they shouldn't be there.
I'll need a lot of practice if I want to be a professional welder (which I don't), but for my first heavy joint I'm pretty damn happy with it. For things like building armor for a 4x4, welding up a picture frame or a metal fence, etc. I can weld!
We also took some tubing and tried welding that, as well as patching it after we blew through it by accident (which is easy to do on pipe, due to how it traps heat). With mild steel you can patch it and grind it and make it pretty much as strong as new. This isn't true for steels that are more heat sensitive (crystallize more easily) and need to be re-tempered after you weld them to get full strength (e.g. cro-moly). This is dependent on the alloy, carbon content, etc.
Conclusion
Unlike my last welding class, now I feel like I can go buy a MIG welder, and actually weld something. I have some vague plans to build rock-sliders for my Jeep... maybe. We'll see. If not maybe I can find another excuse to do some welding, like shoring up cave entrances for caving, repairing tools, etc.
I'd actually be helping clean up the entrance to a cave today, but I'm stuck at home due to an on-call shift. Oh well, I guess you can't play all the time. It's a good chance to write up some experiences though :).
Jeep lift
2015-03-18
I know a lot of my readers aren't car people. Don't worry, I've got some more non-Jeep posts coming soon. We processed a roadkill deer recently. I finally made a form of tarred canvas and I'll post about that once I get a chance to test it. I joined a grotto last weekend (a group of cavers). I just got a mountain bike yesterday, took it for a spin around the neighborhood today.
But, since I posted the others, I figured I ought to post a followup since I finally finished installing my lift. Here's the mods on my vehicle so far (in the order they were installed):
- drains: drilled in plastic, floor plugs pulled
- hitch reciever: like factory, forgot the brand
- vacuum pump relo: OR vacuum pump relocation bracket
- fenders: trim, remove liner, spray bedliner for wheel-wells
- programming: turn signal, light timeout, acc timeout
- spare-tire mount: teraflex hinged tire-carrier
- highlift mount: teraflex accessory mount
- headrests: bent back
- CB radio: midland CB, Wilson 305-483 Silver Load antenna
- Winch: superwinch 9500, synthetic rope
- Winch plate: Rough Country, with D rings
- Tires: duratrak 285/85R16
- wheels: 4.25" backset steel
- E-bake: pulled the bracket
- brake lines: synergy
- ABS sensors: rerouted and ziptied
- diff breathers: home-grown
- shocks: Bilstein 5100
- rear sway-bar links: some cheap brand
- front sway-bar links: relocated from the rear
- springs: OEM 18/59 (ebay), replacing factory 13/55's (1.5-2" lift)
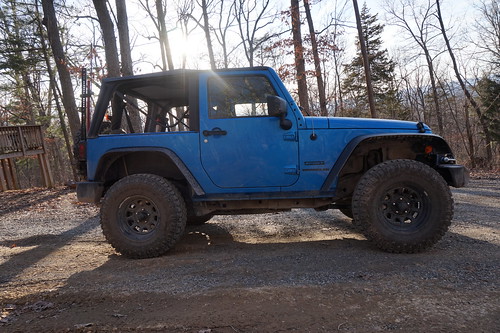
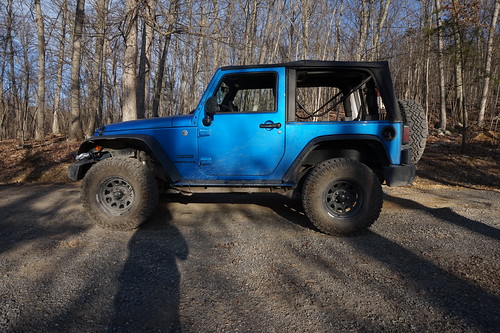
The last 4 items on the list are the actual lift. Overall I think this setup adds ~2" travel to one end and ~4" to the other (I forget which is which), and lifts the vehicle 1.5-2". Due to the fender trim there's no need to extend the bumpstops even running 33" tires. The shocks are just barely not fully compressed at full stuff, so I'm getting the full range of the bilstein 5100 shocks.
So, how do I like my new suspension?
Handling
The stock shocks on the sport model of the wrangler are terrible, as are the springs actually. The handling was really poor. The body pitched forward and backward when I hit a bump, and the rear end would skip really badly while cornering. It felt kindof unsafe. That's a lot of what got me doing the lift now, I had expected to wait a while. I got the bilstein shocks in an attempt to improve the handling, but with the extra droop they provided I was in danger of inverting my sway-bar, so I needed longer links to keep that from happening. I was also nervous about the brake lines and ABS sensors so I did them too.I bottomed out (almost high-centered) not long ago while out wandering. Given that I was getting the rest I figured why not pick up some stock springs on ebay and see what lift that got me, since you can get them cheap.
I did the brake-lines and ABS sensors first, then the shocks and sway bar links. That did improve my handling, the skipping on the rear got a little better, but not nearly as much as I'd hoped. Also, the sway bars were now poorly positioned (too far from level) so my body roll got worse.
Next I did the springs and the stiffer springs made all the difference. The body pitching is gone, the back skips even less, the body roll is less than ever, it doesn't dive when I turn or brake. I love it.
Difficulty
No-one but me has worked on my Jeep since it rolled off the lot, so I did this all myself. Sorry, I didn't take in process photos like I meant to.I did the ABS sensors and brake lines one wheel at a time, jack it up, remove the wheel, do the work, put it back together.
The hard part of this was figuring out how to jack up the car. Jacking from the front-wheel didn't work well because the steering wheel turns. Wranglers have no key lockout on the steering column. Jacking off the bumper I would get it up and at some point it would lift the other front-wheel off the ground, at that point it's sitting on just the 2 rear wheels and can fall sideways too easy, and the jack would fall over.
The solution was 2 fold. First, level the car before you start! This should be obvious, but I tried all sorts of *other* ways to compensate for the hill. Leveling the set of wheels that stay on the ground though worked wonders. Second, jack one side a little ways, throw a jack-stand under it, then do the other, jack stand, back to the first, adjust the jack-stand up. Between the two I was finally able to safely get the car up in the air with the axles at full droop and the wheels off the ground.
Note that I'm doing this to work on one end of the car at a time, leaving the other on the ground. Getting the whole thing on jack-stands would be significantly more difficult.
In theory you can install the shocks without lifting up the vehicle at all, but I couldn't get them in while compressed. With it off the ground it's much easier. The first time I did it I actually levered them in to place (compressing them) using a screw-driver so I didn't have to shift anything after pulling the stockers off. That worked prety well.
Once you can get both wheels off, the sway bar is trivial. Disassemble it, put it back together. I did notice that there's a actually a spot for a wrench next to the ball fitting, which is way easier to use than a hex-wrench.
To get the springs in I jacked the car up pretty high and pulled both wheels off. I took off one end of the sway-bar link again. I then placed the factory sissor jack (with an extra block under it) under the axle and lifted it just a bit so it wasn't hanging on the shock so I could unbolt the shock again. Then I just lowered the axle down. The axle stopped dropping at some point due to the control arm bushings, I just shoved it a bit further and popped the spring out, then popped the new one in. Jack the axle back up, reassemble everything, and then do the other end of the axle.
So, very very easy... if you can figure out how to get the jeep up on jack-stands or have access to a lift
Cost
- shocks, ~$300
- springs, ~$180
- sway-bar links, ~$30
When I went looking for kits that get those gains with only a small lift all I could find were kits advertised as e.g. a 1.5" lift that actually lift it more like 2.5" and cost more like $1500.
Planning a lift
It took me a lot of research and thinking to figure out where to *start*. On the Tacoma this was pretty simple as it's independent front and leaf-spring live-axle in the rear, but Jeeps use a live-axle coil suspension which makes for a lot of different moving pieces. All of the components need to work together. If you're planning a suspension modification I have a suggestion: Start with your tire size and how much you want to trim fenders/bodywork/etc, and let that decide your bumpstop.Once you have your bumpstop height, everything else chains from there. That's because your bumpstop height decides how long a shock body will fit when everything is fully flexed. You need to hit the bumpstop and not the shock body, so you want a shock that's just a little bit short, that way you get to use all the travel the shock gives you.
Once you've chosen your shock, your shock is likely to be the limiting factor on your droop. Now you can use your maximum droop to decide how long your spring needs to be uncompressed. If the spring is shorter than this you'll have to limit your flex by attaching the springs to the axle and the vehicle, or using limit straps. The droop is also what matters for brake lines, breather tubes, diff locker wires or air-tubes, exhaust relocation, it's a factor for driveshafts, etc.
Now that you're picking your springs you can figure out normal ride height. Note that nothing above was impacted much by ride-height. You can have the normal ride be basically anywhere in that travel . It's just a matter of how stiff your springs are.
Now you'll want to pick sway-bar links that accommodate that droop, but also come out near level at your normal ride height. You may have to give up on getting them level.
If you're going more dramatic you may also need track-bars to recenter your axles, this is mostly based on normal ride-height, but may be impacted by trying to avoid tires hitting the body at full flex. Driveshafts are also mostly based on ride-height, since they get most of their wear at normal angles, but I'd imagine that not having them bind too badly would still be important even with a low ride-height and a lot of droop. Control arms are based on ride-height as you need them to correct camber, and that's all about highway driving.
I'm not expert in the area, and you may note I didn't do ANY of the complicated stuff... but I found this model to be a useful way to work through planning a lift. The internet would have you thinking that tire-size decides your ride height, and everything else stems from there. But ride-height is actually one of the more independent variables, while bumpstop is really solidly fixed by tire-size and fenders, and due to shocks a lot stems from that.
Just a thought.
Conclusions
While I definitely used the large knobby tires this winter to get in and out of the driveway (and get Jess truck unstuck once), I haven't taken old blue offroading since I did the lift (I finished it last weekend). So, I'm really curious to see how it all performs. I can't use all my flex right now since I don't have sway-bar disconnects. I believe that the sway bars will lift my wheels off the ground even though I have suspension play left, so discos will likely be the next purchase. I'd rather get a more multi-setting front sway-bar, but those are *expensive*, so I'll probably just do discos for now.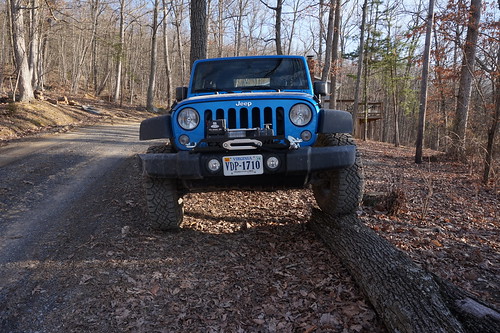
Overall the lift was pretty cheap, it handles far better than it did on road, and it should be strictly better off road. So, I'm really happy with it. It's also always fun using things you've really spent some time and energy on. A car is no exception. I'm looking forward to getting it on the trails again... possibly this weekend!
UPDATE
Later on I did adjust my drag link, by about 1/8 of a turn. This corrected my steering wheel by maybe 5 degrees, probably less. I did this by taking a 15mm wrench with me and driving back and forth down a stretch of fairly straight highway, and just tweaking it until I found just the right setting.
Also, I've now taken this setup off-road, and indeed it performs very well, I'm extremely happy with it. I think the height came out just right, significantly improving break-over angle. I bottomed out once, and that was on my diff, so that's a matter of tire-size, not lift height.
Roadkill deer today!
2015-03-08
I found a roadkill deer today!
I found her while out on a drive in GW west of here. It was a young doe killed primarily by a head strike. The only other notable damage were some broken ribs, and she was a bit bloodshot on that side.
I'm not sure how long she'd be been there. She'd definitely been frozen in the snow, but the scavangers hadn't gotten to her at all. We just finished butchering her. The meat is good excepting the skirt stakes, which had turned. We decided to bail on the organ meats and buried them with the other offal. We could still eat the skirt steaks but we wanted to give some to the dog anyway, so let her have those cuts.We've got ribs in the oven with a barbeque sauce I mixed up. The legs are still out in the garage hanging in pillow-cases to keep the flies off, they'll be fine like that for a few days. We'll get to those in a day or two. Jess sliced up the backstrap and it's jerking in the dehydrator.
I tried scraping the hide green and the hair was tearing, so it's soaking overnight. I threw in two handfulls of hardwood ash just to avoid getting staff when I work the hide tomorrow. My plan for the hide is to try a method a friend of ours told us about a while ago. He claims he can do an elk in 6 hours of work with this method. If we're recalling right you start with a green hide, scrape the grain off (which I'll do tomorrow), then acidify it with tanic acid, and then soften it after the tanic acid has made the glue all loose and easy to remove. Then smoke as normal. I had hoped to skip the bucking step with the ash, but the hair just wasn't slipping.
So, another hide to work on (a second thin one, so I've probably got enough to make a shirt or something) and enough meat for several months for Jess and I. Death is always sad, but it also brought us joy, thank you deer.
It's been a beautiful day. It hit the 50's, the 10" of snow is mostly melted off. Jess and her guest went on a hike while I was off driving, and now we're exhausted and chilling out with wonderful smells wafting through the house.
Leaves as sleepingbags
2015-02-09
Recently Jess heard about a technique for sleeping out in cold weather where you use trashbags filled with leaves as insulation. This sounded pretty cool, so we decided to give it a try. In addition, we wanted to cover a little bit of ground, just because neither of us had done a longer-distance backpacking trip in a while.
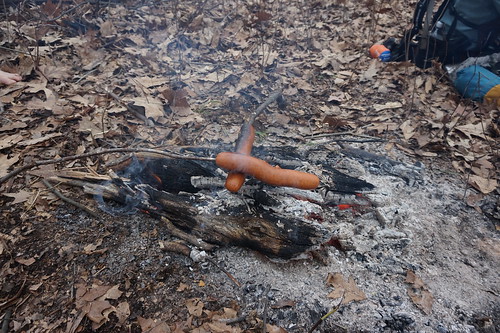
I'd also been playing with the idea of doing trips without a cookpot, by cooking sausages over the fire as warm food. If you've been reading this blog you know we've also been trying ponchos as shelter, so there's no separate tarp. Well with no sleepingbag, no cooking gear, and no tarp, that's the bulk of the gear, so we were pretty excited about this itea.
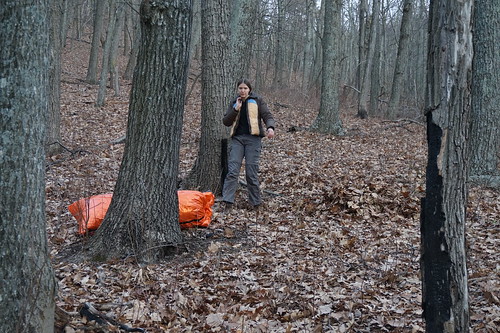
We weren't sure exactly how it would work, so we brought both emergency bivies (I actually had 2 as I had one that had already been used), and contractor trash bags. We also had sleeping-bags and extra coats as backup. Despite actually needing so little, with all the backup gear our packs still came out looking about normal. You'll see at the bottom though that the gear-list is a bit odd.

Selecting a site
We walked in a pretty long way. At some point we were talking about tea and I realized that I'd forgotten it. So we stopped to get some tea fixings. Fir is usually pretty good.
A while later we found a nice spot next to a stream. When using possibly marginal setups site selection is really important. We ended up on the south-facing part of a west-facing slope quite near a stream. This surprised us a lot actually. As a rule you want a south-facing part of an east-facing slope and you want to be relatively far from water so the humidity is lower. But, the spot we ended up in was quite sheltered and felt easily a solid 5-10 degrees warmer than the general average at the time. The stream didn't matter as it was steep enough that the damp air could fall down the slope and didn't build up near our campsite. All in all it was a pretty perfect spot.
After some discussion we decided that we were concerned about wind only from one side, so the smart thing would be to sleep on the lee-ward side of a log, in case the wind came up that way. Having finally selected our site we started building.
Making the beds
Our first task was to build insulating matts to sleep on. After a bit of consideration we decided to start by building platforms out of branches, this would supply us a solid separation from the ground even before adding leaves as padding and insulation. This is when we were about half complete.The near bed is mine, the far bed is Jess'.
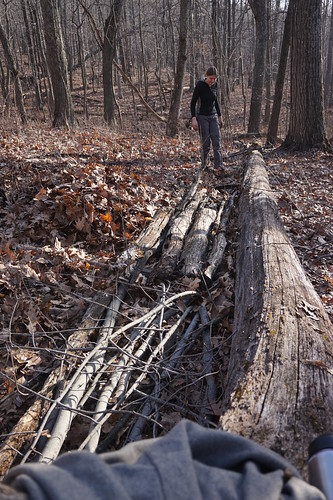
As you can see my technique isn't working quite as well as hers, I switched to something half-way in between her technique and mine after this photo. We also both placed branches as "rails" that sat higher on the sides and ends to help hold the leaves in.
Next we gathered leaves... lots and lots of leaves. We heaped these on to the beds until the beds were mounded high. Then we'd lie down on them squashing it all down and repeat. I found it helpful to gather into one of the contractor bags I had brought actually, as a way to gather from the best areas. Sadly, I didn't take any photos of this stage.
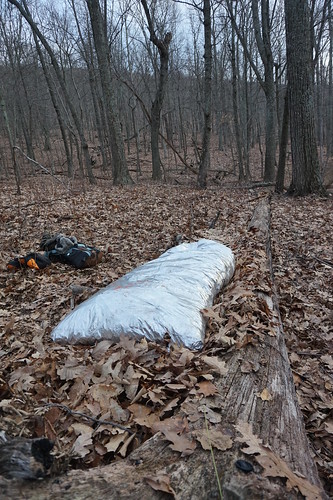
Once we had our beds we started on our sleeping-bags. Jess and I had slightly different ideas for this. I have tried sleeping in an emergency bivy several times, e.g. http://www.blog.smalladventures.net/2013/08/bushcraft-in-lassen-national-parkforest.html , and every time I do it I end up waking up soaking wet. To make it work I have found that I have to wait until I can't stand it anymore and *have* to use the bivy, to minimize my time in it. Otherwise I'm so soaked by the low around 4-6 am that I end up really chilled. This happens basically no matter how cold I am. Jess doesn't have this problem, she generally sweats very little while sleeping unless she is overheated.
As a result, Jess decided to use an emergency bivy, fill it with leaves, and then climb in to it with a silk liner. I decided instead to use my bivy like a quilt. I flipped it inside out (so the shiny part is out), filled it with leaves, swashed it flat, tied one end off, and used it like a quilt. Here's the bivies filled with leaves.
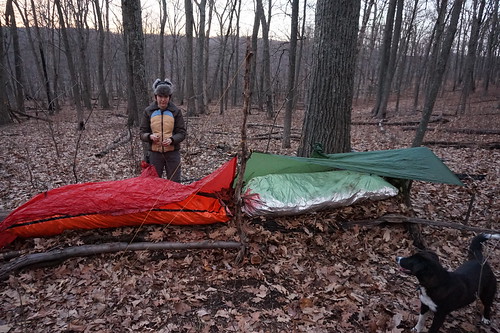
Shelter
Next, we pitched our poncho/tarps. The weather here has been very unpredictible lately and there was a predicted chance of rain, it kept shifting. We decided we really didn't want to get wet, and that the tarps might help a little with heat. This turned out to be the single hardest tarp pitch either of us had ever done, due to having to precisely locate the tarps over the beds. As a note, I find I need 50ft of twine (that I never cut) for a normal tarp, but I prefer to have more for a poncho-tarp. We intentionally hadn't brought stakes, but with a few carved stakes and some ingenuity we got it up and had a nice shelter.
Dinner
The leaves were so dry that I used them as tinder. I struck a spark off a faro-rod into a bit of cotton from the top of a pill bottle and that lit the leaves. Within minutes we had a nice roaring fire. Next we gathered wood and bucked it up using my handsaw.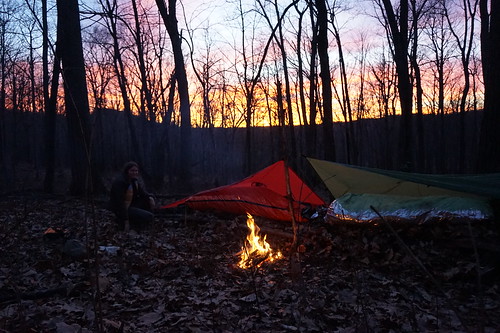
The sunset was spectacular. We dined on sausages roasted on sticks jammed in the ground, and some bread we'd brought with us.
How did it work?
We were both pretty surprised at how warm our setups were. We figure based on feel an local weather reports that it was maybe ~40F that night. Jess' was definitely warmer, as she had no air-gaps she said she was actually almost too warm, and that her setup would've worked down to much colder temps.
My quilt setup worked pretty well, but not perfectly. The emergency bivies are really too narrow to use like a quilt, because they don't droop over the sides enough to seal in the air. That said, throughout the night I slowly sank in to my leave bed, so the leaves around me started to seal the gaps from below. I could also snuggle up to the log a little letting me seal one side and in effect gain some width. Overall it worked just fine, and I would've been comfortable 10 or 15 degrees cooler easy, it's hard to say if it would work colder than that though, as it's a very odd feel. Some of the leaves are damp, and the mylar was against me, so it felt colder than it was.
One big advantage of the quilt method is that you only need ~4-5" of loose leaves. shoved in to the bag, more and it makes it stiffer and harder to use. With the sleepingbag method the leaves get crushed down easilly, and you need them to be densely packed enough to keep some on top of you. As a result, Jess found she needed several times more leaves than I did, making the setup take quite a bit longer.
Overall, given my sweating, the next time I try this I intend to use the quilt setup again, but with a bag that's maybe twice the width of the emergency bivy.
The rest of our trip
In any case, we both slept in comfort and woke up refreshed in the morning. After getting up we cooked up some sausages on our still going fire (I'd gotten up and tended it 3 times in the night). Once again I was reminded of how much longer large slightly damp logs burn than small dry ones do.
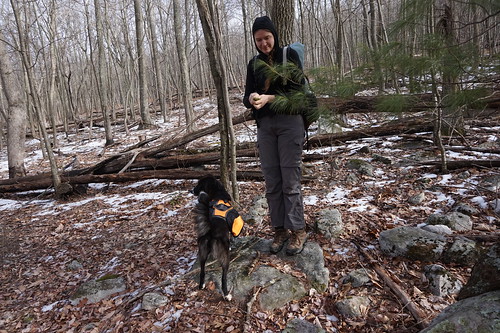
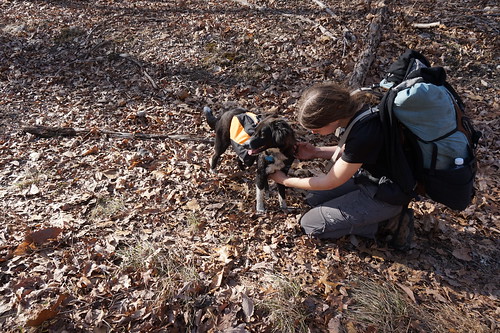
The next day we had a long beautiful and slightly more round-about hike home. Beau had a blast the whole trip, with her winter fur she was completely content the whole time.
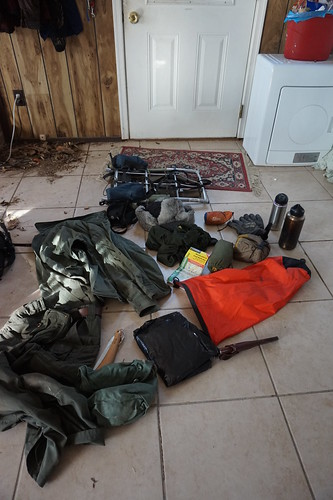
Gear
Here's the gear I brought and expected to use. Note that this is absolutely everything... I took this photo after I got home, and stripped naked to take it :P.
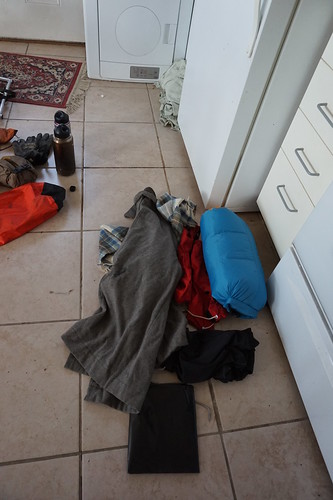
This is the stuff that I brought as backup and didn't use (actually, the gators were brought as another experiment, but it didn't end up raining on us).
Gearlist
Worn:
- canvas pants
- wool sweater
- canvas shirt
- warm boots
- wool socks
- belt knife
- wood saw
- steel water bottle
- steel thermos
- emergency bivy x2
- contractor bag (only used to speed gathering)
- poncho w/ 100ft twine
- backpack w/ drysack
- ursack w/ food
- Warm rabbitfur hat
- warm work gloves
- sparker
- tinder (cotton)
- bandanna
- personal drugs (for medical condition)
- wool jacket
- down sleepingbag w/ drysack
- gators (intended to test in the rain)
- contractor bag
- scarf
- tights
- med kit (pills)
- knife sharpener
- repair kit (needles, floss, steel wire, etc.)
- headlamp (battery was basically dead)
- sighting compass
- lighter
- fatwood
- homemade hacksaw-blade backup knife
- backup personal drugs (for medical condition)
Conclusion
Overall it worked! Jess' technique worked well for her, and mine worked well for me.In really cold weather if I'm worried I think I would go with the "sleeping-bag" model. If it's cold enough than the Mylar bag won't make enough difference and the temperature at the Mylar bag will be below freezing. In this case the sweat will condense there and then freeze solid, thus keeping you dry. I would also recommend this method in other weather for folks who don't sweat much. Note though that this technique is trickier to get in and out of.
In warmer weather I think I want a bag that is twice as wide as a normal emergency bivy. This would be much faster to stuff with leaves than the sleeping-bag approach (despite being larger the leaves can be fairly loose), is very easy to adjust for temperature, and is super easy to get in and out of. This seems to me like the more general approach that I'd like to understand better and persue, as it should work in fairly cold weather as well.
Note that this technique only works when there are fluffy dry'ish leaves about. If we had a bought of freezing rain that soaked everything and then glued it to the ground, the leaves won't be very insulating. It remains to be seen what weather allows one to still get good enough leaves.
That said, in VA I suspect this technique works quite a bit of the time. It's especially tempting to adjust gear for day-hiking a little to allow for doing this, as it would allow one to voluntarily or not, actually have a fairly comfortable night in a fairly wide range of circumstances, while likely adding almost no weight to your normal kit (since many of us already carry the necessary components).
The sleepingbag for me has proven to be one of the hardest pieces of gear to substitute for or drop so far. So, I'm really excited about the possibilities this opens up and I'm really curious to see just how wide a range of weather I can get it to handle. I'm toying with the idea of making a bag for this purpose, maybe something like a "survival scarf": https://www.youtube.com/watch?v=LElsE3kseQM . Given that and a poncho I could sleep out in a lot of different weather while carrying a very very small pack. Also, it's one more step towards dropping plastics out of my kit.
Jeep plans (lift, gears, and lockers)
2015-01-22
I've got this Jeep, and it's pretty cool. But, I want to make it cooler.
My plan from the start has been to build a not-flashy daily-driver with a moderate lift, that performs well on road and better than it looks like it should on the trail. Because it's a neat challenge.
To that end, I've been looking in to:
- Lifts
- Gear ratios
- Transfer cases
- Lockers
- Armor
I should note that this represents a fair bit of research on my part. I'm only just learning about all of this. I've done one lift in the past, and it was quite a simple affair on a coil-over front and leaf-spring rear, and it came as a boxed as a kit. Once I threw out that option, I got in to building up my own kit from individual parts, which gets complex fast.
I don't know what I'm doing... this is just what I found. I'm happy to take suggestions, input, or questions.
Lets start by talking about lifts. I'm running 33" duratraks, which so far I like a lot. They have great on-road manners. I was playing in the mud a little last weekend and they performed great. We were on hard-pack, slime, and hitting mudpuddles. I'm running 33" because they are the largest tire you can easily run without damaging components, they also happen to be the largest tire that runs well with an unlifted Jeep... convenient. My stock height was 8.7" ground clearance, going from 29" to 33" tires I got another ~1.75 inches (tires aren't exactly the size they say), so now I have ~10.0" of clearance.
It turns out finding springs that will raise your vehicle 2" is a lot harder than it sounds though. A 2" lift maybe built for a heavier version of the Jeep, in which case it could lift it as much as 5", even if it's built for this model they are usually designed to get that lift over stock height, after also adding heavy bumpers and such. I plan to keep my Jeep quite light, so a 2" lift is likely to be at least a 3" lift. After a lot a lot of looking at various springs on the market, I don't like almost any of them. Most of the "triple rate" springs are a sham, and are also too short (I explain why this is bad later), and most of the good springs give 3" or more lift.
All of this is even further complicated by JKs having all different springs from the factory. While what springs they have is vaguely correlated with the model, it's only very vague and almost any spring will occasionally be found on almost any model. This means if you look at the current ride height that's based on some unknown quantity.
Luckily you can go look, I have 13's in front and 55's in the rear. As it happens this means I could get ~1.75" of lift in the front and maybe 1.5" in the rear by buying stock 19/60 springs someone else is swapping out. As it turned out I couldn't find these, so I got 18/59, we'll see how much lift I get out of it.
Droop
Now, the lift isn't just about getting the vehicle higher, it's also to increase droop, that is, the amount the axle can travel downward from it's normal position. I'd like to increase droop as much as is reasonable.
Droop lets you articulate more, meaning lets the axle pitch relative to the body of the vehicle more. The more you can articulate, the easier it is to keep your wheels on the ground in harry situations, surprisingly, more articulation also helps with stability and avoiding rolling the vehicle.
So, how do we get droop? The first limit to droop is usually your shock, which has a limited throw. If your axle is just hanging from the car, that's what it should hang by. So, to increase droop you want to swap out for a shock with a longer throw. The complication is that this usually also increases the minimum length of the shock as well. When the suspension is all of the way compressed, if you sit on the shock, you generally destroy the shock.
Shocks
A good shock absorber will actually make my car much safer and better behaved on the road, as well as off the road. Right now when I corner hard the rear wheels frequently leave the pavement causing the car to oversteer. I don't like this, and better shocks should help.
After much research it turns out the Bilstein-5100 just barely fits on my vehicle with no modification, it has a significantly longer throw (4 inches in the rear, 2 in the front), and it's minimum length is only just smaller than my minimum length. As a bonus I had Bilstein 5100s on my last car, and I loved them, so I'm happy to use them again.
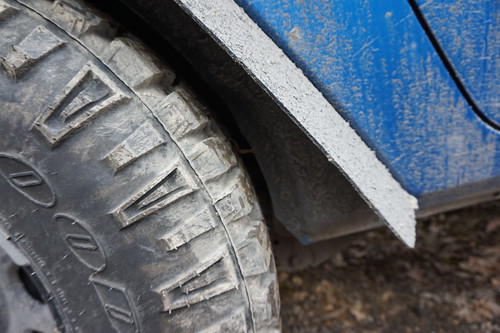
Oookay, but is that actually what we want, is it possible to let my no 33" wheel go ALL up without something else bad happening? To answer this I used a rock next to my driveway:
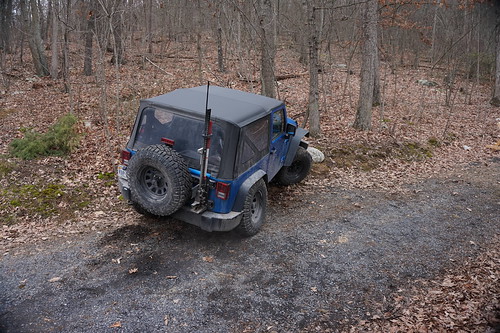
Below you can see that it's close, but at full stuff, my rear tire clears by maybe an inch and a half. This axle is sitting on it's bump-stop. I'll have to watch that if I ever run aired down though, since that can bulge a tire out a bit. This is with the current sway-bar, which I intend to leave.
And up front we see again that it clears fine. I'm actually about 2 inches from full stuff, but there's plenty of space. That's a good thing, because up-front I may decide to disconnect my sway-bar at some point, which would let it articulate further.
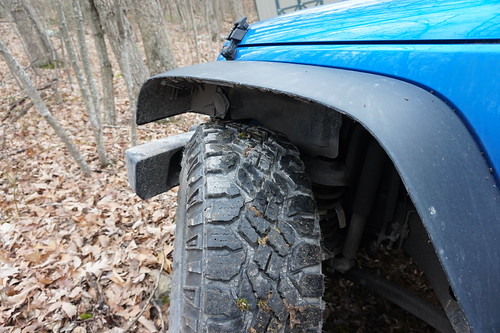
Now, if you think through the geometry. If the far wheel is drooping another 4 inches, this side is going to come up yet another inch (thus why the sway-bar matters). It might just barely clear, it might not... that'll be something to test. If it hits I'll probably rig some tiny spacer for the bumpstop, any bit of rubber will work. It's definitely in the ballpark, which is good enough for selecting parts.
So, it looks like we can use most of the uptravel. I don't want to get in to welding my frame and crazy stuff, so bilstein 5100 should work perfectly, getting me the maximum droop I can get without crazy modifications.
You have to extend brake lines and a few other things, at some point on the 2015 Jeep JK, it turns out the driveshaft hits the exhaust, and there's a couple of other issues. These can be surpassed though with a little work as they arise. Another example is the sway bar links, which I'll want to extend. If you don't extend them it turns out they can invert, and break things. Still, I don't know how long they actually need to be, so I figured I'd see it all in place first and measure. There's also disconnectable sway-bar links which give more articulation make the vehicle less stable offroad, but keep full stability on road.
I'll probably keep the non-disconnects for now, since as it happens I can likely replace the rears and move the rears to the fronts... I can also probably hack up a disconnect myself.
More about coils
Besides those things, the next thing to limit your droop is your spring length. At some point the axle droops enough that the coil just falls out. Oops! For this reason you want a nice long coil. When the suspension compresses though the coil can be the limiting factor on that end, so you want one without too many turns. Spacers just take up space that could be used by coils that will unfurl, so spacers are bad for your droop if coils are your limiting factor. For this reason, I want a pure coil suspension if I can get it. As it turns out, not many aftermarket coils in the 1-2" range are longer than the longest stock ones, so that's another advantage of going with take-off OE springs.
Gear ratios
A 4wd car has an engine, which drives the transmission, which drives a transfer case, which drives the differentials, which spin the axles, which are connected to the wheels. The final gear ratio between the engine and the wheels depends on the product of the gear ratios at each stage.
My transmission has 6 gears, and my transfer case has 2. The transfer case is also responsible for swapping from 2 to 4wd (engaging the front wheels or not). Usually the high gear of the transfer case is used for normal driving, and you just use the transmission to shift. You can swap to 4wd still in the high range, and drive like normal on slick roads. When you need lower gears for crawling up steep hills really slowly you swap the transfer case to low range, giving you a whole new range of gears to shift between on the transmission.
Now, my car had ~29" tires and now has ~33" tires. This affectively changed the gear ratio of the whole drivetrain by ~10%. This is okay, but if it gets to far outside a reasonable range, 6'th gear becomes useless, and it gets hard to get up hills in 1'st. Usually people compensate for this change in the differentials. My car came stock with 3.21 gears in the differentials. The JK is also available with 3.73 and 4.10 gears in the diffs.
Interestingly, the differential gearing, transfer case, and transmission, are all the same on JKs prior to 2012, but at that time they were mated to a significantly less powerful engine. Personally, I actually think the feel of my car on the street was *improved* by the whole thing being shifted up a little. Most Jeep people would call me crazy for saying that, but hey, I'm used to an underpowered Toyota on oversized tires. Anyway, all of this is to say that I want to keep my gear ratio in the differential (I think).
But, what about when I 4-wheel? When I'm wheeling I'd really like that torque back that I lost by increasing the tire size. Well, if I like it when the transfer case is in high (which, btw, is 1:1 in the transfer case), and I don't like it in low (1:2.73 I think?) then maybe the answer is to change the transfer case!
Transfer case
I'm not doing this any time soon, but I want to figure out every change that I think I might want to make eventually, so I can make sure they all work together well. As it turns out, there are some very nice transfer case swaps available that make for a much lower low range (higher gear ratio numerically). After doing a bunch of research, if I did this I'd probably install a 4-speed transfer case from Atlas. This gives you 24 gear ratios, instead of just 12. The advantage would be having good gears for climbing hills and the like, as well as super super low gears for slowly crawling over dangerous stuff. It's not that I care about torque, actually the torque is bad since it breaks components. But going slower makes it easier to not break things, and that I like.
Lockers
Differentials are designed so that when you spin the input shaft, the output shafts spin. If you hold one output shaft, the other spins at double the speed. This allows cars to go around corners. A locking differential allows you to disable this feature and make both wheels turn at the same speed, this way if one wheel is off the ground, the one on the ground is still forced to turn.
My first Tacoma had a locking rear differential, and I *loved* it. Having a locking differential doesn't matter much most of the time though. I discovered with Jane (my last Tacoma) that after I lifted her, thus giving her more articulation so she could keep her tires on the ground, I didn't ever need lockers the whole time I was mucking about in California.
The exceptions though are snow, mud, and ice. California had very little of any of these, but as soon as I hit snow in Jane I wanted one again. In these cases having your tires on the ground doesn't guarantee that you have traction, so the locker is still useful.
So, I want to install locking differentials eventually. This ties in to the decision about what gear ratios I want in the differentials, since if I replace/rebuild my current differentials and add lockers, I'd like to do the whole thing at the same time.
Armor
My current plan is not to armor my vehicle at all. I like it being light, and I like my gas-milage. My hope is that with the lift I'll get enough clearance that I don't have to worry about it. If I armored up much I would definitely have to change my axle ratio to 3.73 for normal driving, and it's possible that will happen, but for now I'm going to try not to. If I did armor up, it would probably be to add rock-sliders to protect the quarter panels (the painted bit below the door, between the front and rear wheels). Some rubicon stock sliders would be about perfect if I do decide that I need them, and still keep things light.