
Jeep: Vacume pump and Fenders
2014-11-10
Now that I got the trivial stuff out of the way, I went on to some still relatively easy but more drastic mods. I drilled my first hole in a metal part of the Jeep actually as part of the fender mod. It had to happen some time ;-).
I moved the vacuum pump up into the engine compartment - so I can install a winch plate (now coming in the mail). And I trimmed my fenders, for full flex once I get 33" tires on there.
Fenders:
After:
Before:
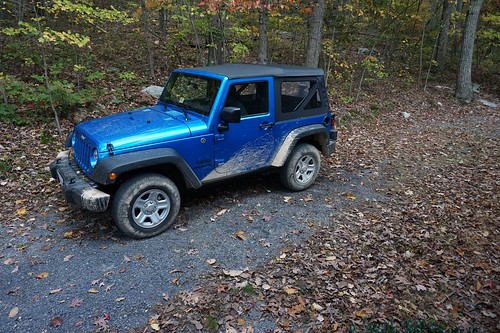
It looks almost the same right? Personally, I'm quite happy with that.
I followed (approximately) this guys directions:
https://www.youtube.com/watch?v=EppDwS34sXs
I'll note now that after digging through the VA codes, although a LOT of people seem to do this mod and no-one reports having problems, it looks like strictly speaking I'm not currently quite legal. Technically VA requires side-lights to be on the widest part of the permanent body of the vehicle, as high as is practical, and visible from the front. Mine are currently not visible from the front, nor are they all the way out to the side. I have some new lights I need to experiment with, but I think it'll be okay until I get around to it.
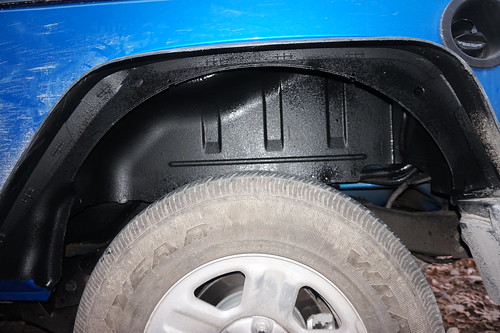
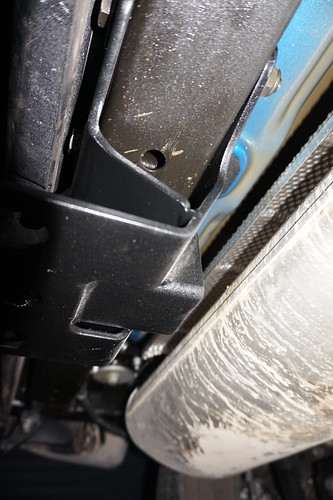
With this mod, you remove the entire inner fender from the rear of the vehicle. This exposes the body to all the rocks that get kicked up.
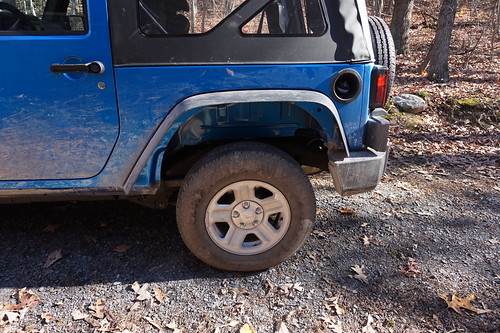
The easiest fix is to cover the area in spray-in bed liner. I got some duplicolor liner at an autoparts store and put on about 6 or so coats. Paint would've sort-of worked, but the rubberized coating should protect a little better against gravel dinging the metal.
All in all it's simple and cheap, and it opens up a lot more space. It's pretty silly for the little 29" tires I have right now. It's not even needed for 33", but without trimming I'd probably rub at full flex and might have to adjust bump-stops and limit my flex more. This way if I put on a high-flex (low COG) lift kit later, (meaning a high quality say 1.5" lift kit), my fenders won't be what limits my flex.
Vacuum Pump
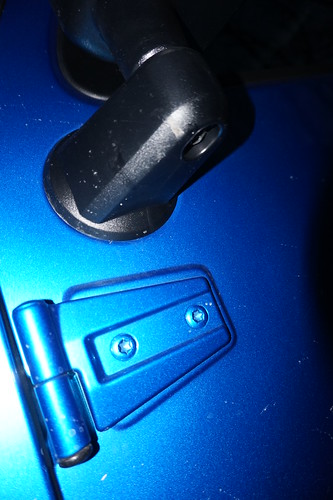
The other project was moving the vacuum pump. The newer JKs have the vacuum pump just behind the front bumper. It's a really dumb place for it for several reasons. For example, the exhaust for the pump has to run back up and into the engine-compartment so it doesn't fill with mud. Also, it's directly in the way of basically anything you might put on the front, either a winch-plate for the factory bumper, or any aftermarket bumper. Heck, it even makes it hard to get the factory bumper *off*.
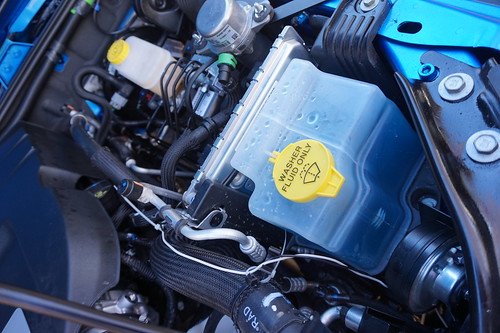
Sadly, I didn't take any pictures of it in the original position, but here it is in the new position:
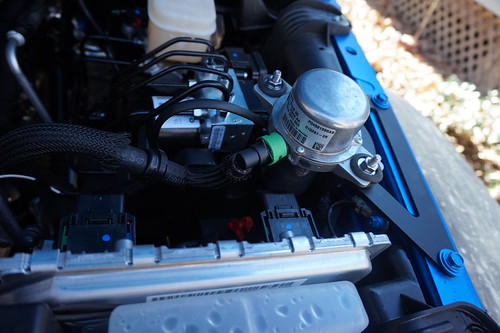
I purchased an OR-fab vacuum pump relocation bracket. It comes with stupid low-quality crimp connectors. I couldn't find good ones, so instead I opted to do a modified lineman's splice and solder it. The wire is milti-fiber copper core, so it was very easy to do.
Here's what it looks like all wired up, you can see the wires running down to where the pump used to be, behind the front bumper.
Besides simply following the directions, there were 2 other things I needed to do.
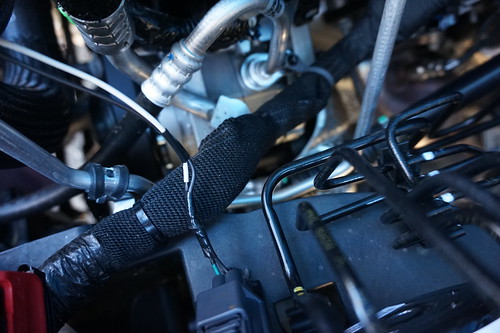
First, Apparently older JKs had removable nuts on the factory vacuum pump mount... mine did not. When I went to purchase some at the local hardware store I couldn't find ones that fit, so I got a new set of bolts, nuts, washers, and lockwashers... but although they seemed like they were close enough, these didn't fit through the sleeve. I pulled the sleeves and that got everything working. That's what the first picture is from. Later I found the right nut and put it together properly, you may notice the rubber looks less "squashed" in the last photo than it does in the first.
Second, you remove about 3 feet of the vacuum hose, and the entire of the exhaust hose, but you extend the wires to the pump by 3-4 feet. The kit didn't come with any wire loom for those wires. So, I picked some up at the auto parts store. Here's what it looks like all finished up:

The new location seems better in every way. The vacuum tubes are shorter, the pump is better protected, the exhaust pipe doesn't need to exist at all. I don't know why they don't put it there in the first place. I'm pretty happy with the mod though.
More coming down the pipe. I'm not planning anything too crazy (yet), but there's a few more things I want to do that I feel like I'll really use. I was skidding logs with this vehicle, and had offroaded it, before it hit 200 miles. Given that, I decided I should spend the energy to make it nice for how I want to use it.
Trivial Jeep "mods"
2014-11-08
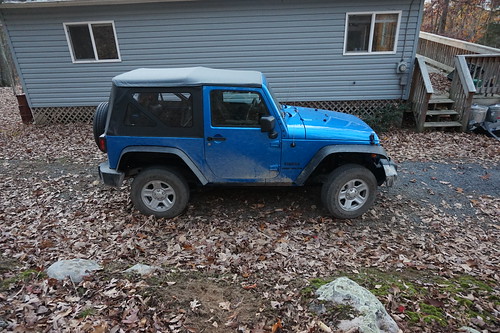
Well, I got a Jeep. You don't get a Jeep so you can keep it stock. I'm starting easy.
Part of why I got a Jeep is so I would learn more about cars. The stuff here is the super-easy not-too-educational stuff, but you gotta start somewhere.
I didn't buy a hitch on my jeep when I got it. At the time I thought I'd get a bumper with one built in. Anyway, this was $55 on amazon, including wiring harness.
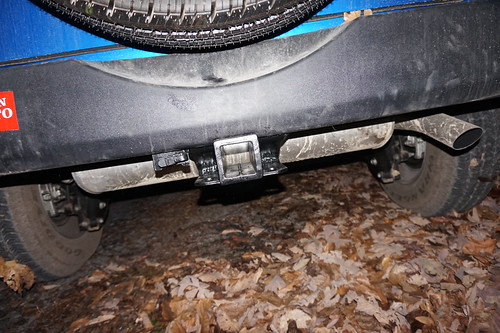
To mount it you just pull the bumper and bolt it on. The wiring harness (like most) is just a jumper that takes off from the plug on the left-side tail light. I've been spraying more undercoating whenever I expose a new part of the Jeep and this was no exception.
The well known mirror drain mod turns out to be unnecessary on the 2015 Wrangler. I drilled it first. Later I removed the mirror to use to look up our chimney (we didn't have any other mirror in the house, I guess I don't touch up my makeup enough). Apon inspection they've added a notch to the gasket and set it up so it seems to drain properly. It's been raining a lot and there was no water in it when I drilled it, or when I pulled it off.
Chrysler, in their infinite wisdom, didn't put drain holes in virtually anything but the main tub. I went through and added them to the plastic tray in the back:
I unplugged the doors a while ago to so it doesn't "ding" when they are open. I hate that feature in all cars, and carefully broke it in the Tacoma as well.
Lastly, I have no pictures for this, but I purchased a flash-cal. This lets you tweak the computer in a number of interesting ways. Some are only relevent to automatics, but a bunch are useful. I adjusted the front lights so I can use highbeams and fog-lights at the same time (I mean, why would you interlock those in the first place?) I tweaked the front-light timeout which for some reason applies when you turn the car off and then turn the lights off (ANNOYING!). I set it to one second so this doesn't matter. I tweaked the one-touch turn-signal, which again drove me nuts. I hate things with timeouts like that, let me flip a switch on, and then off.
Annoyingly it wouldn't let me adjust the stereo timeout. The stereo keeps playing after I turn the ACC off and then turns itself off about a minute later. I find this rather annoying. I'd much rather it just switched off instantly. Oh well. I suspect there's an update that would let me do it, but I haven't gotten the update software to run under wine yet (windows installer DLL hell).
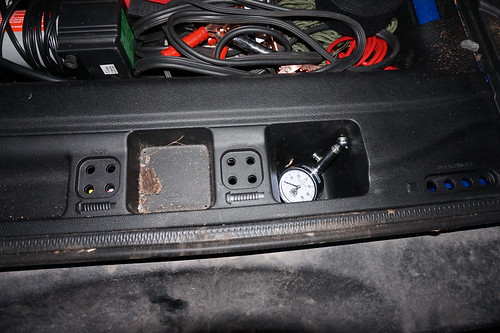
The original impetus for purchasing the flashcal was so I could fix the TPMS and speedo when I upsize my tires (current plan is 33"). I already tweaked the TPMS so it won't complain until I'm below 20 PSI. I'd rather go on handling and watching the tires carefully than a light anyway. You may notice the tire guage in the last picture.
I've got lots more planned. I'm just doing the super-easy stuff first. I already have a kit for relocating the vacuum pump, but haven't gotten up the gumption and a couple consecutive days where I'm willing to break my daily driver.
UPDATE:
I learned several things today:
- blogger's comment system is still totally hosed, after several attempts I've been unable to reply to the comment on this post. I've been intending to migrate the blog elsewhere at some point.
-
Indeed, said comment is 100% correct for VA. I found the regulation:
http://leg1.state.va.us/cgi-bin/legp504.exe?000+reg+19VAC30-70-160. It's I-11-G-1. So, I'll probably be undoing that particular mod. Thank you very much for the comment!
New trailer
2014-11-08
I just bought a trailer.
This in and of itself isn't that interesting, but I thought it might be interesting to explain why I got a trailer, and how I selected this particular one.
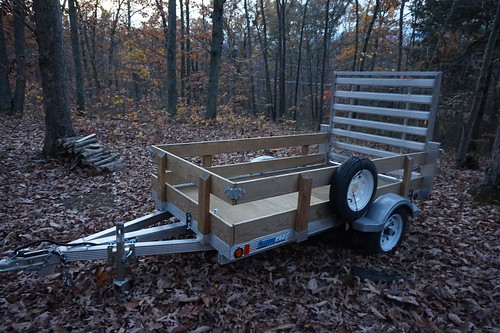
(the wheel on the side is attached via bungee cord, I did that after I got home)
As Jess and I were working on how to acquire wood, we noticed that if we could move it ourselves it would be a lot cheaper. This was kind of my plan from the start. In fact, I originally considered getting a serious tow vehicle, rather than the jeep, but decided to scale it back and see if I could get away with a smaller and cheaper vehicle. I adored having a pickup truck (as you've seen from previous posts) and wasn't about to give mine up without a plan to be able to move *more* than my old pickup, not less.
As an amusing aside, I can't rent a trailer from Uhaul. They have a somewhat esoteric and odd rule that you can't rent a trailer with an soft-top SUV (soft-top cars are fine). It's kinda weird. Otherwise I might've rented once or twice before purchasing.
So, I started looking at trailers with two purposes in mind. The first is just moving "stuff". Furniture, building supplies, whatever. Basically, the stuff I've moved in the pickup in the past. The second is to move firewood, something I would not have done in the bed of our little pickup. The wait capacity of anything short of a full-sized pickup just isn't sufficient (I looked at those a while back, and they are expensive). I *could* do it in a tacoma like ours, but I'd want to reinforce the frame, probably do a different suspension than we have, and we'd still be left trashing the poor clutch on the little 4 cylinder. In short... it would be very hard on it.
Common firewood here is oak, hickory, and locust. These are all wonderfully dense hardwoods, great for heating. That means a cord of these woods weighs ~4500 lbs, even dry. This should make it a bit more clear why I don't want to do it in the bed of a light pickup.
My jeep can pull 1 ton (including the weight of the trailer), a cord of firewood weighs ~4500 lbs. A lot of 1-1.5 ton trailers are 700 or even 1200 lbs. That would only leave 800 to 1300 lbs of actual wood I could haul in a trip. It would take me 4-6 loads to move a cord of wood!
Given that I was looking for the lightest trailer I could. I'm not going to weigh the wood before I load it - just estimate, so something that won't fail if I accidentally overload it a bit is also important. With my vehicle it's clearly weight that limits how much wood I can haul, not the size of the trailer. For the other purposes I wanted between 4x6 and 5x8 (pickup truck size), just so it's easy to deal with and weighs less. As it happened the trailer place had 4x8 in stock... works for me!
My new trailer has steel wheels and plastic fenders.
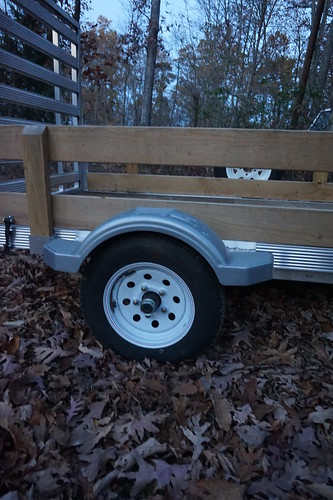
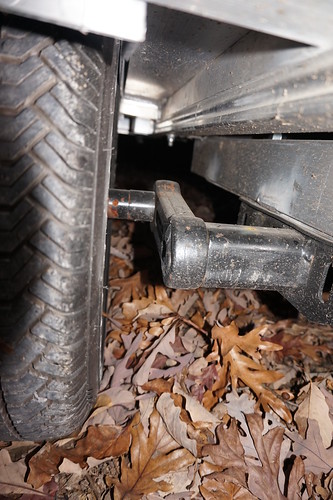
The suspension is something I haven't seen before, a swinging-arm system sprung at the axle. The salesman said the axle is rated to 3000 lbs, thus meeting my "can handle mild overload" requirement.
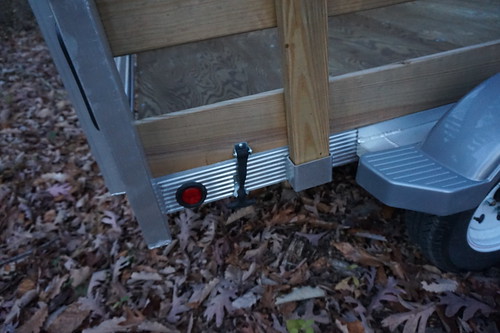
It's also got a wooden deck and sides and aluminum frame. The sides are held on with funky rubber things to reduce rattle I guess. It seems to work, the trailer is surprisingly quiet (well, as judged when pulled behind a soft-top jeep :P).
It's ~300 lbs empty and just over a 1 ton GVWR. That's perfect to maximize what I can move with the Jeep. As a bonus, being aluminum, the trailer shouldn't rust. I considered getting something rated a touch higher, but it didn't seem worth the cost and would've reduced my practical load capacity anyway.
My hope is that I can load a bit in the jeep as well as the trailer, and it should actually make the whole thing safer. So with a bit of the wood in the jeep I should be able to haul a thin 1/2 cord of hardwood, or a generous 1/2 cord of softwood. The previous tenent in the house I'm in now burned ~3 cords a winter, so that would be 6 loads. It's a fair number of trips, but sane... unlike say 12 or 18 trips.
That's all the theory... it pulled great on the way home (2.5 hours on the freeway). Once nice feature is being only a 4 foot wide bed the wheels land entirely inside the jeep's wheels. I didn't measure, but it felt like the wheels tracked maybe 2" inside the jeep's wheels on any reasonable turn. That makes pulling the trailer much less scary.
The one thing I don't like about it is the giant sail of a rear gate. I got >22mpg on the way up to PA, and about 15mpg on the way back... ouch. To be fair I think I had a tail-wind one way and a head-wind the other, but still. Oh well, I didn't buy it for high-gas-milage, I got it for doing things I can't do without it.
I'm not sure if I'll actually use the trailer to haul wood this year, we'll see, but now I have it so we have the option. I'm sure it will get use hauling all sorts of other things though, and this way I won't have to borrow Jess' truck all the time.
Cutting wood
2014-11-03
I'd like to open this post by saying that I only sort of know what I'm doing. I cut wood as a kid, but figured a lot of what I know out by reading. That said, I thought I'd write a quick post about some of my recent experiences cutting wood.
First step is to fell the tree. We had a dead tree that was leaning heavily over the driveway. I wasn't sure that it would make it through the winter without blocking us in, and we needed the firewood. So I dropped it. My biggest concern was that I'd block our driveway, and then be unable to cut the tree before we wanted to go somewhere. Jess was gone at the time though, so I figured we'd have at least one car free.
This tree was leaning quite a bit. A mostly straight tree will be converting fairly little potential energy into kennetic in the first few seconds of the fall, making them relatively safe. A leaning tree though is read to drop fast, so they are much more dangerous to cut.
Also, a live tree is flexible, this means when the tree starts to fall the remaining wood will act like a "hinge". If all goes well this "hinge" stays attached to both the stump and the tree. That's great, because then the base of the tree isn't going anywhere *else* (like through your head).
So, all that is to say that this tree was a dangerous tree to fell. Given that, I wouldn't even consider using a chainsaw (I wouldn't use one alone anyway, besides that I don't own one). The noise would keep me from hearing the first moments of the tree dropping, and the speed would cause me to cut a lot away in the last moments, possibly causing a catastrophic drop. I could've used a handsaw, but a handsaw is likely to get pinched in this sort of tree. Also, it would put me much closer to the tree, and likely in a crouching position. So, instead, I used a nice long-handled axe.
Here's the resulting stump
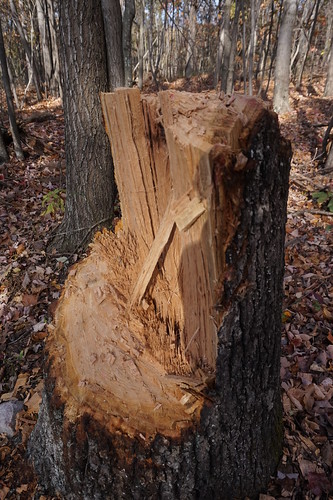
Notice how far I cut the back notch above the front... I wanted a serious ledge to keep that tree from kicking back in case it broke free. As it happened this wood was wetter than expected and the tree hinged down very very slowly. You can see the fibers from that hinge on the stump, just in front of the split, and behind the area I cut with the axe. It dropped so slowly that I ended up walking up several times and whacking it a bit more to get it to actually drop. You can see the results of that here:
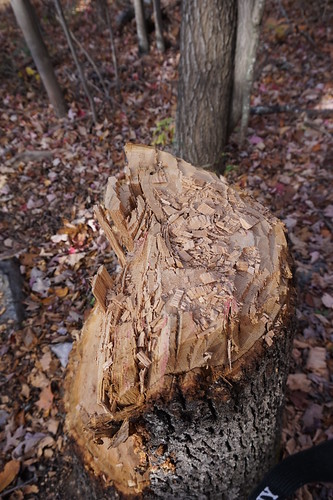
If you look closely at this you can see that I was hacking down into the split taking out more chunks of wood trying to get the tree to drop.
The drop worked perfectly. The top of the tree was mostly rotten, so it broke just at the top of the main trunk. This was ideal for me. It left two sections small enough that I could pull the jeep up and drag them with my 30k lb jerk strap, just like I've done in previous posts. This is how I cleared the driveway. The jeep has 2 front hooks, so I wrapped the strap around the trunk, and hooked each end to a hook, thus ensuring that I balanced the load and didn't risk twisting my frame.
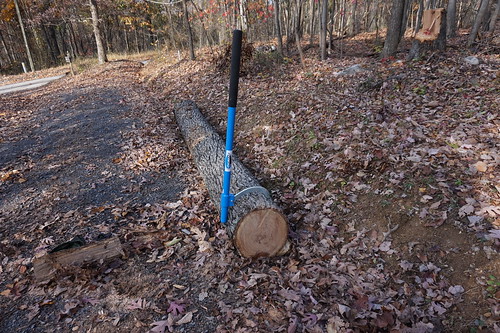
The next challenge was getting the log up on something. With any saw you don't want to cut in to the dirt, so if you can you want to get the log up off the ground. Sadly, I didn't think to take photos, but here's what ended up working. I took my highlift jack and set it next to the log. Next I took a 2x4 and set one end on the ground on the far side of the trunk, and the other side on the jack, turned the direction in which it would be strongest. Then I took my 16k lb synthetic winch-rope (not on a winch) and ran this around the log, looping it through itself. I then tied a bowline in the tail, but with an extra 2 wraps around the 2x4 so it wouldn't slide down it. Using this kindof janky rig I got the log up off the ground and stuck a split log under it. So it looked something like this (this particular photo was taken later)
I then cut off a round or two. I have a great american tooth bucking saw I bought for this purpose. This tooth pattern is known for being a little hard to drive through wood, but fairly fast. I understand that it's also best used on hardwoods, or dry softwoods. Since I was working on dry hardwood it's probably about the best saw I could have had.
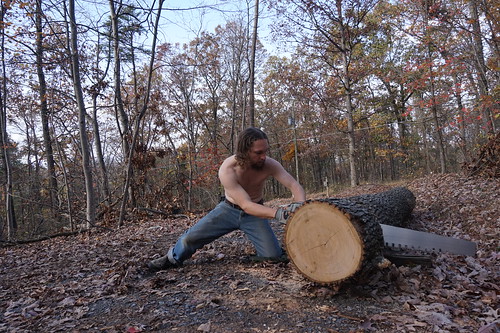
Working with this saw I can cut a round off the tree in about half an hour. Not too shabby. The only flaw is I can only do a couple a day without injuring my shoulders as they aren't used to this particular exercise. I'm a chicken and haven't brought myself to try sharpening the new saw yet, I'm sure I could cut more efficiently, but I want to wait until sharpening it will definitely make it better. For now I could easily make it worse.
One thing I might change is the length of the saw. This one is long enough, but I often end up sawing partly with the starter teeth on the end, rather than just with the good teeth in the middle. It's perfect for smaller logs, but if you were cutting this size logs a lot, I'd go a little longer.
I've been using a trick I've seen people use in crosscut competitions where they spray the blade with oil occasionally. I've been using WD40. I'm sure it's not optimal, but it'll be good for the blade and it seems to work.
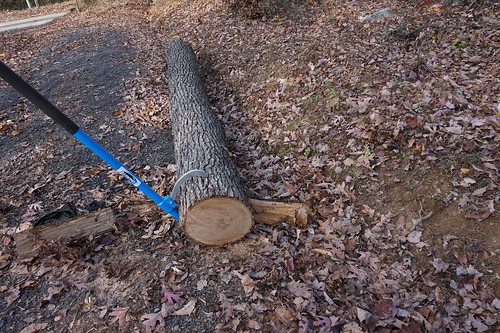
Occasionally though you have to shift the supports for the log, so you can keep taking off rounds without pinching your saw (and dropping it on the ground again). To do this I've been using the scissor jack from my jeep. It works okay, though I think I'm stressing it a little because it's so low down.
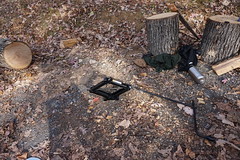
Of course, this is only one point of contact, and sometimes it doesn't work so well... oops! it's back in the ditch.
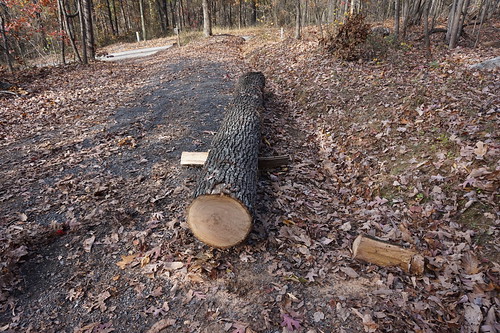
I recently purchased this aluminum handled log roller, and decided rather than dragging the log out with the jeep again, or trying to get under it to jack it, I'd dry rolling it. You can't really get it in one move, but I found I could capture progress by bracing with logs.
And eventually I had it off the ground and up on top of logs again. I'm not so sure about this technique though. In some situations I can imagine it being perfect, and with two people it would be a lot safer. Alone it's hard to hold the log in it's new position, and handle moving something to brace it. Still, highlift jacks aren't exactly safe either, and neither is dragging things with a vehicle. I think I'll just pick whichever looks best for a given problem and go with it.
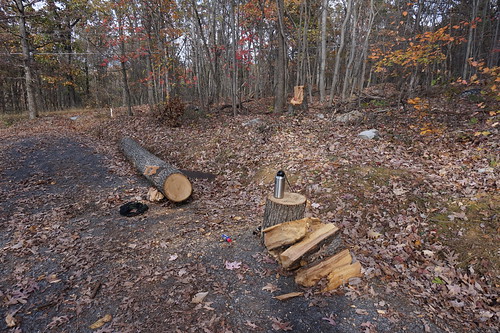
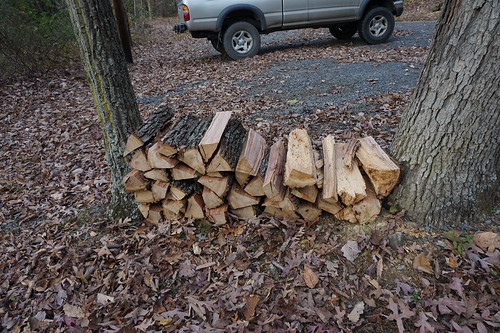
Below is 4 rounds split and stacked (the slightly rotten ones are the top round off the trunk, where the tree cracked when it dropped), and about 1/4 of the main trunk. So the wood below represents maybe (and this is really rough) 1 hour of tree dropping, 4 hours of sawing, and 20 minutes or less of splitting. So <6 hours of work.
I could've gone out and got a chainsaw, but I was really curious to try it just with traditional hand-tools (well, and a really nice aluminum log roller... the bit with the jeep was to clear the road, I didn't have to do it). I'm a far cry from the quantities I've read of people cutting, and I have to spread those 6 hours across several days to avoid injuring myself. But hey, they knew what the heck they were doing :P.
While an interesting experiment, I didn't have time/energy/inclination to cut nearly enough wood. I do still have a day-job and we had a lot to do after moving in. So, we picked up some phone numbers at the hardware store and Jess is going to order some firewood within the next couple of days :P.
Homemade shoes
2014-10-05
I've been wanting to make shoes for a long time. I've made gillies, but while they were cool, I never got one that was really useful as a generalized standalone shoe. I've tried a couple moccasin designs, but never quite got it to work out.
Recently I bought a pair of original run-amoc moccasins from soft-star shoes... I just looked at their website, and can't find them, so they must've canceled them. Anyway, I like those shoes enough that I just wore them on a 4 day backpacking trip. They have been my primary shoe since I bought them in the spring.
I looked at the design, and loosely based a shoe on it. It's really just a basic turnshoe, the the trick comes with the heal flap going *under* the toe-piece this allows the lace, which runs around the heal, to pull the heal forward when you cinch it, thus pushing your foot up towards the front of the shoe towards the tongue.
Here's my attempt at a shoe using this idea:
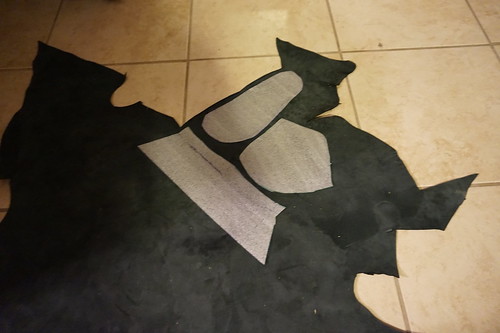
I started by tracing my feet, and adding a seam allowance. The top of the shoe I literally just pulled the material over my foot and traced around the outer edge. For the pattern we used some left-over shipping foam that came from something we'd received.
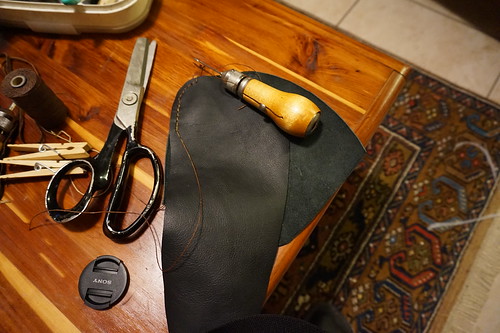
I simply saddle-stitched it together, nothing magic here. Notice that I'm stitching it with the shiny-side out. This is because although the design that inspired my shoe is a turn-shoe I decided I'd had so many failures I wanted to really keep it simple, so I did this shoe as a simple-shoe rather than a turn-shoe. Fewer things can go wrong this way.
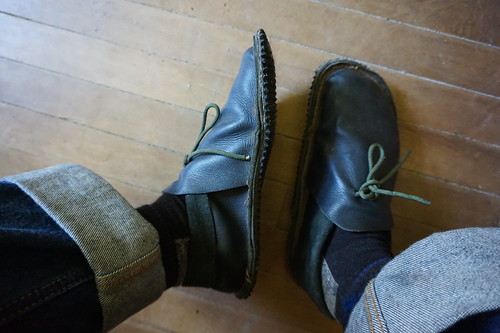
Here's the completed moccasin with the single-layer leather bottom.
Knowing that wouldn't cut it, I glued a sole to the bottom using some barge cement. To get it to to join properly I filled a bag with beans and stuffed this in the shoe for a little weight. The seam around the edge tends to pull off the shoe, so the clothes-pins here are to hold it on.
That glue-job was sufficient for about 3 days of wear. I took them to a primitive skills gathering in South Carolina (falling leaves) and the sole started to fall off :(. Fine I said, and stitched the sole on using saddle stitch. That worked okay, but I went just *inside* the existing stitching, so the shoe shrank by a half-size. This pushed my heal back a tiny bit. This caused my heal to stretch the heal-cup backwards a little, so now if I take long-strides the seam on the back sometimes lands under my heal. It's also possible that the leather choice is just wrong. This is a chrome-tan thin chap-leather, a different leather might help, prestretching it, etc. I'll have to experiment a bit.
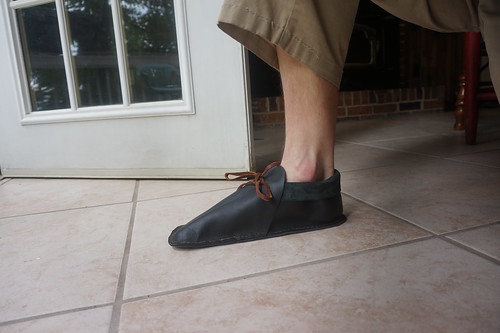
I almost wore them on our backpacking trip instead of the purchased shoes that gave me the inspiration, but I got nervous about the heal-seam problem and chickened out. They are totally wearable, and I would consider the project a success, but before I want to call this a solid design I'd make again, I need to solve the heal-stretch problem so I can backpack in them.
Note BTW, that the entire shoe is only the seam running around the sole of the shoe, and then a second one for the sole. That's IT. The string runs around my heal, and the leather is just folded over over it, and that seems to keep everything in place fine.
A pair takes maybe a day to make, probably less time the next time. that's pretty awesome actually! Notice that the top photo has p-cord for lacing, even though I was using leather initially. Another flaw is that the tension on that cord needs to be pretty high, to hold the heal forward. Because of that I broke on of the leather laces and decided to just switch to p-cord for now.
Not a bad experiment! Jess is still working on a pair made as a turn-shoe, using leather she made herself out of deer-hide. I can't wait to see her final shoes. In the meantime, I'll continue wearing mine looking for other flaws to look in to in my next design.