
Hiking and Backpacking in Mendocino
2013-09-05
A while back Jess and I looked at what search terms brought people to our blog. One of the top searches was "hiking" or "backpacking" in mendocino. It turns out that very few people do this, and of course, even fewer blog about it, and people are curious. Our previous posts are just specific trips, so I thought I'd write an overview of backpacking in Mendocino National Forest.
Our past posts
- http://www.blog.smalladventures.net/2010/04/trip-report-mendocino-national-forest.html
- http://www.blog.smalladventures.net/2010/09/mendocino-first-foraging-attempt.html
- http://www.blog.smalladventures.net/2010/07/swimming-river.html
- http://www.blog.smalladventures.net/2010/11/building-wickiup.html
Summary
For the bulk of backpackers I can summarize this post very easilly. There's a reason no-one posts about backpacking in Mendicino National Forest. Terrain-wise, Mendocino is one of the most difficult places you can backpack. If you don't read this blog, take a quick perusal and you'll see that this is not said lightly. I'm no stranger to tough terrain. If you are looking for a walk down a maintained trail and a clear campsite. This is not the place for you.
If you are looking for somewhere where you will not see ANYONE else. Where you can drive deep into the forest. Where you can follow deer trail for miles, build shelters, and really challenge your abilities on steep terrain and through dense brush, Mendocino might be just your place. Just watch out for the pot grows. I've never run into one myself, but they are definitely out there.
For backpacking in Mendocino there are just a few major points.
- There are (nearly) no trails
- It's steep
- The water is hard to get to
- The brush is often VERY dense
Trails
There has recently been an effort to build some honest-to-goodness marked trails in the forest. I personally know of one such trail, though in Covelo at the market there (sadly I forget the name) they have a packet of several of the trails they've been trying to make official.
That said, functionally? There are no trails in 99% of the forest. This means that if you don't want to walk where you could just drive (there are lots of roads), you need to bushwhack, and this brings us to most of the other points in this post
It's very steep
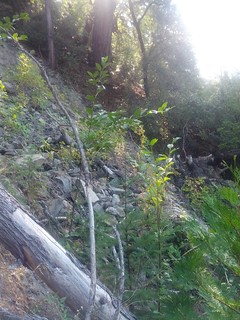
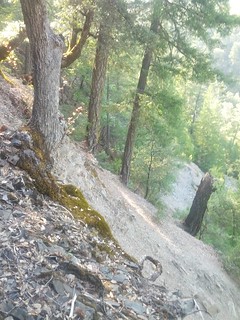
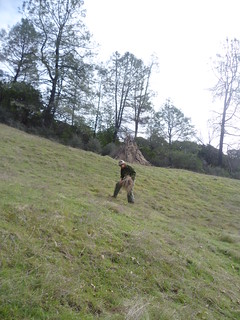
Most of Mendocino National Forest is very very steep. I often find myself sidehilling on deer-trail on terrain where I can just barely walk without sliding down the hill. I am now extremely skilled at walking on steep terrain, to an extent where I'm perfectly comfortable walking where most folks, even who do backcountry, would likely want a rope. The soil over most of the Forest is only a very very thin layer of loam. Just under this layer it varies from nearly sand to quickly rotting rock. So the footing is never solid on these steep slopes. The best footing is usually just behind a tree, so you're moving in quick steps on a sliding hillside from behind one tree to behind the next - carefully placing the edge of your foot into the slight depression made by a deer trail.
There are ridges of course, and there are rivers. This brings us to the next point
The water is down there
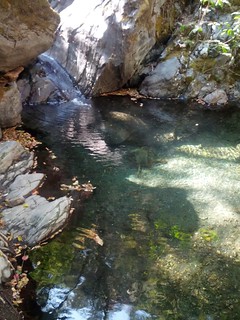
As you drive through the forest, you will see almost no water. The lakes and such that exist have campgrounds around them, so are no fun for backpacking. So why so little water? Southern Mendocino is nearly desert in many areas. So here it's not so surprising. If you are good at finding water you'll find small trickles and such in streams occasionally even in the dry season. There *is* water here. In Northern Mendicono there's a lot of water, you can see it by the trees that grow there. What took me a while to figure out is where the water was.
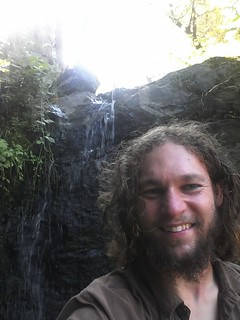
I'm a little dense sometimes, but eventually I realized that I couldn't find the water near a road because the water is all at the bottom of steep walled canyons. The roads don't go into these canyons and instead skirt the edges up much higher. In the northern part of Mendocino there's actually quite a bit of water around for pretty much the entire year! You know how I mentioned the soil being sandy? Well, this means the water runs through it quickly and carves it away quickly. This is likely the cause of the extremely steep slopes. As a bonus though, it means there are beautiful waterfalls in virtually every stream.
The brush gets very dense
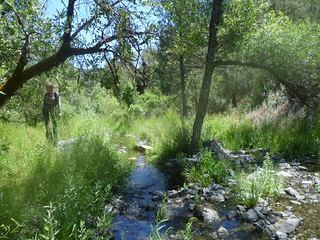
It's hard to get a picture conveying dense brush, but here's an attempt. Here's Jess in a very open area, in a drainage.
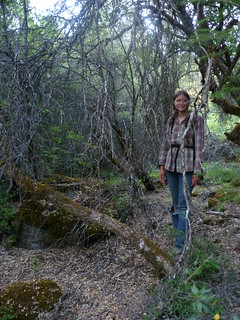
When I say very dense I mean that it gets dense enough that two fit people used to bushwhacking took about 2 hours to go 1/4 mile and came out completely and utterly exhausted and somewhat bloody. We're talking walking 4 feet off the ground on top of brush and pushing it over in front of you because it's *slightly* to close together to walk though, but still has trunks barely smaller than my wrist. If it's slightly farther apart the trunks are large enough they can't be pushed over and you're reduced to belly crawling on your side between them, dragging your backpack behind you. These are the worst where it's dry.
In the north there's more water, so there are more often comparitively open forests rather than dense manzanita. The tradeoff is that there seem to be steeper hills. In general the going isn't too bad as far as brush if you are under dense tree cover, but often those areas are extremely steep. Also, at some point you need to get to water, which probably means sliding down slope, or you may need to traverse a southern slope to get to the next ridge. Be careful and make sure you have the skills or equipment necessary to get back out of the valley if you go down. I've walked for 3 hours downriver without seeing an easy escape route.
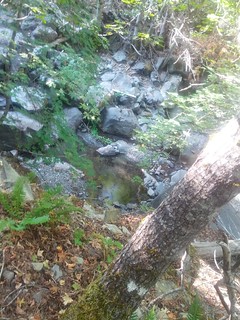
In the south about halfway up northern slopes there are often open fields. These are the best campsites as it's dry and open and there's water access (down a very steep hill). Besides this any upland area, south-facing or tops of hills, are nearly impassable. Because of this Jess and I prefer to travel via the drainages where you'll need some bouldering skill, but it's generally passable at least.
Conclusion
I promise that I'm not trying to keep the forest to myself. It is gorgious. If you want to challenge yourself with some really awesome bushwhacking, and go somewhere where you will not see any other people at all, Mendocino is absolutely amazing. Every time I go I get to see wildlife. The northern end where it's a long drive to get into there are a lot more game species and they are a lot less flighty so you get to see deer and the like.
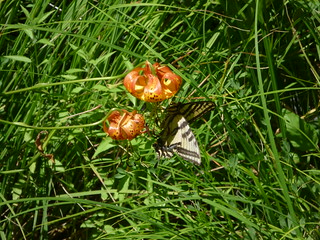
One awesome bonus is that it's a National Forest, NOT a park, and much of it is not useful for logging. This means you can go out there and do things like build shelters without breaking any rules, as long as you use already downed wood and don't remove any from the Forest without a permit, something like a survival shelter is pretty legit, and of course Hunting and trapping is fine. So if you're looking for a place to bushcraft, and you're up for a bit of a challenge, I highly recommend it.
Final Note
I believe previously we stated that it didn't rain in the summer. This is false. I was rained on twice in August. Rain is rare, and it'll pass fairly quickly, but it DOES rain on rare occasions, and when it does the temperature drops. Just be aware.
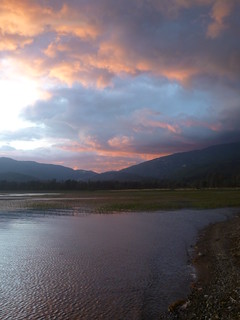
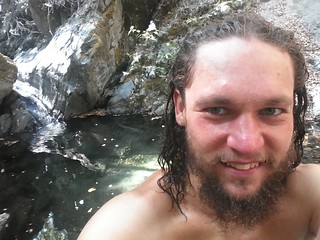
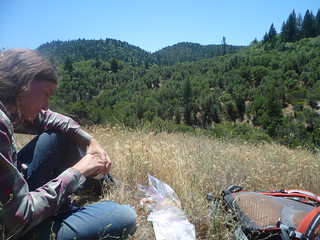
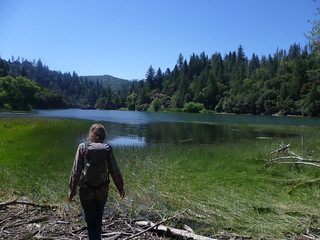
I tend to take pictures of water, so these are not very representative. I lack good photos of a lot of the really brushy/deserty areas (most of the park), sorry about that. Still, these are something.
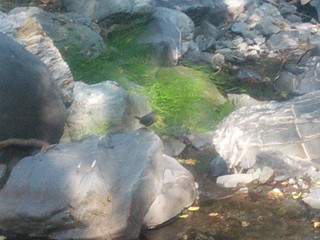
These little birds will flit down the stream over and over again in front of you.
Archery: Building Arrows
2013-09-05
I went to several archery shops and couldn't find an arrow I wanted. My requirements were:
- Correct spining: ~1716
- Relatively large feather fletch (not plastic)
- 28" long
- heavy tips
In other words... this:
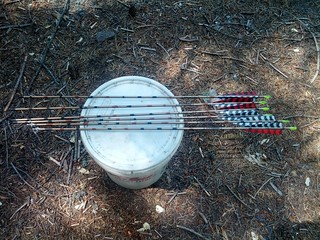
Well, to get that you have to get custom made arrows. Most shooters and thus most archery shops are targetting compound hunters. Usually these are hunters who shoot compound just so they can hunt in the archery season in addition to the gun season. Because of this they tend to shoot with all the fancy wizbang stuff, and with extremely heavy draw-weights (taking advantage of the let-off of a compound)... thus requiring extremely stiff arrows. As a result there are few arrows or shafts available below 1917 or so. Additionally it means most shops tend to sell you too stiff an arrow because it's based on poundage - but a recurve or longbow doesn't have as efficient of delivery of that force into the arrow (even more so for self-bows and such), so you'll generally need a softer spine for the same poundage.
What I found though was a shop that sold me 1716 aluminumarrow shafts. They also had feather fletching, 125 grain tips (a little light, but it'll do), knocks, and glue. Sadly they don't sell B50 (bow-string), but it seems no-one does you have to order it if you want it.
Well, I could pay them a bunch of money and wait for them to build the arrows, or I could do it myself. You can probably guess by the title of this post, and by the rest of the blog, what I did.
So, a few tips:
Start with the inserts
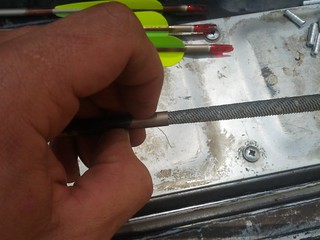
The arrow shafts aren't absolutely perfect, so before you start take a round file, stick it in the end of the arrow-shaft and spin it a little. This cleans out burrs that wil stop the insert from going all of the way in
Put a touch of glue on the insert, it doesn't take much, and then push the insert into the arrow shaft
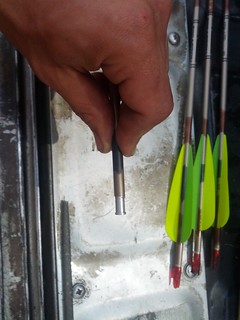
Put it in relatively quickly, have a flat surface handy and push HARD to make sure you get it all of the way in. If you're wondering about that picture, some of the arrow shafts I got were plastic fletched. I'll just strip the plastic off when I get around to fletching those (I only did 6 so far).
fletch
This is the fun part. You can use a jig and stuff, but chances are you don't have one (I didn't). Take a piece of paper and wrap it around the arrow shaft, starting at the end, Where it crosses itself mark the paper.
Measure the paper and divide in thirds (assuming you're doing a triple-fletch), mark this or another piece of paper with those increments, include all 3 so you can be sure you have the paper wrapped tight around the shaft when you're marking.
Figure out how far from the knock you want your fletching, something like 1.5"'ish... it's your choice really. Measure down and make a little mark you can see on the arrow. Here, use the paper you just made to mark 3 spots around the shaft. This will get your spacing right
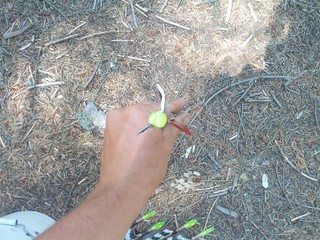
To glue on the fletching. Put glue fairly sparsely on the fletching. Start at the *back* (the wide part) of the fletching and work towards the front. This is important so the glue dries in that order. Place the back on the arrow in the right place, don't try to hold the whole thing on as it won't work, just an inch or two worth. Hold in place for 20-25 seconds, this is enough for the glue to pretty much set. Now take the front and place it where it needs to be, and hold again for 20-25 seconds.
Move on to your next fletch
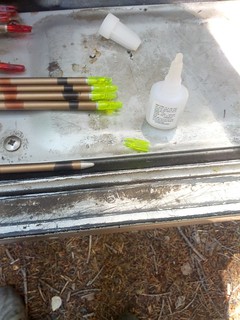
Then install the knock
The only reason I suggest doing it last is that then you don't have to think about it when you're fletching. You'll note from the photos that I did it in the wrong order. Take your key-feather (the one that's a different color) and place the knock so the key feather points wherever it is you want it to point. For me I like my key-feather to point away from the bow, this seems to work well for shooting off the shelf. There's no trick to this at all, just put some glue there, and shove the knock on... done.
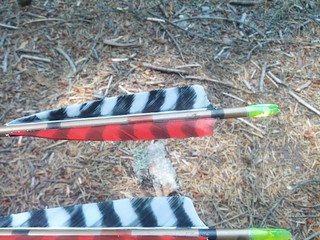
A little trick
To keep your arrow-tips from unscrewing, rub the threads in wax before screwing them in.
That's it!
You have a set of arrows. It really is incredibly easy. Personally I don't rifle my fletching, I've found that I don't care much and It's definitely quiter to straight-fletch, other's will disagree. If you want to rifle the jig becomes a lot more critical. Doing a straight-fletch I was surprised at how straight I could get the fletching.
Eventually I'd like to make arrows from scratch (along with a lot of other things), but it's always nice to have made what I use. It means I know it, understand it, and can make exactly what I want or need. It also means that I am more likely to be able to repair it. For archery: I made my quiver with commercial leather. A friend made my string with commercial material. And now I made my arrows with commercial parts.
In defense of drinking unpurified water
2013-08-29
I wanted to post this just so I'd have it to refer to as it's such a common topic of conversation for outdoors enthusiasts
So, everyone you talk to will tell you that it's (in a basso important voice) "Very important to purify your water when in the backcountry". Okay... great. And before we get rolling, let me be clear, I'm not saying to stop doing that! Your risk, your body, your hike. I just want to explain the facts, and my views on the issue.
Now, try backpacking in the Sierra and chatting with some of the Rangers who've worked up there 20 or 30 years. Guess what? A lot of them don't treat their water.
Okay, so why the disconnect, what's going on here?
I'm going to leave cryptosporidium out of the conversation entirely, as most popular filters in the US don't work for it anyway, it's a moot point. So lets focus on Giardia, as that's the one everyone is always worried about. Note though that there are a LOT of bacterials, a lot a lot, and that these are more common than Giardia. You should be suspicious whenever a friend says "Oh yeah, I got giardia once, on this weekend trip from drinking the water, we had to leave the next day". Giardia's onset is not 24-48 hours, it's more like a week (see facts/citations below). Gastrointestinal problems can be a pile of different things. Shigella bacteria for example.
Facts
- Giardia is basically limited to the digestive tract [1]
- Giardia rarely hits you in less than a week [2], but can occur after 3 days [4]
- Giardia is the most common NON-BACTERIAL cause of gastro-intestinal diseas [3]
- Giardia can be caused by as few as 10 human sourced giardia cysts [4][5]
- Giardia is highly temperature sensitive. Both cold and warm temperatures kill it. [4]
- Giardia can cause no symptoms at all [3][4]
- Ill effects for healthy individuals are restricted to discomfort, dehydration, and vitimin deficiencies. [4]
- Standard treatment is a round of antibiotics [5], though healthy individuals usually pass it within a month [6]
- The disease is most infectious within a species, but does appear to species jump fairly easilly [4]
- Giardia is primarilly acquired via ingestion of infected human waste [5]
- Untreated Giardia can cause more interesting complications [6]
- Most of the symptoms of Giardia can be caused by dehydration - my citation? If you've been badly dehydrated you know what I'm talking about.
- I'm having trouble finding the citation now, but there have been a couple studies done basically saying that the vast majority of all cases are human-human direct cross contamination. This was particularly in the setting of backpacking. Additionally some water studies have found that while it is there in some rivers, it's not incredibly common.
My thoughts
To me, drinking water directly from a river or lake is a very important experience. It's a spiritual or religious thing for me. For the same reason as I try and reduce my gear such as on my recent Lassen trip. When I went back to find my knife, I knew that place. I had bonded with it deeply, spiritually. Every piece of equipment and gear between me and that environment gets in the way of that experience for me. The feeling is stronger with a locally built shelter than a tarp, and stronger with a tarp than a tent. So, to me, it's worth a certain risk - even beyond weight savings - to drink the water straight.Giardia is very easy to treat. I'm having trouble finding a reliable citation, but there's a LOT of anacdotal evidence that grapefruit seed extract (as well as a number of other simple treatments) are extremely effective. There are no lasting problems if it's fully cured, and some people even become immune [3].
So, will I get sick from Giardia or something else in the water? Yeah, it's not unlikely. On the other hand, most likely I'll treat it, be sick for a week, and that'll be that. To me, that's worth a lifetime of drinking pure sweet water straight from the source, and not fiddling with gadgets to do it. We'll see if my opinions change if I get sick.
And for gosh sakes, if you are going to go to all of the work to treat your water, Wash your hands! . Wash with water (and not in the stream... duh), and some soap. Interestingly actually, water is more important than soap.
My point here is just to say, consider the risks. This is always true, but when it comes to "medical" conditions people seem to shut off their brains and just listen to what they are told. Think about not only how likely something is to occur, but how bad would it be if it did? And *reconsider* for different places you might be. The risk of getting Giardia in the Sierra is relatively low, but where there are beavers, or worse muskrats [4], it increases. Outside the US is a whole different ballgame. The likely result is also a lot worse if you flew deep into Alaska by bushplane, and don't know any local treatments or have the right stuff, than if you're on a weekend trip and it won't matter until next week when you'll have to take 2 days off work and sit on the toilet a lot.
One more little point. If you are thirsty and you are not going to get pure water soon... seriously, consider the alternative to drinking that water? I personally drank from what amounts to a hog-wallow without treating (I actually scared the hogs off). I am alive here today, and in fact didn't even get sick. I'm not sure how I would've faired against the heat-stroke had I not drank that water, probably poorly.
So, as always. HYOH (Hike your own hike), make your own decisions, judge the risk for yourself, and deal with the results of those decisions.
- 1: http://www.who.int/ith/diseases/giardiasis/en/index.html
- 2: http://diarrhea.emedtv.com/giardia/giardia-facts.html
- 3: http://www.rightdiagnosis.com/g/giardia/stats.htm
- 4: https://www.google.com/url?sa=t&rct=j&q=&esrc=s&source=web&cd=2&ved=0CDEQFjAB&url=http%3A%2F%2Fwater.epa.gov%2Faction%2Fadvisories%2Fdrinking%2Fupload%2F2009_02_03_criteria_humanhealth_microbial_giardiafs.pdf&ei=2NAfUt6yCMn5iwKS2YHoAQ&usg=AFQjCNEmHfmYayouSXiZPx5sqWwilOuLQw&bvm=bv.51495398,d.cGE&cad=rja
- 5: http://www.cdc.gov/mmwr/preview/mmwrhtml/ss6105a2.htm
- 6: http://www.bccdc.ca/dis-cond/a-z/_g/Giardiasis/overview/Giardiasis.htm
Here Beaver are common and finding toilet-paper near a stream is sadly a daily occurrence. So, living out here I do treat my water. I may change my mind again, but for the time being I'm taking the conservative approach.
Look at where you go, get educated, decide what risks you want to take, and make your own decision. If you don't want to do all that, just filter and don't worry about it.
Update 2
I've actually returned to drinking almost entirely untreated water, even on the east coast. I still haven't gotten sick. Since Angie and I hit the road we've barely treated our water. We drank water straight from lake Michigan, as well as random streams, rivers, and lakes in the Ozarks, Adirondacks, Green Mountains, and White Mountains.
Random stuff
2013-08-28
One more post in this flood of posts :)
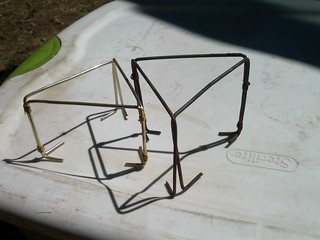
Here's a new pot-stand I made for car-camping. My old one (the one I used on the AT) was getting pretty janky, so I finally made a new one. It's just coat-hanger and trap-wire.
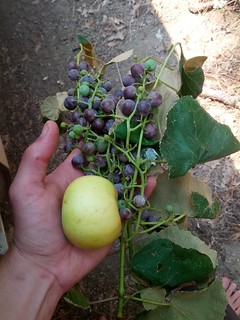
I was swimming in a nice swimming hole. A few other folks were there, when I went back to my truck there was a nice girl in her car who offered me grapes and apples that she had just picked. What an awesome breakfast!
Actually, the day prior to this a guy randomly gave me a CD of 60's music at a gas-station, it's a mix CD, good music. People are so cool
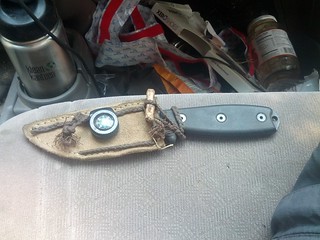
A few repairs to my knife-sheeth. I also stuck a button compass on it as I'm often out with nothing but my inhaler and the knife - and sometimes it's overcast and it gets hard to tell direction. It's nice to have the backup. Note that the button-hole is actually braided into the twine, this is MUCH easier to get open and closed than the old design.
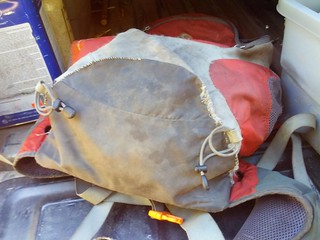
My old backpack is on it's last legs. I have plans to replace it, but it needs to last me a *little* bit longer first, in particular for some SAR activities in yosemite this weekend. So, I reinforced the seems that are tearing out. This is an Granit Gear Serrano. It's 25 liters and my general workhorse pack. It went to work with me every day for about 2 years, it's done a number of heavy bushwhacking trips and been ludicrously overpacked several times. A great pack that's seen better days. My next little pack will almost certainly be canvas so it can take the beating better.
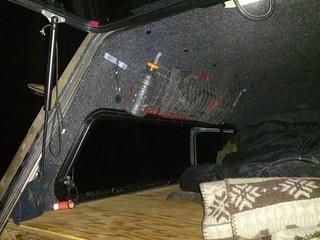
I suddenly had an idea a couple nights ago. I made curtains for each of the rear windows, they have velcro to stick to the inside of the cap. The velcro keeps sticking to random stuff, and they were just floating around loose in the truck. It suddenly occured to me that a little cargo-net to store them would be really cool! I learned netting a while back
http://www.blog.smalladventures.net/2012/12/netting.html
, but I'd never had a use for it. So, I sat down one evening and made a net, then sewed it to some velcro. This net makes me WAY happier than it should. It's so nice to make your home a bit more homely and well organized.
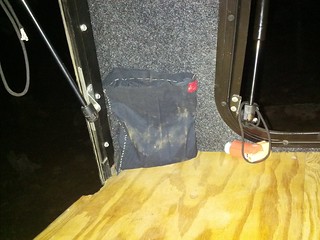
On a similar note here's a tiny pocket I made myself to store my inhalers and headlamp in the back. They kept rolling around and weren't easy to grab when I wanted them.
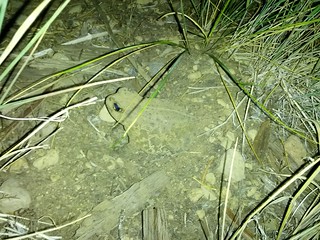
Lastly, here's a picture of a toad I found while going to the bathroom in the middle of the night. It scared me since it made snakelike noises when it moved. This guy is a little bigger than my fist (and no my hands are not small).
Bushcraft in Lassen National Park
2013-08-28
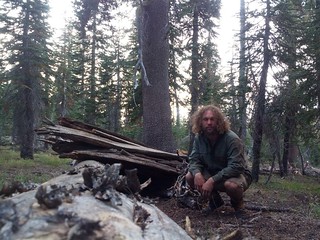
After my swiftwater class I wandered my way north on 49. I don't really have a reason, it's just what happened. Eventually I found myself outside Lassen National Forest. I stopped by a ranger station and picked up some large-area maps, they aren't topo, but they have all the little roads.
I decided to park in the Forest just outside the park and hike in on a trail that was supposedly there. Longtime readers may remember my last
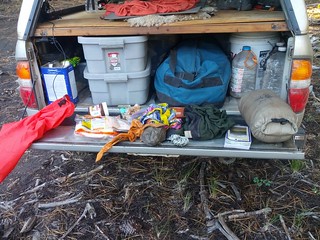
packlist
- external frame pack
- drysack
- sleepingbag
- wool sweater
- sorong
- jurkey, 2/3 jar of nutella, tortillas, 4 energy bars, small bag of nuts
- Emergency bivy
- Basic repair/fire stuff (firestarting, sharpener, needle, spare meds, etc.)
- belt knife
- ~40 ft of twine
- compass
- monocular
- rock-salt
- stainless steel water bottle
- plastic water bottle
- cellphone
- meds
- wool socks
- shorty gators
- cotton canvas shorts
- cotton/polyester blend canvas shirt (5.11)
You'll note a lack of things like shelter, raingear, much warm clothing, a sleepingpad, or any cooking equipment. It had been cold the night prior (not sure how cold, but pretty chilly, maybe 40s), so I wanted a sleepingbag as backup just in case.
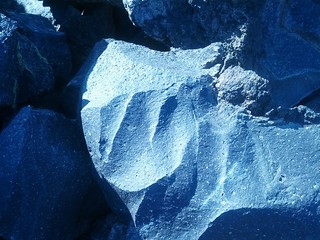
I had a pretty fun hike. It was hot so I was shirtless the whole first day exploring the cindercone, lavaflows and such. I was also in search of volcanic glass, you can see how it could form. This is closer to a chert, but you can see that it's starting to break the right way. It's got too many bubbles and is too inconsistant to be useful though, sadly.
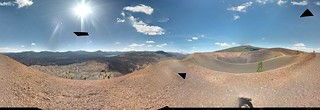
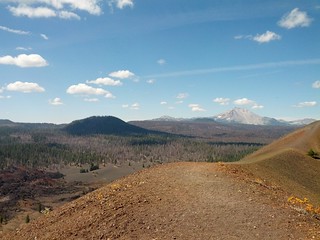
During the hike someone asked me if it was worth hiking to the top of the cindercone. Judge for yourself
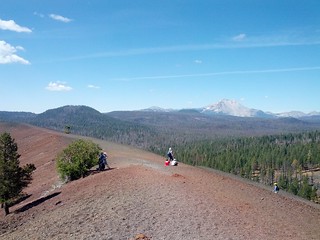
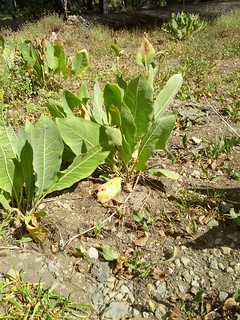
I got kindof sunburned actually. Once I realized this I started looking around and saw some mule's ear. I chewed it up, spit it out and put that on it. I knew mule's ear wouldn't hurt me to chew, and that when you mush it up it gets kindof gummy so might work like other moisturizers. It worked quite well. The burn hurt a bit to touch, and that evening and the next day it wasn't even red.
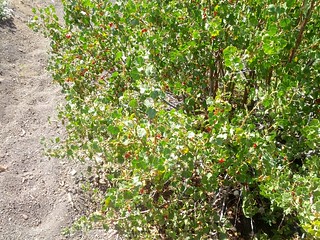
I also found some delicious Gooseberries. Yum! These might actually better be called currents (they are closely related) in any case, they were delicious.
Lassen is hard hiking due to the sand, especially in the northeast side where the cindercones all blew their tops. After maybe 14 miles I was sufficiently exhuasted that it was time for bed. I got out to national forest again (still many miles from my truck). The sky was threatening so I needed to do something about rain. I had no rain-gear or shelter except an emergency bivy. My backup plan was to slit one side and the bottom of the bivy and string it up as a makeshift tarp using the twine. As it turned out though my shelter worked out great, and only took maybe 2 hours to build.
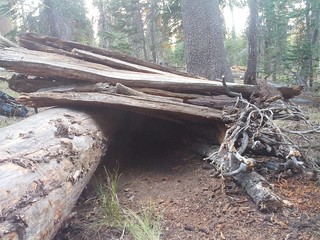
In the Sierra downed trees often rot so that the middle turns to dust but the outside takes longer. As a result you can pick up these sort of panels of rotting wood. This is about as perfect as you could ask for for shelter building. I found several such trees next to each other and a less-rotton log to use for one side of the shelter.
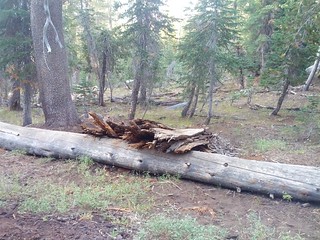
After these pictures were taken I spent some time chinking all the holes. This took at least as long as building the primary shelter. I figured I'd already protected myself from the wind. My goal now was to reduce air circulation so I could actually heat the inside up somewhat and use it as an insulating layer. This sort-of worked, but not as well as I hoped. I'll keep chinking in mind earlier in the process next time. You want it as sealed as possible. If I'd had a shovel I would've burried the whole thing.
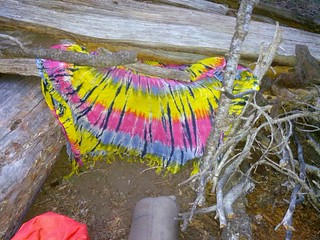
I had originally grabbed the sorong for gathering things I found and carrying them. As it happened though it worked perfectly as a door to try and cut down the air circulation further.
I started by trying to sleep in this shelter with just the canvas shirt, shorts, shoes and socks on. That didn't quite work, I was definitely okay and would've probably even gotten a little sleep but I couldn't get comfy. Next I tried putting my wool shirt over my legs... that was a waste of the wool shirt. I swapped the canvas and the wool shirts. I still couldn't get comfortable enough to sleep (I'd been trying for maybe 3 hours by this time, fidgiting with the shelter and tweaking my clothes). So I put on the wool shirt and the canvas shirt over it and I broke out the emergency bivy. I figured I still wasn't using the sleepingbag, I was only using gear I typically carry on a dayhike, so if I actually slept and was happy with that it was an accomplishment. This was downright comfortable! I slept for a solid 3 hours before waking up.
I usually sleep for 3 hour spells when out backpacking. Generally I get up and pee, shift things back into position if I slid down a hill or whatever, roll over, and go back to sleep. So generally I wake up two to three times a night. So 3 hours means everything is hunky-dory for me.
On my next cycle I slept 2 hours. Not bad, but I was starting to get damp from the emergency blanket. I was pretty damp when I got up. The temperature outside was still dropping as well. That said, I had 5 hours of sleep. If I didn't sleep the rest of the night that'd be a pretty good success. I got between an hour and two hours more that night in shorter segments. The last time I got up and went back I shivered for a while in the shelter, but warmed up again in not too long. I finally got up at 7:40 after stalling a bit waiting for it to warm up outside. It was still chilly at this time so I shivered for the first half mile of hiking. I'm always cold when I get up in the morning though and it was a good healthy tooth chatter, I wasn't cramping up at all and it definitely wasn't the nearly hypothermic shiver that threatens to stop if you get colder.
It didn't warm up much the second day. It sprinked several times and actually broke out into an honest-to-goddness rain one time for a couple minutes. I just wore the canvas shirt the whole day buttoning and unbottoning as needed. The rain was short enough that it barely got wet. Had I gotten wet I had the wool shirt, which even soaked would keep me warm enough as long as I'm hiking. Personally I get cold when I sleep and I'm very cold in the morning, but once I'm moving I get very warm.
For me, this trip was a huge step. This is the second time I've ever been comfortable sleeping out in not super-hot weather without a sleepingbag. It's also the first time I've built a shelter on the fly out of need, and the first shelter I've built that I think would have a hope of keeping me dry in a normal rain.
As yet one more bonus I found not only gooseberry and guessed at a sunburn treatment. I also found lichen that you can eat like spaghetti (NOTE: I've never done this, Jess has and explained it to me recently). There's a fire-ban on so I couldn't make a fire to cook it unfortunately. Still, gooseberry and licken for dinner, and a shelter I could've slept in with no other gear and been fine. In short, I almost could've lived a day or two out there.
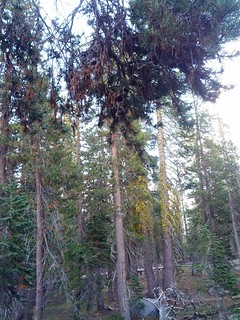
An aside for anyone thinking of doing something crazy like this. I'm not going to say don't try this at home, the point of this blog is largely to encourage people to just try things. But please be careful:
- I know my warmth requirements very well.
- I know my personal signs for hypothermia and am good at recognizing them.
- Note that even with the above I *still* had a sleepingbag, canvas shirt, wool shirt, and emergency bivy. I was hoping to use none of these, and I was very glad I had them.
- I know I can dry out clothes and gear. This is critical for doing without raingear in particular. I discovered accidentally that this isn't true of everyone when my brother's sleepingbag bad been wet for 2 nights running with no change. I slept in it and it was bone dry in the morning.
Just to illustrate that not everything went smoothly, I managed to leave my knife in the shelter. I drove around to the other side of the park and did a midsized dayhike the next day to get it back. Happily I found it though, YAY!
One last thing, I upgraded my phone recently, and now it can do "sphere" photos. Here's the first one I ever took