
How to make Jerky
2012-06-29
I've been making a lot of jerky recently without a dehydrator, and it's super easy. The basic concept with jerky is that you're taking a lean meat, cutting it into thin strips and then drying it out. You want a lean meat so that the fat doesn't go rancid on you. You can add flavoring, but that's mostly a taste thing.
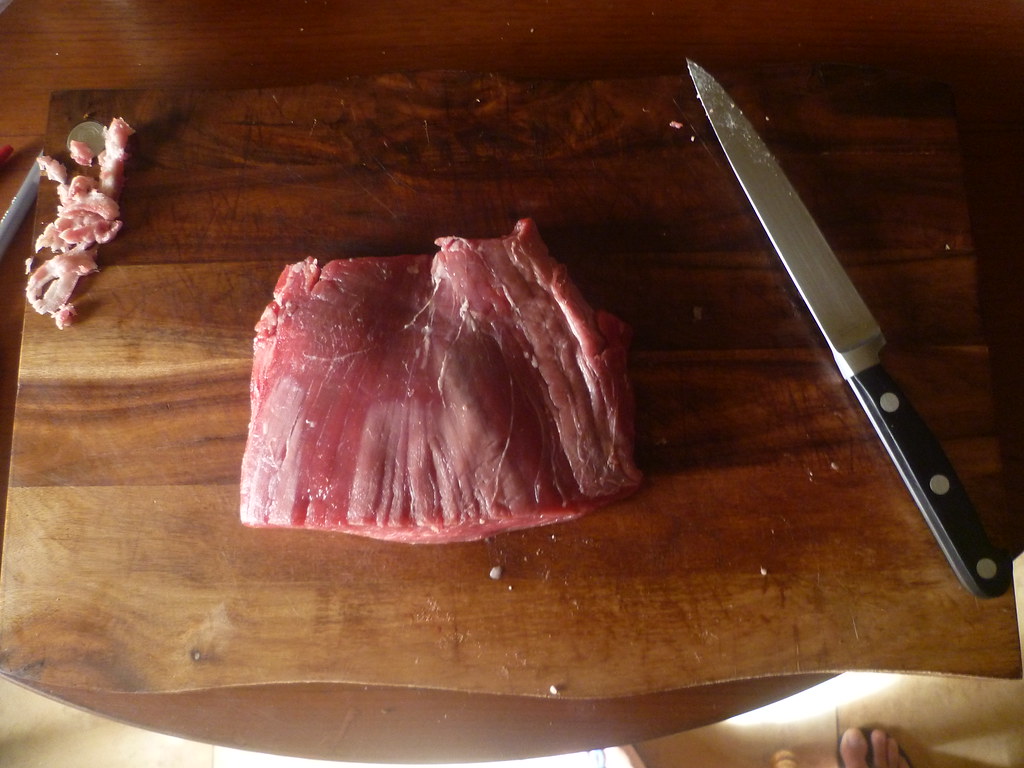
So first step is to pick out the meat. Flank steak is the easiest thing to buy. Sheep jerky is amazing. I bet goat would be even better. As stated before the biggest thing is that you don't want any fat marbled into the cut. (Also cubed is a pain in the butt to slice) Then take a very sharp knife and cut against the grain to make the thinnest slices you can manage. Some people suggest freezing it slightly before hand to make this easier, but I prefer to do it with fresh meat.
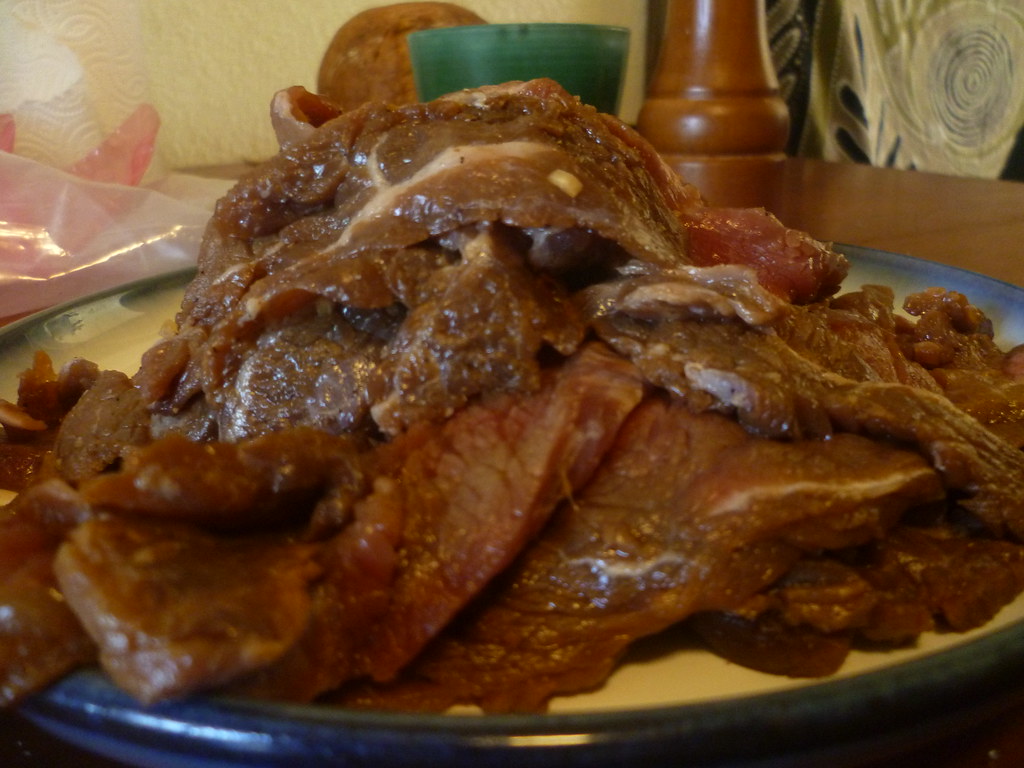
If you want to marinate it now's the time. I marinated my last batch using this recipe (without the liquid smoke), but it had too much Worcestershire sauce in it for my tastes. If you marinade let it soak for a few hours, then pull it out, dry it off with a towel and continue from there. In the past I've just sprinkled soy sauce, salt, pepper, and a little hot pepper on the meat strips. It's a bit blander, but way easier.
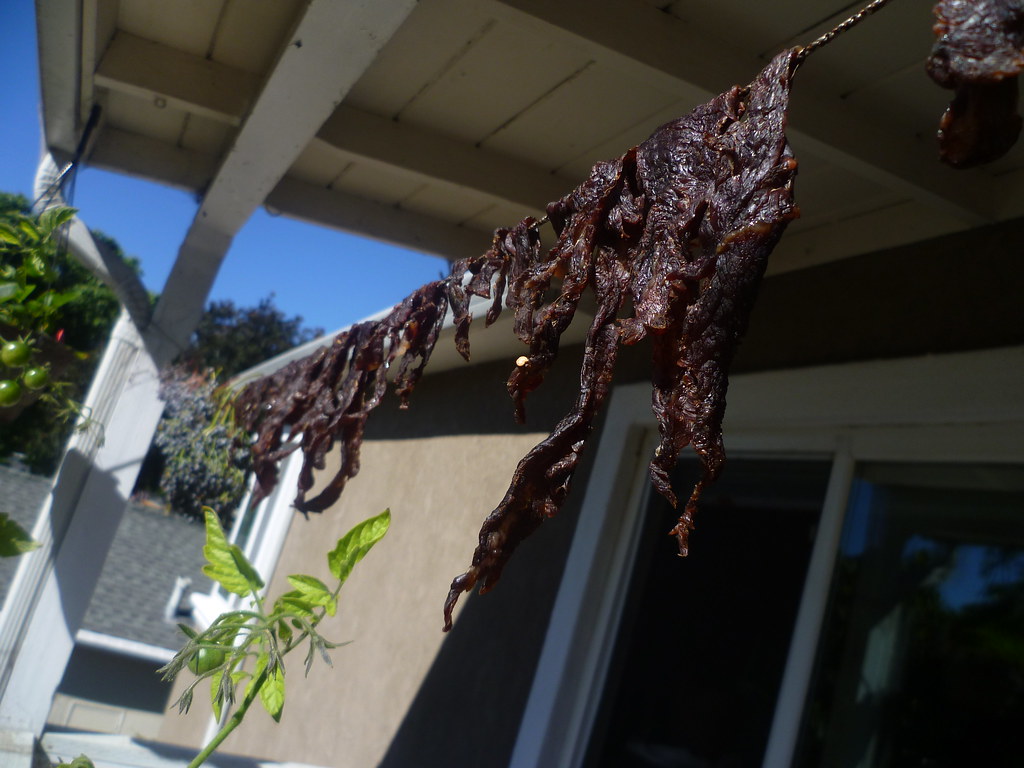
Okay! Hard part over, now it's just time to hang it up in the backyard to dry. Any dry, warm day should do it. I kind of squish any thick pieces a little thinner as I'm hanging it up, but I don't know how much it matters.
I make sure to pick a sunny spot where the sun hits it full on for the initial part of the drying process. Later on it doesn't mater, but when the meat's wet the flies will be interested in it. Once a crust forms on the outside they can't get at it. I haven't hand any problems with flies ruining the jerky though - only with the neighbor's dog stealing a few pieces.
How long the jerky will have to dry depends on your preferences and your climate. Generally I dry it for two days in the sun (I have to take it in at night so the sprinklers don't get it wet), though this last time I put it up on the balcony after the first day and just left it for three days. I like mine dried to the point where it will snap if you bend it.
That's it! I tend to store mine tied up in a bandana, but a paper bag should also work fine. If your climate is particularly cold or humid this might not work as well, but it works wonders even in May in California.
Notes:
- Beef in particular seems to get a slightly sour flavor partway through the aging process. If you let it age longer (at least a month or two) it appears to go away again, but this is probably why people flavor their jerky so much.
- These pictures are all of about a pound of flank steak. More are here
Review: Feathered Friends Lark Sleeping Bag
2012-06-23
 Feathered Friends 10F Lark Sleepingbag
Advertised specs
- Weight: 2lb 3oz
- Rated temp: 10F
- Cost: $499.0
Back Story
In 2008 I'd just moved to CA and after a trip to the desert in a 20F rated REI sub-kilo I decided I wanted a warmer sleepingbag, knowing I'd want to explore the high Sierra. I got a Feathered Friends Lark sleepingbag. I got a custom 5'6" bag (they come in 4" increments, I'm 5'6"). Full-length zipper, epic for the shell, pertex for the inner layer. I had intended to get a half-zipper and eVent shell, but the salesman talked me out of both on the phone. I'm still not sure about the shell, but I'm *really* glad I got the full zipper.
I used it for a while and loved it so much that when Jess and I started dating in 2009 I talked her into getting one. I payed for half of it as a gift. She went to the actual store in Seattle and they spent the time to make sure her 6' bag would zip to my 5'6". After a couple of other trips that year we carried them on the AT. I carried mine for all 1500 miles I did and Jess for her 1000.
I'm writing this because I finally gave up the poor beaten bag as it's lost too much loft. I recently got a down quilt that so far I'm in love with. This seemed like the perfect time to write a review of my old trusty sleepingbag
Things We've done to our bags
-
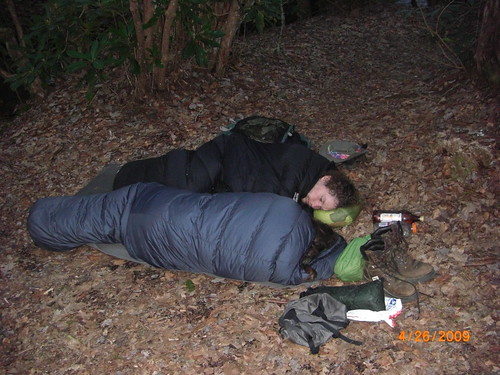
In 2009, a while before the AT I decided to go up into Humboldt Toyobe wilderness. The second night I was at ~9600ft, and the temperature plummeted. I slept behind a giant boulder to break the wind and the venturies behind it were still enough that if I rolled off my pad it would blow away. I didn't use a tent. I was a bit on the cool side until I remembered the bag had a neck baffle, I fell asleep staring at the beautiful stars, otherwise naked in the bag.
The next morning I woke up and the ground had grown crystals up, it was rock hard. The lake had frozen over. This means it was no warmer than ~20F that night. I was perfectly comfy. -
On a trip to silver-peak wilderness I camped on a ridgeline one night near the ocean. I didn't yet know this was a bad idea. The fog blew over me FAST the whole night. It was a pretty cold and uncomfortable night, but I was okay. When I got up in the morning I went to pack my sleepingbag and I literally rung water out of it. I packed it anyway not having much choice.
Later that day I stopped in a field in the sun and lay it out to dry for a while. I unzipped it all the way and spread it out. As it got towards evening I zipped it up and crawled in. By the time I went to sleep it was just damp, and by morning it was basically dry and fluffy again. - In 2010 we decided to go snowcaving . The temperatures dropped to 7 outside that night. I soaked my bag by accident with my tights. THIS night I slept in a lot of extra clothing (tights and jacket), due to exhaustion and soaking the bag.
- We carried these bags for the whole time we were on the AT, despite them being "warmer than needed" we were *extremely* happy we had them when in the smokies.
- In 2010 in Yosemite I had gotten soaked due to a failed raincoat experiment. Jess barely got a fire started to cook dinner. I was going hypothermic and had soaked my vest. I crawled into my bag, and after a bit of shivering was just fine.
- A couple other snowshoe trips. Trips with heavy dew. Jess got her bag damp many many nights on the AT as she would slide out of the tarp while sleeping. 9 days of rain in the Smokies near freezing. 5 days of rain just crossing freezing at night with my parents in the whites. etc. With all of that I've always been fine, the snowcaving trip was the only time I needed clothing with it.
Discovered properties
- Jess and I both put off a fair amount of heat while sleeping, we can dry these bags after a normal natural soaking (I.E. not a full long-duration dunking) in 1 day in the sun, and 1 night sleeping.
- The 5'6" model fits in a 3 liter eVent drysack (my favorite sacks), if you're a bit talented.
- The 6' model needs the larger 6 liter compression sack.
- I've slept in this bag ~10F with no additional clothing. New, I'd trust it to 0F. This is in contrast to an REI sub-kilo 20F, which I'd be confident with down to ~25F.
- It depends on the person how much it loses loft as it ages. My sweat is very caustic. I wear out a set of sheets in ~1 year, but now (2012) my bag is relegated to being a 30F bag. Washing only helps it a little for me. Jess' bag is still going strong. With a washing it returns almost to new condition each time. We've been following the manufacturers recommendations including mostly their soap, it does seem not all soaps are created equal. Jess' washed her bag twice, mine has been washed maybe 4 times or so.
- Jess' bag formed one hole in it in it's whole lifetime. This was due to a hot ember, not a flaw. Remember that we (especially Jess) often sleep directly on the ground and are generally pretty hard on gear. She stitched it up no problems.
- The baffles are circular. When the bag is new this doesn't matter, but when the down is less fluffy then optimal, you'll find yourself shifting the down around on a cold night. It also slows down drying more if the down starts clumping, since it makes bigger clumps. Personally I do NOT see this as a feature, and other things being equal would prefer a full box baffle.
- In practice we don't zip them together. Jess sleeps curled up. We tried zipping them together a couple of times and it didn't go well :P.
- A full zipper is really really nice, as it can reduce drying times and allows it to work better as a quilt.
- Simple neck baffles are the bomb.
- It will shed light dew relatively well, but only light dew.
- The grey color disappears in a field (great for stealthing).
So, what do we think?
Is it expensive? Yes. Is it worth it? That depends. Note my temperature commentary above (good too 0F for me). Now look at the weight of the bag at the top. Now try and name another bag that can do that temperature in < 1 KG and 3 liters. THAT is what this bag is for.
I figure the single piece of gear most likely to save my life is my sleepingbag. For me the weight and volume means there's rarely a reason not to carry this bag. I don't worry where I'm going or what I'm doing. 12,000ft on whitney? used it. A weekend with a tiny little daypack in mendocino? Yup, used it there too.
If that's worth paying double the price of some other bags to you? That's the decision. This is a great bag. It's well made, and absolutely is as warm as advertised. You're getting at least what you think you're paying for. Jess thinks it's like sleeping in a cloud, so there's always that too :). If you don't need it though, there's numerous cheaper solutions.
There are of course other options in this category as well. This is the 3'rd decent sleeping-bag I've owned. All have been down. I've heard great things about several other brands, and so far I'm loving my new overstuffed 10F down quilt. YMMV as always.
New Webstore
2012-06-18
So, we've made several changes to the site that you might have noticed:
- We've removed the random and irrelevant ads.
- We've added amazon links where relevant from some of our blog posts. We're only putting them at the END of the post, and we're going to make sure they are very obviously advertising.
- We've put up a store on amazon, linked from the blog. This contains only gear we've actually used fairly extensively, and liked (or at least gear nearly identical to such). Each product also has a short blurb about what we think of the gear, and links back to our reviews where relevant. Hopefully this will prove useful to our readers as much as helpful to us.
On T-shirts
2012-06-17
A short story
At some point while in college I got annoyed at dealing with clothing. I played a little with washing things by hand and then decided to try an experiment.
I decided to go with only one set of clothing. That is: one pair of boxers, one pair of shorts, 1 pair of socks, and 1 t-shirt. At the time I never wore long-pants (I used warm tights and/or wind-pants in the winter), so this sufficed for all of my first-layer needs.
Well, it worked, I went a year this way, and I actually *liked* it. Every night I would wash my clothing by hand using Dr Brauners and baking soda, and hang it up to dry. As a bit of a cheat I had a sorong I would wear for the short remainder of the evening. In the morning I'd put the same clothes back on. The only thing that particularly annoyed me was washing socks.
I continued the experiment but with multiple socks for another year. More recently I've switched to having more like 3 shirts and 2 pairs of shorts and boxers - so I don't have to do laundry quite as often. I've gone kinda crazy/lazy, think I own 5 shirts now!
I also hiked the Appalachian trail with Jess, when I did so I used one pair of women's running shorts (for decency), one pair of compression shorts, and 1 t-shirt.
(Ice-breaker 200 weight tech-t)
An opportunity
In this time I had a rather unique opportunity to evaluate clothing. Wearing the same shirt every day you become keenly aware of how fast they wear out. It turns out that most t-shirts won't even last a year. In fact, some will barely last a couple of months!
I also got an opportunity to find out exactly how well different clothing dried overnight, and as I softened my initial experiment, how long they took to start to smell. So, here's some of what I learned.
The T-shirts!
First, material:- Plastics: Plastics can be the most durable option. Surprisingly, they can also be the least durable. The longest I ever had a shirt last was a bit over year. This was a Columbia shirt designed to dry quickly. The shortest I ever had a shirt was ~1 month, I forget the brand but it was also plastic. The key is that the first one was a very dense weave, the second felt almost like a sponge. The first shirt didn't ever snag on anything, the second snagged on everything, and each time pull a fiber out into a little loop that stuck out off the shirt. This meant the shirt looked absolutely terrible in NO-time. Be careful of the weave! Note that silver stitched in does help keep odor down, but it only gets it marginally better than cotton. The one like a sponge dried *okay*, the other dried as well as any shirt does.
-
Cotton:
Again, it's all about the weave. A waffle-weave cotton shirt lasts fairly well (~6-8 months). It looks a bit hippy for some people's tastes, but works well for me. Surprisingly, a waffle-weave cotton will actually dry over night no problem, as well as many plastic shirts. Note that a waffle weave cotton is approximately the worst option for cold, and approximately the best option for the desert. A more normal weave shirt won't dry overnight, as a result I've never done more extensive testing on them.

(Standard T-shirt, not waffle)
- Marino Wool: This is my favorite option because it's the most flexible. The number one advantage is smell. Marino beats every other option for smell hands down. The biggest downside is lifetime. It loses to the good plastics, and it loses slightly to the waffle-weave cotton. Other great feature though is it's wicking properties, and the fact that it's warm and comfy when wet. It will keep you a touch warmer than some options, but regulates to that temp extremely well. On the AT I wore an icebreaker marino wool t-shirt, it was a bit used at the start. 1500 miles later I'd torn out both shoulders and sewn them back up. Overall the shirt performed beautifully.
(200 weight icebreaker tech-t)
Further notes:
Notes on wool: I wore smartool marino shirts for a little while, and then stopped. These do NOT last long enough, these would live 3-months or less and then get so full of holes I couldn't wear them in public. For wool t-shirts the best I've found are icebreaker 200 weight shirts. Note that the tech-t is the best looking as a normal t-shirt, but for backpacking it has those shoulders that I tore out on the AT. Icebraeaker makes raglan sleeve shirts, which should help the shoulders last a lot better when under the stress of a backpack.
(Smartool T-shirt)
Backpacking: For serious backpacking, a discussion of t-shirts is a little silly. A shirt serves to keep bugs and brush off your skin, block sun, and be decent for town. Maybe you might need it occasionally 'til you get calluses on your shoulders. IMHO, if you need it for bugs, brush, or sun, you need a long-sleeve shirt. For the AT you can easily tan enough to just go shirtless whenever you're on the trail for sun purposes. More and more I've been moving towards this model - and thus thinking of t-shirts as something for society. When you think this way things like raglan sleeves are for fashion, since you won't have it on most of the time with a pack anyway. I will say that wool makes a nice base-layer.

(really bad gnats while on the AT)
Edit: Sadly, it appears the Tech-T is no longer made, only the Tech-T lite, which is 150 instead of 200 weight - so the wear lifetime will be somewhat shorter, though it is cooler.
Super simple tarp pitch
2012-06-12
This is the fastest and easiest pitch I know. It requires a tarp, a tree, and three stakes (optional) A flat 8'x10' tarp is pictured here, though a 6'x8' would also work.
First find a tree with a nice spot to one side of it. The space needs to extend a fair distance from the tree, about ten feet.
Tie one corner of your tarp to the tree at about head height. Then, grab the diagonally opposed corner and stake it out as far away from the tree as you can. If you don't have any stakes just hold it down with a log or rock, or even tie it to some bushes. This is a low tension pitch so it's fairly forgiving. Then take the two remaining corners and stake or tie them to the ground so everything is taut.
Voila! You have a shelter that will comfortably sleep two. An yes, that's a very car shaped tree... it's just the picture I had laying around.

Note: Your head will be at the tree side of the shelter, so make sure that side is up hill unless you like inversions.
Unfortunately side blown rain will still get you wet in this shelter, and a heavy wind from the tree side of the shelter would put a lot of strain on the pitch and possibly collapse it. I've never had that happen, but I don't use this pitch in storms.
This shelter works best in the same weather where an umbrella would keep you dry. That is to say it's useful for rain in still air, and for keeping off heavy dews. I learned this pitch in Seattle, where the weather is almost always perfect for it. It's also great for dealing with fog coming off the ocean, which is key down in California. In general the openness makes it ideal to cook under and it's tall enough to sit up in, but my favorite thing about this pitch is that almost half the setup time is pulling the supplies out of my pack.