
Non-synthetic waterbottle: Gaskets
2017-07-02
I recently posted a review of the "BOT" bottle/pot
http://www.blog.smalladventures.net/2017/06/review-vargo-titanium-bot-bottlepot.html
. I liked it a lot, but it had a very significant flaw for my use. The gasket is made if silicone, which doesn't quite fit with the "no synthetics" idea for my gear. So, I decided to try replacing it.
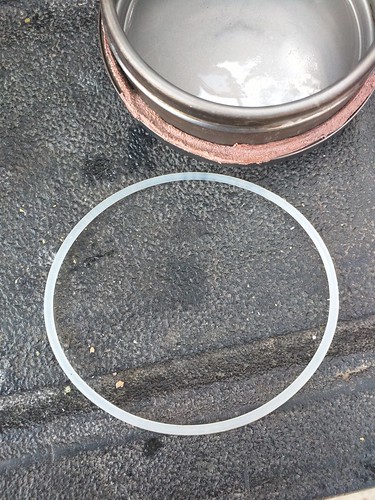
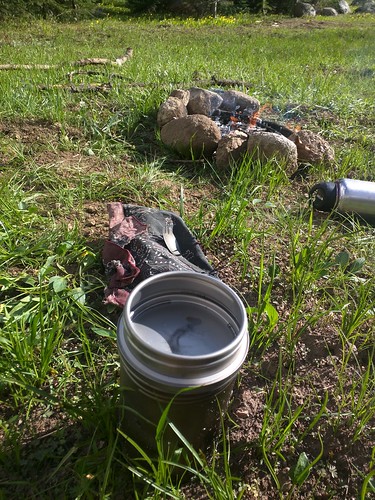
The ring shown here is the original Silicone gasket. On my first try I cut a leather gasket about the size of the top out of some vegtan leather I had in the truck. It immediatly stretched out to the point of uselessness, inches longer than needed.
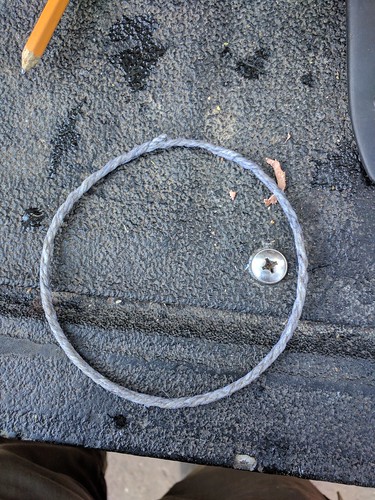
Next I tried using some waxed chord. I first leg-rolled a 2-ply twine from waxed linen. Then I twisted this around itself into a 3-ply (total of 6-ply) closed ring of chordage. This leaked like crazy, it might work if I dipped it in additional wax, but as is it's just too lumpy.
Okay, back to the leather, I tried cutting something quite a bit smaller probably ~1/2" smaller in radius. Then I soaked it in water and stretched it until I could just barely pop it on to the lid.
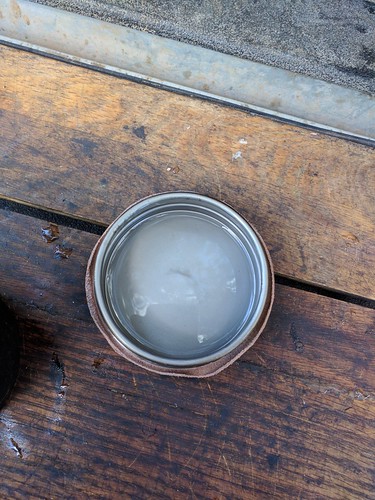
This worked okay at first, but as I've used it it's shaped better to the bottle and worked better and better. The biggest problem is that this bottle is already a little bit difficult to open, and the leather seems to have a higher frictional co-efficient than the silicone did, making the BOT sometimes quite difficult to open. If I'm careful though about how tight I screw it on it seems to be quite usable, and this method would work great for smaller lids. Due to this difficulty though I'm thinking that for thru-hiking I'd rather pick up a dedicated bottle as my second water-container, as that one gets opened and closed many many times a day, and a smaller lid would be easier.
Overall I'm very excited to finally have my first functional water container with no synthetics in it. One more step!
Update:
I've had some time to actually use this quite a bit now.. The gasket definitely leaks a little, but slowly. On a recent hike I failed to screw the lid on quite tight enough and soaked my sweater... but it always drips a little.
Plastic has it's place, for sure, in some cases it really is worthwhile. Part of the point of my project is to figure out where that is... water bottle gaskets is probably one of those places. I'm going to continue using this out of interest, but I wouldn't recommend this method if you can use silicone.
Review: Vargo Titanium BOT (bottle
2017-06-13
Usually I like to use gear for quite a long time before I review it, but I'm really excited about this one and wanted to share that excitement.
I've been thinking about how to cut weight while not using plastic, and I started to think how silly it is that I have this water container in my backpack which I can only store my pot and stuff up. If the top of my cookpot screwed on, I could use it for extra capacity on the rare occasion that I need it. On more minimal trips, I could just bring the one container.
I've tried a kleen kanteen food container for this, but it has a couple of flaws. 1) It's too small, I eat too much to use a 16 ounce container to cook in. 2) the threads on the lid are still plastic, so it doesn't meet my criteria. As a third flaw, it's quite heavy.
The Vargo BOT solves all of these problems, and quite elegantly too. It's 1L and titanium. The only plastic in it is the silicone ring used to seal it. to make it stiff enough to seal properly it has a small lip at the top of the pot, which makes it easier to use as a bottle, like so:
I've been using a 1.3L pot, a 1L pot is a little small to cook 2 Knorr sides in, but it works if you're careful, you just have to use only 1/2 cup of water, and keep the boil mild (tricky when using fire, but doable). When using it on a fire, the top lip cools pretty quickly, so it's easy to eat out of actually. Obviously it has no handles, I'm fairly used to this from a previous cookpot, but it could be a big downside for some. I was using the bandana seen in the background to pull it on and off the fire.

This pot has another neat trick up it's sleeve actually. The silicone ring rolls off the top easily, and if you flip the lid over it has a bump that sits just in to the pot. This allows you to use it as a lid for speeding up the boiling of water (which I did, and it worked well).
Obviously there are downsides to combining your bottle and pot. For one, if you need to boil 2 cups of water, and have a liter in your bottle, you'll have to dump out 2 cups of it... this could be an issue if you are dry camping and were hoping to keep everything full. It's also a little narrow and tall, so there's less surface area on the bottom for heating with a stove, and it's a little less stable in the fire. I think the BOT balances these issues well and is just wide enough to still work well (about the same width as my 40 oz kleen kanteen), yet still be easy to hold in your hand and drink from as well as fitting in most water-bottle holders. It's very close in dimension to the old Nalgenes everyone used to carry before the BPA scare.
Lastly, some folks seem to have trouble opening it. I've always had a lot of hand-strength, and I rock-climb, so I've had no trouble, but if you're always asking your S.O. to open jars for you this pot might not be a good fit.
Oh, and yes... it does NOT leak. This surprised me a lot, but it seals great, and hasn't leaked on me yet.
This is *definitely* going to become a part of my kit for almost all trips. For thru-hike style trips I'm still deciding whether to carry it as a primary bottle (for which it works wonderfully), or as a cookpot capable of holding extra water when needed (for which it would be ideal if I ate less food). I'm actually really tempted to get a second and actually just use one for each.
For minimal/bushcraft type trips this is the ideal vessel. This and a knife rolled up in a wool poncho tied around your waist would be a pretty ideal summer bushcraft kit.
Hey other manufacturers... Vargo has it right! Now, if someone would only make a version of this that was short and squat, I could have one of each... a pot that can work as a bottle, and a bottle that can work as a pot!
For full disclosure I've been using this as a bottle for about a week, and used it as a pot on one 4-day trip, so robustness is still unknown. It's stiffer feeling than any other titanium pot I've tried, with well designed rolled lips and such to give it enough stiffness to function as a bottle well, but how well it holds up to drops and bumps is yet to be seen.
Trip Report: Zerkel Wilderness
2017-06-13
I finally got a chance to work out the snowshoes I've had on the roof of the truck for the last year.
Angie and I wanted to go backpacking for 4 or 5 days. We were up near Steamboat Springs CO, visiting Angie's friend. We knew there was still snow at higher elevations, and didn't know where a good loop was, so we swung by the Forest Service office to ask. The lady we talked to there said the nearest/best spot was the Zerkel wilderness, but that there was was no-where to do a trip of that length without hitting snow. Undaunted we left in a search for snowshoes. Stopping at Ski Haus nearby and bought Angie a pair of used rental snowshoes, then returned and picked up the map the lady had recommended.
I'd snowshoed before, but Angie never had, so we really didn't know how far we'd get. Given that we packed our gear and 5 days of food with the attitude that it could last anywhere from 2 to 5 days, and we could cover anything from 5 to 20 miles per day... just keeping it loose.
Gear
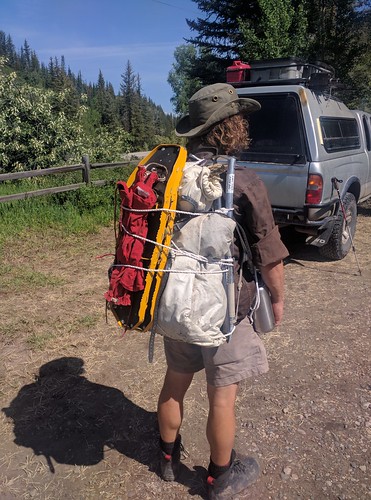
(Leaving the truck in beautiful weather... Later I moved the bearbag to the bottom, when food got lighter)
Sleeping:
- Alpaca sleepingbag
- Wool poncho
- Canvas groundcloth
- Waxed 800 threadcount poncho
- 1/4" cotton rope
- 32oz BOT titanium cookpot/water bottle
- 40oz Kleen Kanteen water bottle
- Toaks titanium alcohol stove
- Toaks pot stand
- Toaks titanium windscreen, with 2 paperclips
- Folding titanium spork
- Bear bag (Waxed 800 threadcount cotton, handsewn)
- Bear bag rope (50' hemp, and Titanium micro-beaner)
- Cotton shorts
- Waxed cotton canvas shirt (rain/wind)
- Marino wool sweater (icebreaker)
- Marino wool sweater (goodwill)
- Fur "Tuk" hat (nylon shell)
- Wool/synthetic gloves
- Icebreaker winter socks
- Darn Tough socks
- Belt
- Cotton gators (with elastic)
- Vivo-barefoot waterproof boots
- Snowshoes (MSR Lightning Ascent)
- Iceaxe (aluminum Black Diamond)
Ditty:
- Uco candle lantern
- Zippo lighter
- Fire kit (sparker, tinder, etc. in tin)
- Repair kit (sewing kit, matches, etc. in tin)
- Belt knife (handmade)
- Metal Compass
- Keys (with salt in metal pill container)
- Belt pouch (worn on belt)
- Modified kelty frame
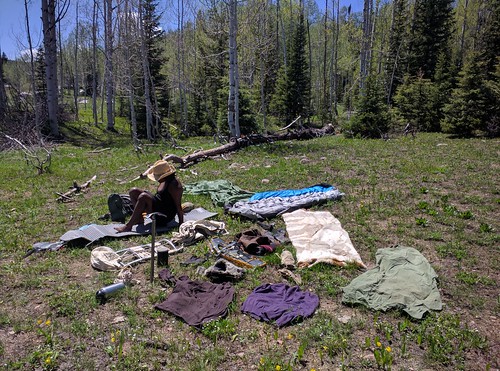
(Drying our gear out on the afternoon of day 3)
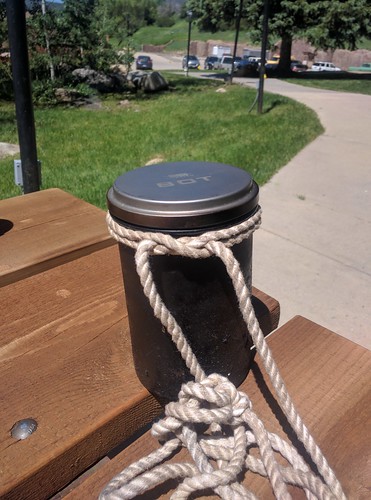
I carried my bottle on one of the ropes I used for the shelter. I used another one to tie my bearbag to the frame. Quick access items were in my pockets on belt pouch, with my belt knife worn on my hip. Everything else was folded up in the poncho envelope style, which was then tied to the frame using a diamond hitch.
I've been working on gear involving no synthetics for 3-season backpacking, but I've got a ways to go for 4 still, so you'll notice a mix here. The snowshoes, boots, hat, and gloves, are "extra" gear I had to throw in. The gators, uco lantern, and kleen kanteen are incomplete summer gear I haven't modified yet. And of course, I still need to replace the plastic plugs on the pack frame, and the silicone ring on the BOT cookpot/bottle.
That said... I was amazed how well this gear worked. I was generally quite comfortable. Had I put on the gators before postholing through snow I would've had dry boots, and would've been comfortable the whole time. I do have some work to do though, my groundcloth should be treated, and my tarp not, for example.
The trip
Day 1:
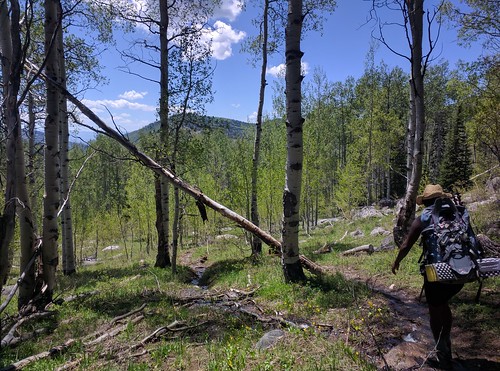
We felt pretty silly walking through gorgeous 60+F weather with snowshoes on our backs, and no snow in site, but everyone had told us we needed them, so we stuck to it.
It was absolutely gorgeous but pretty much uneventful for the bulk of the first day. We got a late start, had heavier packs than usual, and had no milage goals, so around 9 miles in we decided to stop at a river crossing.
As we were considering this though I realized we really wouldn't want to cross the snowmelt fed river early in the morning when it's still chilly, so we decided it was best to cross now and camp on the other side.

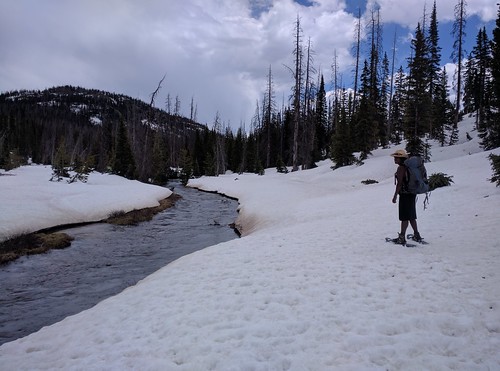
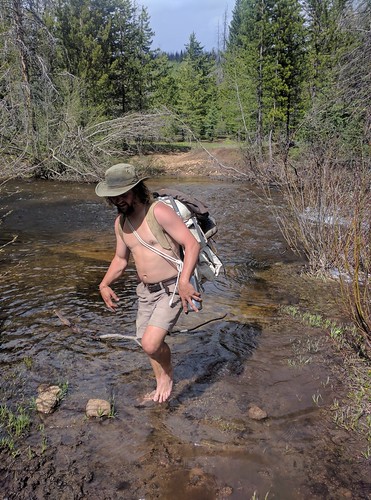
(Crossing the fast moving, deep, and cold first branch)
It was *COLD*. I usually do crossing barefoot, and I've done enough of them, I'm pretty used to the cold shock, but this was different. The current was also fairly strong, you can see me using a stick for balance in the above photo. The ford ended up being thigh-deep, and when I got to the other side of the first river I was in PAIN that caused me to pant pretty hard.
Next it was Angie's turn... I hadn't made much noise crossing, knowing it would be worse for her and not wanting to discourage her. She made it halfway across, but was slowing down further and further. Pain in your feet during crossings makes balancing on rocks harder, and she looked like she was going to topple in. I grabbed my stick and went back in to the river, walking upstream from her to create and eddy to make it easier we made it the rest of the way across. She was okay, but crying from the pain.
100 yards down the trail, we found another river. Shallower, but still not trivial. We crossed this.
100 yards down the trail we found a *third* crossing. Again shallower, but again, not trivial. The snowmelt had caused the river to swell and fill extra streambeds to the side of the main river, streams that were probably normally barely a trickle. We realized this was why the crossing was here, far upstream from where we'd started, because here it was spread out enough to be crossable.
Anyway, we set camp and slept well.
Day 2:
Day 2 started similar to day 1, but after a while, we started to hit lump of snow on the trail, and slowly but surely it changed to being mostly snow instead of mostly not snow. We started to have issues with losing the trail probably around 9500 feet, and kept a close eye on our compasses and map. We thought we lost the trail a couple of times, but kept finding again by going in the logical direction. Eventually we were on just snow and Angie suggested the snowshoes might make easier/safer walking.
(A creek we passed on the way to Lake Margaret, the trail crosses, but crosses back, so we just stayed on the left bank)
At this point we'd long since lost the exact trail and had been navigating by map and compass, with occasional use of cellphone-GPS to double check.
We traveled by Lake Margaret, down to Edward, and then Hawk lake.
(Lake Edwards, I think)
We kept hearing a storm in the distance and it was sprinkling rain off and on, so we were hoping to get to lower elevation to get away from that, and maybe to find a non-snowy patch to pitch our tent.
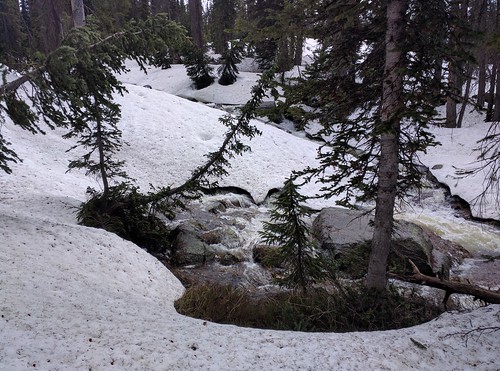
(Creek, or rather raging torrent, running from Lake Edwards to Hawk Lake)
Our guess was wrong and while there was a small clear spot by Hawk Lake, it was really muddy, and a small rise in the rushing creek would flood it.
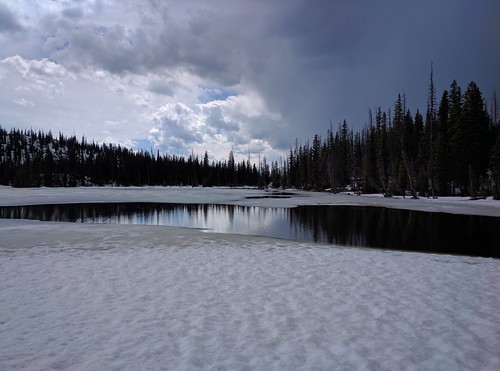
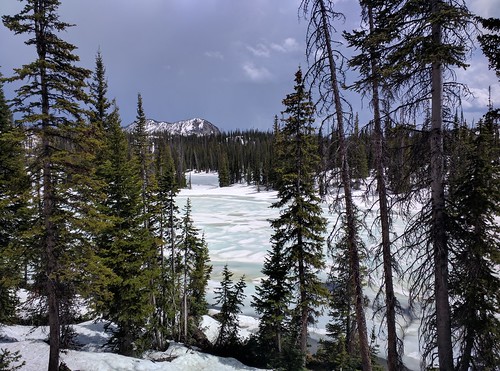
(Hawk Lake, a little lower elevation so not completely frozen over)
So we doubled back to a small spot we'd seen by Lake Edwards. Here Angie started a fire, while I came up with a bit of a hackjob shelter, combining her poncho and my poncho in to a single shelter pitched on a kind-of steep hill. One side was actually staked in to the snow, and I carved some snow away using my ice-axe to get it to fit.
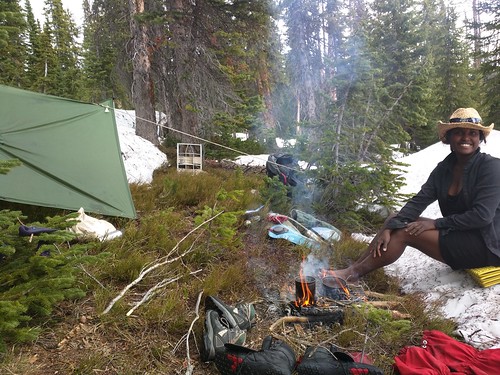
(Angie warming her feet in our tiny snowless campsite)
It rained off and on, so we didn't get a good chance to dry out our shoes, but at least we were able to take them off for a while and warm our toes by the fire. We cooked a nice dinner (I ate 2 boxes of mac n' cheese) and went to bed.
It was a bit of a rough night. There was a bad puddle under the tarp due to the snow melting. I used the ice-axe to dig a little channel to drain it, and that worked okay. I then used my canvas coat to cover the puddle underneath my groundcloth, and that kept me mostly dry. It dropped well below freezing during the night, so the puddle drained, the snow stopped melting and we woke up fairly dry in the morning. Not too shabby for a makeshift shelter... but I could really use a more waterproof groundcloth for winter trips. I'd figured I'd use the poncho under me for this sort of case, it didn't occur to me that it might rain while there was snow on the ground, lesson learned!
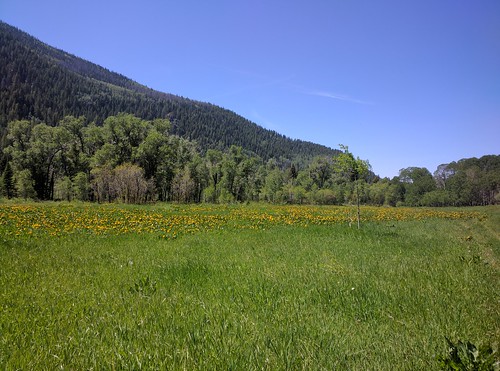
(field of wildflowers we passed on our return trip)
The trip back was pleasant and equally beautiful. We passed some fresh bear tracks in the snow in the morning (really fresh). The rivers felt a bit warmer when we crossed them this time, and Angie just crossed the worst one with her boots on. We camped in the sun and were able to dry out all of our gear, which was nice. We also saw a cow and a bull moose (seperately) who wandered right through our campsite.
On the last day we figured we'd take a longer route back, up through "mud park". When we got there though we judged it not worth doing. It was more worthy of a canoe trip than a backpacking trip. Angie and I have done terrain like this before, and while it's quite the experience, we didn't feel the need to repeat it. That said, it was beautiful to look at before turning around
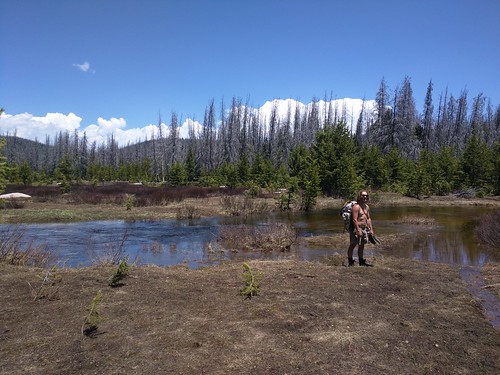
(Standing at the edge of Mud Park, before turning around)
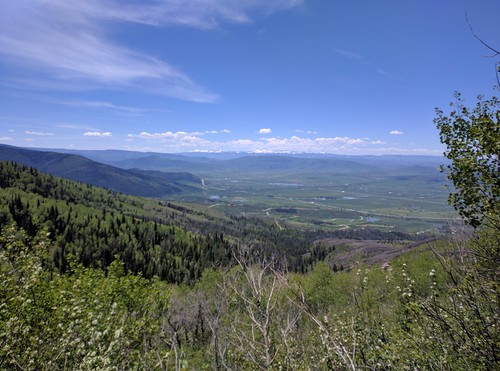
(A view of the valley as we headed back to civilization)
Baking in a frying pan
2017-05-30
Recently, someone on Google+ turned me on to an old AMC pamphlet, which suggested a cool old camping book called "Book of Camping and Woodcraft" by Horace Kephart.
I've been reading through the book, and got particularly interested in the recipes. Angie and I buy most of our food in grocery stores, like everyone else, and we thought making more of our own bread would be cool.
The book mentions an interesting cooking technique, where you "bake" bread in a frying pan. First, you put it on some medium-heat coals and let the bottom of the bread harden a little, so the bread will hold it's shape. Next you tilt the pan up with a stick next to the fire, like the photo below.
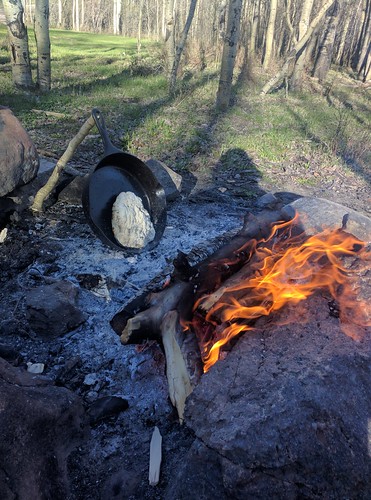
Every so often you rotate the bread in the pan, and eventually flip it, making sure it gets cooked nice and evenly. The bread above is literally just flour, water, sugar, salt, and baking powder.
The bread came out pretty good. Yesterday, we were hanging out at a campsite all day (something we're kind of bad at doing... a do-nothing day like yesterday usually involves bathing in a river, cooking complicated food, going on a run, doing a body-rock type workout, etc.)
Anyway, we made chili using Angie's cast-iron pot strung over the fire by a tripod, our favorite method for slow cooking. We wanted corn-bread to go with it, but the pot was already in use, so no dutch-oven-style cooking. So we tried the method above again, but on cornbread this time (again a recipe from the above book, 1/4 flour 3/4 corn-meal, water, baking soda, sugar, and salt.
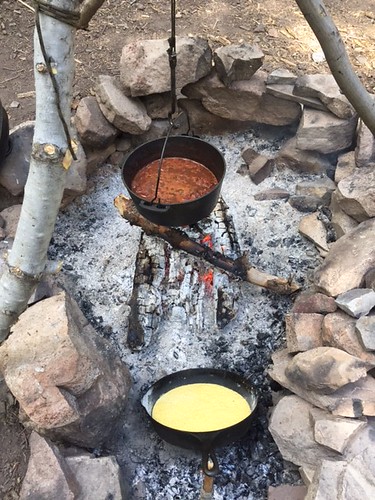
Here we're doing the initial stiffening process, before tilting the pan up. With the corn-bread this step took a little longer, since it was a batter instead of a dough.
It came out quite good! This baking method didn't cause any issues. Next time we do this though I think I'll pour the corn-bread batter directly over the chili and just bake it all together, since in the end we wanted to it eat together anyway.
We've been surprised just how easy and fast baking soda breads are, and how easy it is to bake like this on a fire.
Reasons to camp with a 4x4
2017-05-30
We'd been hanging out around Creede Colorado, but the truck has been acting up... pulling right a little under braking. Long story there, but anyway, we needed to head over to Durango where we'd found a shop with really good reviews we hoped could figure it out (they are actually working on it right now).
While in Paragosa Springs a very helpful man had given us a bunch of tips for cool places to check out in Colorado, he'd highlighted a bunch of pretty routes, including the "Alpine Loop", but said you really need a jeep to do it. When I mentioned we had a lifted pickup he said "so?".
Well, without realizing it we accidentally planned the route from Creede to Durango to take this Alpine Loop. When we realized it we talked a bit and decided to heck with it... why not give it a try? We can always turn around.
Well, we made it through.
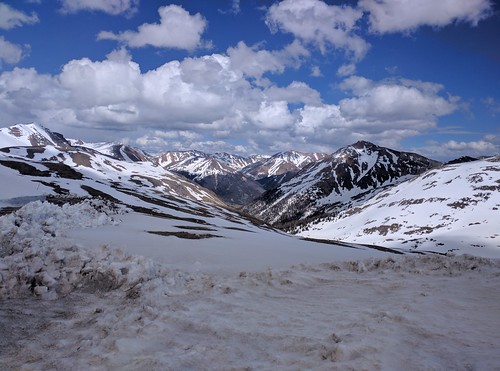
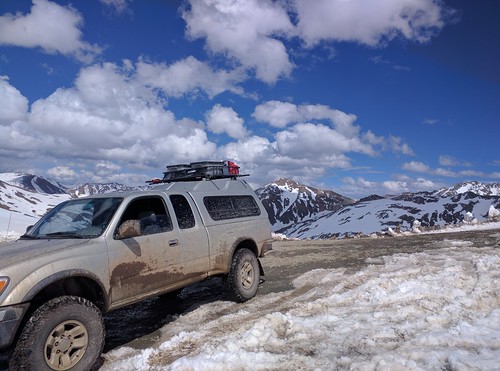
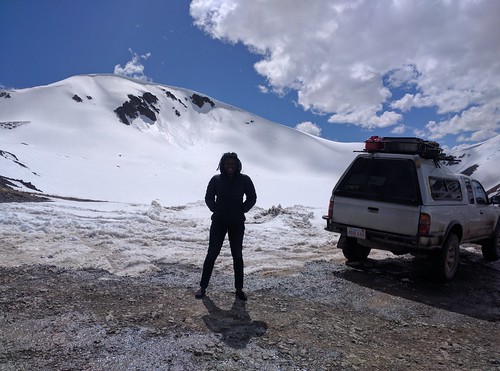
The photos above are from the top of Cinnamon Pass. Jack did great:
http://www.blog.smalladventures.net/2016/02/jack2-another-toyota-tacoma.html
Not only did we make it, but it wasn't actually even hard. The views were just incredible the entire way. It turns out the northern side of the loop was closed due to a recent avalanche that covered over the road, actually another road we tried to take out was also closed (it took a couple of tries to find a route down to normal surface roads again).
In that hunting for an exit I ended up backing probably 500 yards down a steep hill on single-track with a vertical drop-off to the left... I was VERY glad I did not have a trailer. Similarly, had a wide camper on the back, I would have been very nervous about being that close to the edge. Keeping things tight in a single small off-road capable vehicle makes a huge difference to getting out to cool places.
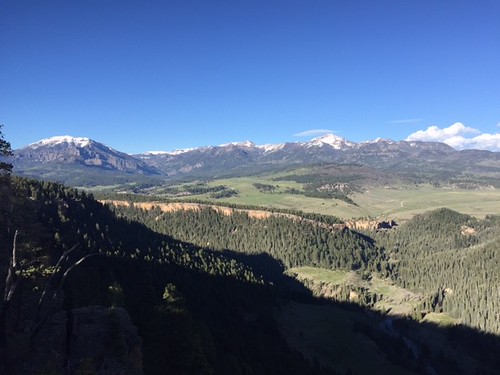
So, we got to our destination by about the prettiest route possible... Now we want to come back and do the northern half too!
This is one example of many. Here's the view from another campsite we stayed at recently, around 9500 feet, and down a long rough dirt road with mud holes (this site is actually the reason Jack is covered in mud in the photos above).
We used the fact that the truck had 4-wheel drive and a lift occasionally out east, but overall it seemed a little extravagant. Since about Texas though we use it pretty much daily. A good half of our camp-sites have been down 4x4-only roads. Low range makes a huge difference when using reverse to maneuver to park in campsites, as well as on extremely steep dirt-road climbs over 10k feet where the engine loses torque. The lift has been critical both for large rocks in the road, and for break-over angle on a lot of trails we camp on. An unlifted truck could probably do a lot of what we've done, but not day after day, solo.
Our trip would be a lot less remote, a lot less private, and a lot less fun with a less capable vehicle.