

More shelters of the southwest
2017-04-20
Here's some photos of the Gila Cliff Dwellings. The caves formed naturally. A group of Mogollon people moved in during what we believe was a time of significant environmental pressure, particularly a major drought across the south-west. This is within easy reach of both the Gila river, and a spring-fed creak that runs there. They then built homes inside the caves. It appears they left not long after, so this site has been unused for quite some time. This is one of the only cliff dwellings that people are allowed in to.
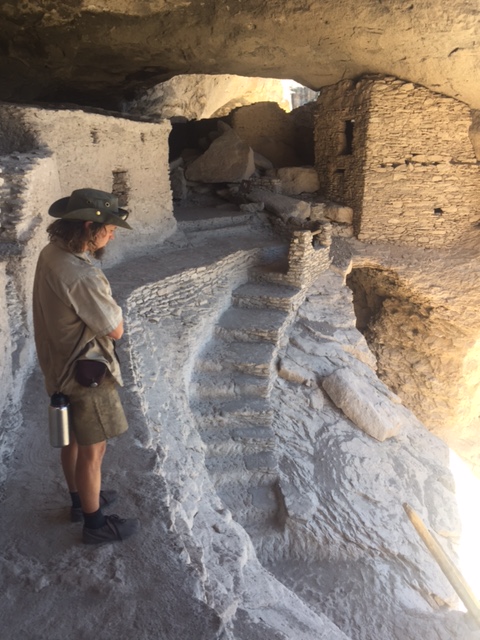
Note the T-shaped window. This is common of the ancient Puebloan style, but many other things (such as lack of circular rooms) indicate Mogollon. The Mogollons were friend's with Puebloans, and were not usually a cliff-dwelling culture, so this group probably picked up some of their ideas from the Puebloans.
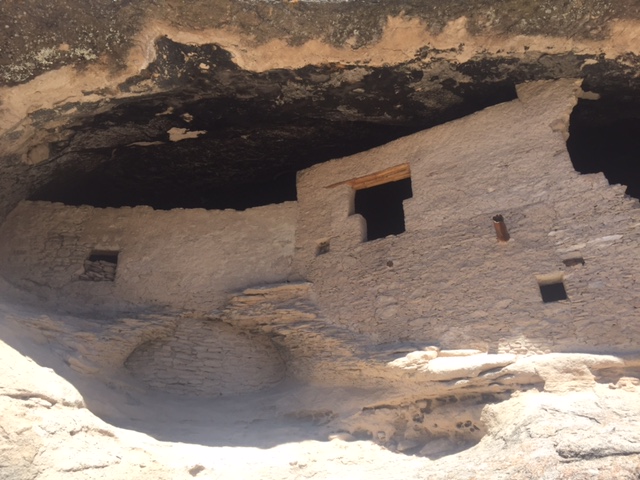
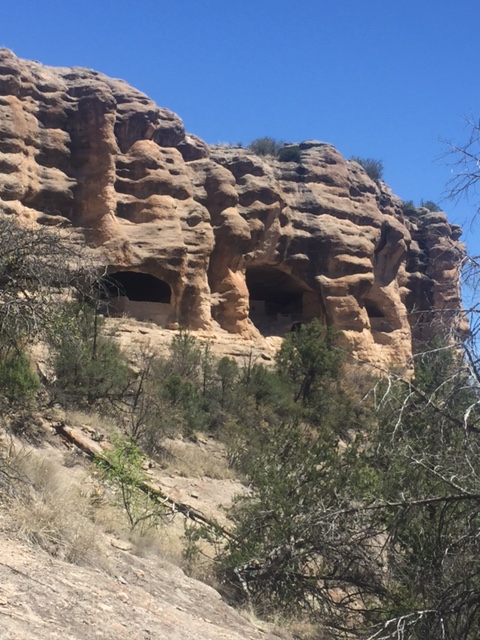
Sadly by the time the site was found i was very difficult to tell a lot of things. The site had already been trashed by people, and no-one has been able to pick out what route people actually used to get up the cliff. This cliff is not shear, a climber of moderate skill (such as myself), can nearly go straight up it.
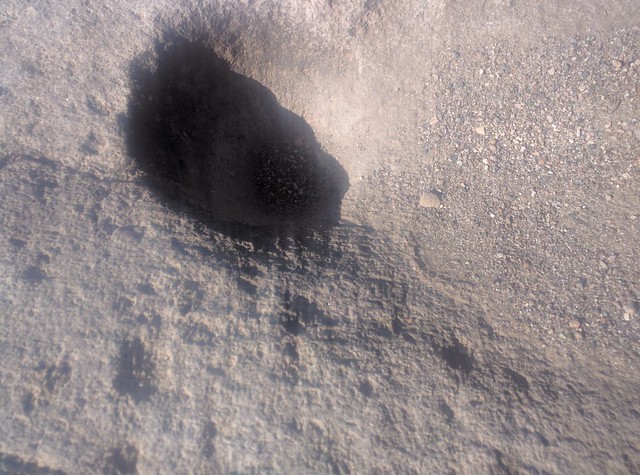
Here is a Morter, directly in the bedrock.
This is a much smaller home, also likely of the Mogollon tribe. This one is constructed under a rock-shelter down in the valley. It looks like it's filled in a little with dust, even still we could stand up inside. Much of it has collapsed, but it would've been a lot more spacious than I expected actually.
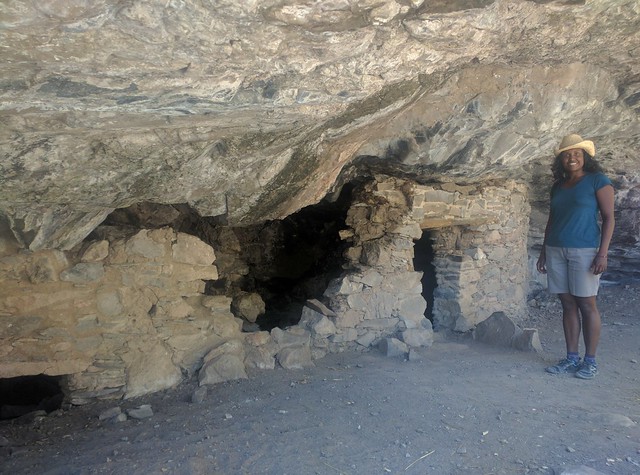
These shelters just look like such nice and comfortable homes. Warm in the summer, cool in the winter.
Near this location there are a number of pictographs as well.
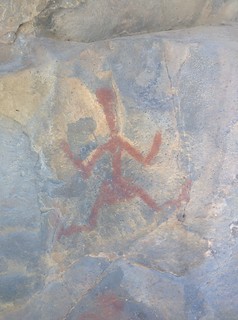
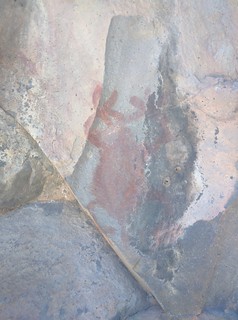
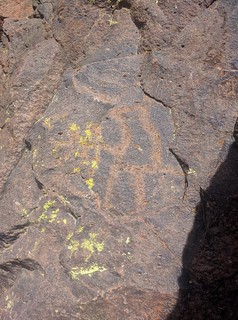
Not shelters, but as long as we're talking about pictographs, here's some neat petroglyph as well, that we saw down in Vallez Canyon... a difficult location to get to (we really needed the lifted 4x4), but neat anyway. I actually know nothing about the originating culture for these petroglyphs except that Gila has few petroglyphs (and thus it is believed Mogollon didn't make them).
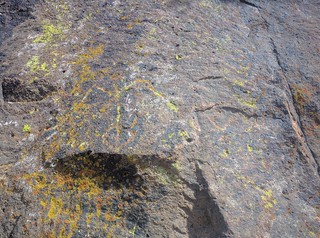
I've been reading "Neither wolf nor Dog" lately, so I was suddenly very aware of what this was, someone's home and entire life, and what it is now, a tourist attraction, though I don't yet have anything intelligent to say on the subject besides that.
Some shelters from Texas and New Mexico
2017-04-09
I just wanted to post some of the interesting shelters I've seen recently while traveling the southwest.
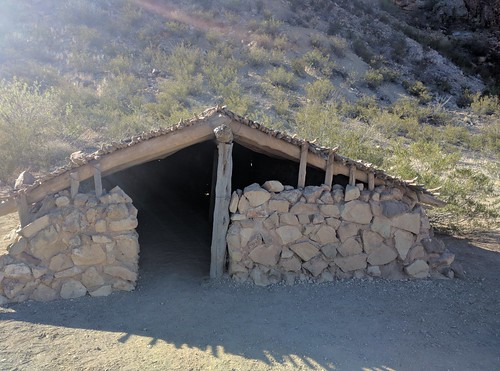
First, here's a Jacal built by Gilberto Luna. It's a traditional style of mexican home. The Luna raised 8 kids in here, and lived to 108. At 5'6" I can stand at the very back, but no-where else in the shelter.
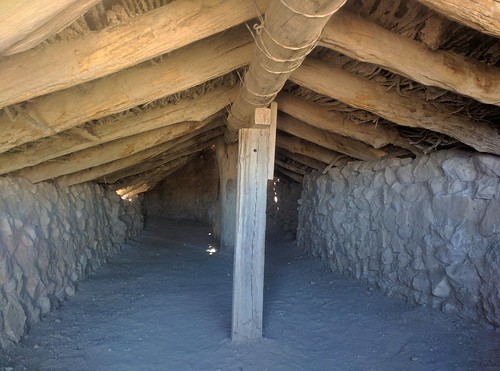
The posts are sunk in to the earth just a bit. The whole shelter is dug in to the dirt a little in the back (though likely this is due to the slope behind it collapsing). It uses a boulder as the back wall, which is part of why the roof is taller there.
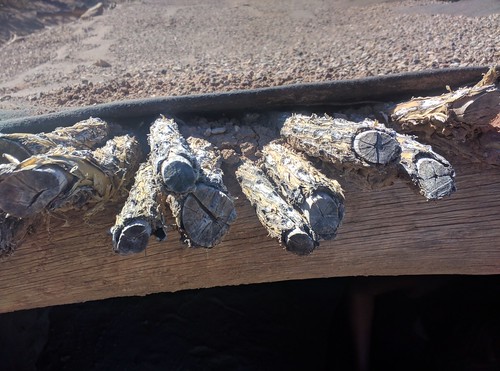
The roof is wood beams, with ocotillo across it, held down against with with fencing wire. The version we saw had a layer of felt... this may be repairs or not, the man did raise sheep after all. Then there's dirt and such on top of that.
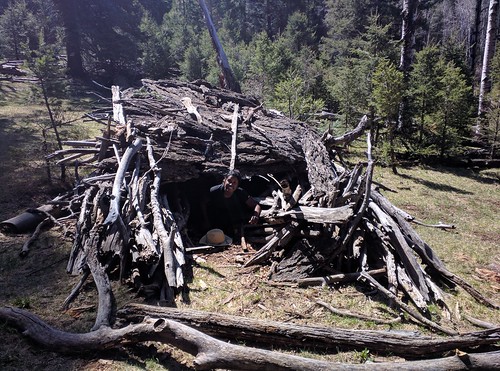
Here's another random shelter we ran in to, this was someone's attempt to build a shelter up in the mountains of New Mexico. The roof looks pretty waterproof, made with layers of thick bark, but the sides are not windproof at all, the wind blows right through (as it did while we were there). Great rain shelter, not a great shelter on a cold night. It seemed like the walls used more material than needed, it must've taken a long time to build.
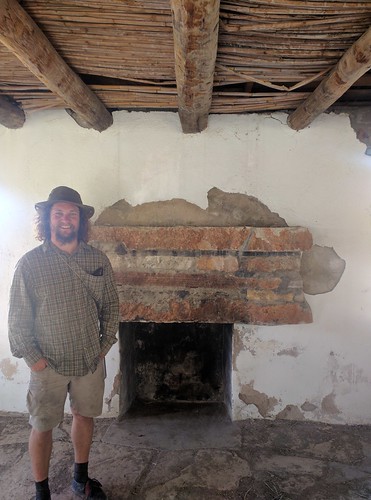
This is a more traditional constructed house... sadly I didn't take any pictures of the various adobe structures we saw in various levels of destruction. Adobe is made by mixing manure mud, and drying it in to bricks. The bricks are then stacked in to a structure, using a similar mix as morter, and the final result is plastered over. This means it's made entirely with local materials (what modern folks call bushcraft :P). We noticed they often layed cables in to the layers of adobe, to help keep the walls from falling outwards I assume. The top beams are just layed directly on the mud. Then traditionally ocotio across that to make the roof.
The structure shown here I believe is part concrete. It's built in a style mixing mexican/spanish and anglo methods. But check out that awesome fireplace, with a stone header. A lot of the structures we'd seen actually used wood in that place (This was true for the various missions for example) - which probably works, but is a lot more likely to accidentally get burnt.
Review: Lem Boulder Boots (a minimal high-ankle boot)
2017-04-09
I had these boots from Lem for about a year and a half, and they finally hit the end of their life... thus, it's time to write a review.
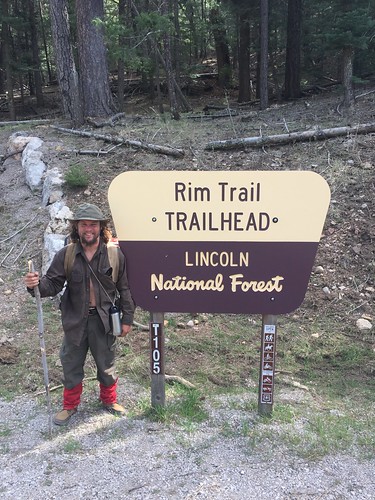
(Photo from these boots last backpacking trip, an overnight in the New Mexico mountains, with possible snow)
Sorry I don't have any photos of just the boots, I forgot to take one before I threw them away.... but here's the lems website
https://www.lemsshoes.com/mens-boulder-boot/
.
a little background. These boots are not intended as backpacking and hiking boots, they are intended as street shoes. But, I USED them as backpacking and hiking boots, so I'm going to write the review from that perspective.
These are minimal zero-drop shoes with flexible soles. This puts them in a similar category as the softstar runamoc, merril glove etc. Except, these shoes are high-ankled boots. This isn't the "ankle support" type of high ankle though. Think old-style jungle combat boots, where the ankle is flexible and acts almost like a gator in practical usage. This sets the Lem Boot apart from virtually any other shoe currently on the market. The closest would be the women's high ankled Merril Glove shoe that was actually designed as a style shoe... but it was only available for a short time.
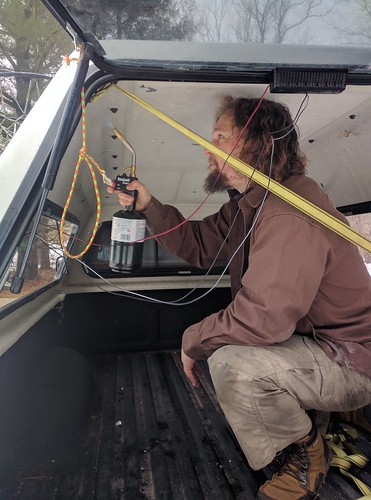
(Photo from repairing the cap while at a friend's house in Wisconsin after rolling the truck in North Dakota, it's a bit below freezing, and there's snow on the ground... note the boots)
With that in mind, a summary
The good
- No break in period, and almost no blisters
- Warm enough for light snow duty
- A little water resistant
- Highly flexible ankle
- Highly flexible zero-drop sole
- Upper is extremely tough
- Traction is abysmal
- Boots can take days to dry once wet... longer than Angie's waterproof boots.
-
Sole is rather puncture prone, I've stabbed my foot with thorns several times.
Would I buy them again?
No
Sometimes compromise is worse than either option. My replacement boots are from Vivo Barefoot. In contrast to the Lems these boots know exactly what they want to be, a beefy leather, winter, flexible soled, zero-rise boot. I don't live the kind of life where I can get away with 1 pair of shoes anyway (that I've been able to figure out). The traction problems with the Lems were a big problem for hiking... a dangerous problem... I'd much rather have a pair of Vivo Barefoot boots, and a pair of Runamoc's from Softstar. If I was thru-hiking the PCT I'd be looking for a super thick or waterproof sock for my Runamoc's rather than going with the Lems.
As I mentioned at the beginning of the article, these weren't intended to be hiking boots. They are very much one of a kind and despite their design intentions they work pretty well. That said, most people who might want these for hiking probably have a specific use-case that something like the vivo's, runamocs, or similar would better fill.
Note: I have never recieved anything for free in relation to reviews or this blog. I usually write reviews only after I've worn out gear, or at least have very thoroughly used it. All opinions expressed are 100% the authors.
How much does it cost
2017-04-09
Angie and I have been on the road for 1 year now. So, I thought this would be a good time to write about money.
One question we're constantly asked is "Are you interdependently wealthy?". Relatedly "Are you working", and "Where'd you get the money? So, first, here's the answers to those questions. No, no, I'm a programmer.
But, really that's not the most interesting question is it? Somehow most people fail to ask the really interesting question, the one they need to know if they want to do it to: how much does it cost?
I see a LOT of people saying "you can travel!" "It's cheaper than you think!" "You just have save a little"... etc. But no-one ever talks numbers. I think it's some sort of old propriety thing people have about talking about income and how much money you have. So, I'm going to break the rules of propriety in the interest of edification talk about real, solid, numbers. Here we go!
Numbers
Our budget is $24k a year, total for the two of us. From that I set $4k aside for surprises (like rolling our truck in a snow-storm in North Dakota), leaving $1600.00 a month, or $800 each per month. We just reached one year and we are *very* close to this budget (within a couple of thousand). That's something I'm actually pretty excited about.
So, where does that money go? Of the $1600:
- $400 -> gasoline
- $400 -> food
- $400 -> Clothing and random incidentals for Brewer
- $400 -> Clothing and random incidentals for Angie
Part of the reason it stays in this range is that we almost never pay for camping. Very occasionally (like, twice in the last year), there's something really exciting and we realize it's *cheaper* to pay for camping nearby than for gas and wear on the truck. We eat out occasionally, especially if we want to try local cuisine... it would be a shame to pass through new-orleans and NOT get some local Cajun and Creole cooking, but we try and keep it to a minimum. Eating out adds up REALLY fast.
Note, that if I were traveling alone (if I hadn't met Angie), it would cost:
- $400 -> gasoline
- $200 -> food
- $400 -> clothing and random incidentals
I don't want to cheat, so there is a MAJOR expense I'm leaving out. If you followed the build of my truck, it cost me ~$21,000.00. That's basically a capitol expense, though it certainly does depreciate. Ideally though, if we didn't have any other emergencies, in 5 years we would've built up about enough money to replace the truck again. You could *definitely* do it cheaper. Pick up a truck in a little less mint condition, get a used, cap and you could get rolling for ~10k pretty easily. I think of ours as the luxury edition, with windoors and headroom and all that (it's all relative right?)
Harder to include is all the backpacking, rockclimbing, and camping equipment we have. It's actually less than a lot of families I see who go camping actually, but it's not trivial. If you are interested in this sort of lifestyle though, chances are you already own a lot of gear you'd need to sell, and would only need to buy (or make... this is smalladventures.net after all) a little bit.
How do you save that?
Make money, and live cheaply. If you haven't seen this blog let me give it a plug: http://www.mrmoneymustache.com . I won't advocate his every viewpoint by any means, but I found it very useful in realizing what I could do with what I already *had*.
I'm not saying everyone can do it. Not everyone has resources, but many do and don't realize it. For those of us with a good job, and no dependents, it's pretty doable. For a number of years I spent in the $10k-$15k range per year. My life wasn't austere, but of my interests I chose cheaper ones.
My coworkers mocked me a bit when I was making ~$200.0k (Yes, I recognize it was particularly easy for me) but shared a 3-bedroom apartment with 3 other people, and didn't own a car. They talked about what they called "Fuck you money" and "fuck off money" the first is financial freedom sufficient to quit a job without worrying about the time it'll take to get a new one. The second is financial freedom enough to not worry about every finding another job at all. They talked about the second as ~5 million and up... But it all depends on your lifestyle. If you want to live like Angie and me, it's not nearly so unattainable as that.
Model 1
Earn money, and then spend it.
If you make $30k a year (after taxes), you can still put away a year of travel per year of work... That's pretty good. It's amazing how much money people make that just falls in to a hole of cellphone bills, cars, junk electronics they replace every year, unnecessary AC, etc.
I've met a lot of people who do this, hitchhikers, thru-hikers, etc.
Model 2
Earn money and invest it, until you can retire permanently.
Now, I definitely don't trust where the economy is going... but lets talk about investment for a moment. There's an old rule, with a pretty solid derivation I won't go in to here, that you can take out 4% of your investments per year. That means that to have 15k a year, you need $375k invested.
At 15k a year that'll take a while... So model 1 is probably better if you really don't make much money, and want to travel now. But, on the other hand, imagine you make ~100k a year (after tax, again). If you can put away ~85k a year, you could retire in 5 years, with extra money to spare.
How much do I have?
It's a little bit complex with 401k's and everything else. There are a myriad of tricks for accessing that money (one of which I pulled today actually, I just moved some money in to a Roth IRA, which makes the principle available in 5 years, and keeps that money in a low tax bracket since I'm not working). But in total I have ~600k. This is actually where the 24k a year budget came from, based on the 4% rule.
IF I can access enough of the money in the 401k soon enough, and if the economy stays stable enough, Angie and I could theoretically travel like this indefinitely.
Most likely that won't happen though. We both expect that we'll want to settle down and buy land. If we buy a 200k property that'll reduce our principle, leaving only 400k invested, which would be too thin to travel with like this again... so I'll probably work more at some point to put some more away, we can be a little less close to the wire, and so we can leave more of the 401k money untouched for when we're old ('cause if you believe my generation will get social security I have a some oceanfront property in Arizona to sell you).
And remember... This is how Angie and I decided to travel for now. If you can do it cheaper, you can save even less, and get on the road even faster.
So, when someone says "are you independently wealthy?" I always wonder what they mean... I am in a sense, but probably not the way they think.
I've tried to keep this to facts.... This isn't about "everyone can do it" or anything... I just want to encourage people to look at what they have, and are making, realize where it's going, and what they could do with it if they wanted to.
Shoe Repair, on and off trail
2017-03-28
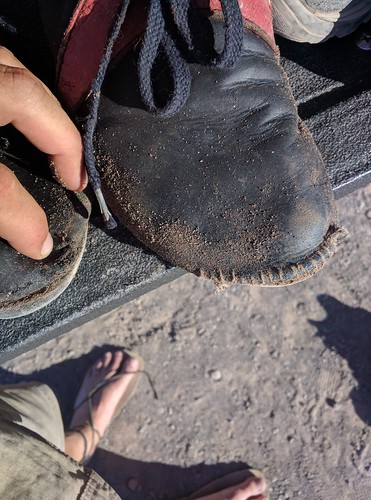
Angie and I just both blew out another pair of shoes. Here's a picture of mine (with a repair)
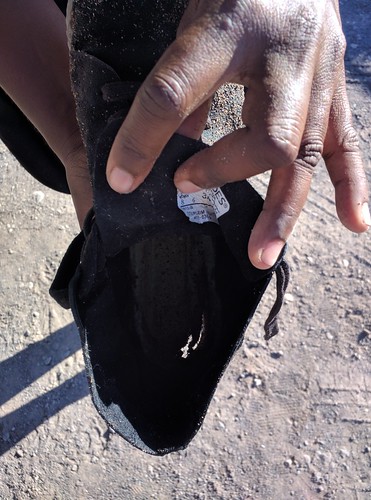
And here's one of Angie's with a hole clear through the heal
Anyway, this made me realize just how many times I've blown out shoes on the trail, and that I'm using a number of tricks to deal with this that I got from esoteric sources, experience, or face-to-face conversations... so I thought I'd share them here. These two pairs of shoes were dropped in a nearby trashcan. Here's another of my shoes:
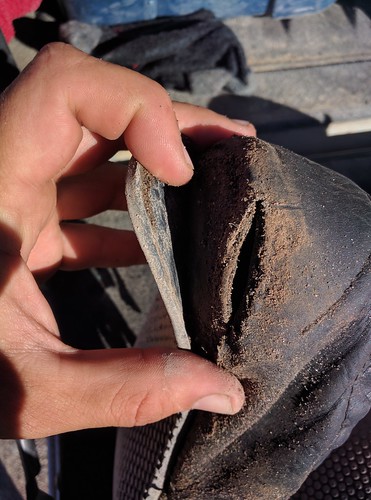
On trail repairs: Torn shoes
Here's a picture just after a quick trail repair on the presidential traverse in the White Mountains.
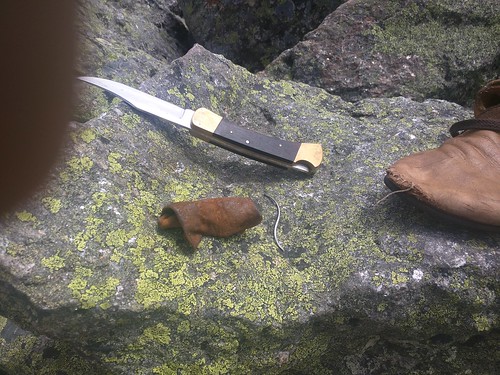
See the thing that looks like a metal worm in the middle of the picture? That's what's called an "S-needle". This is the single biggest secret to on-trail shoe repair. I prefer to use a waxed linen twine to do my repairs (partly because I use it for everything, but also 'cause it holds up pretty well). Another good alternative is tooth-floss (the old style, rather than the ribon stuff). That's what I used here, when I blew out a shoe on the JMT:
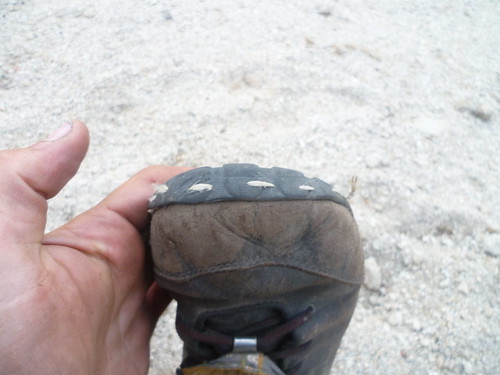
That last repair was actually done with a straight needle- but with great difficulty. The curve of the S-needle gives you something to get a grip on and really shove, so you can do things like shove it straight through the sole of a shoe.
Note that the first two are repairing worn out leather, where the last is actually repairing the sole coming unglued from the shoe. For the last repair, to maximize milage before the shoe fails completely you want to stall until the sole is really pealed back a little, with maybe 3/4" unglued , but not until you catch it on something and separate it further. The thread on the toe will bust through fairly quickly (maybe 100 miles), but that's 100 miles farther than you would've gotten, and you can keep doing this repair until the shoe-sole or leather uses structural integrity.
Too make things a little easier I have a leatherman squirt PS4 on my keychain (the PS2 is even better, but no longer made). The pliers are really helpful if trying to repair heavier boots, which they have been used for on more than one occasion.
On trail repairs: Uneven soles
There is one other on-trail repair I will perform, and it can gain you a lot of milage. Many people, like myself, do not wear shoes evenly. If you wear more traditional shoes than I do these days (as I did on the AT), you may find that your shoe has worn, or the EVA midsole has collapsed such that it's hurting your knees, or such that it's created a ridge between your toes and the ball of your foot and is giving you blisters.
My solution to this is duct-tape. Take your insole out, and layer duct-tape on to the insole to "shim" the low spots back up level. If you do it right, graduating the sizes of the duct-tape you can get the shoe back to level. I've gotten an extra 200 miles out of a pair of shoe at least using this trick, and saved my knees some injury to boot.
Off trail repairs
On trail I pretty much restrict my repairs to sewing. Shoe Goo is useless in my experience, pealing off within just a few miles usually, even if you let it sit. If I wear through a shoe-sole I just hike on it (as I did on the JMT). My belief is that this is because you can't get the two surfaces clean enough... At home though, you can do this right.
For shoe sole seperation here's the trick:
1) Clean the top of the sole, and bottom of the shoe as well as you can with water, let it dry completely
2) Clean them *again* with mineral spirits, keep cleaning until your rag or paper-towel comes away CLEAN. Again let it dry...
3) Use "barge" cement, preferably original formula. I've heard the new "the fumes won't kill you as fast" formula does not bind as well. Put it on fairly liberally
4) Clamp the shoe as best you can, bar clamps or c-clamps work well. Particularly make sure you clamp near the tip of the toe, and that a little glue gooshes out as you do so.
And there you go! If you are used to repairing your shoes, especially on the trail, you can stretch them a lot farther before throwing them away. "Oh this shoe might blow out while I'm out" stops being a reason to replace them immediately... and with the average shoe lasting between 600 and 800 miles, the extra 200 you squeak out of each pair really add up.