
MYOG: Plasticless Backpack
2017-02-06
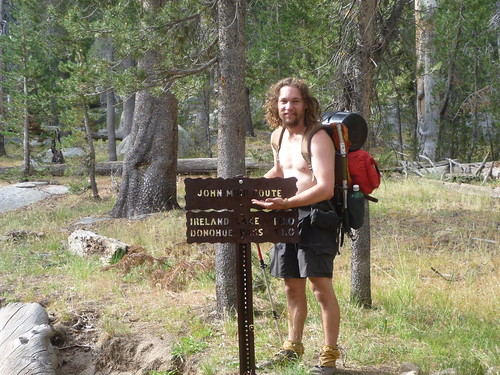
I've been using this backpack for some time now, including for search and rescue trainings, hiking the JMT, etc. and I love it
http://www.blog.smalladventures.net/2010/10/myog-external-framepack-mod.html
. Since that post I did indeed replace the hipbelt with one for a kelty pack, a little hacking and I got it to work quite well.
So, my goal is to emulate this pack. I thought about making a pack from scratch, but having software experience I realized maybe that wasn't the best approach. It would be an adventure, but if I wanted a final result that functioned, why not try replacing things piece by piece? Plus, while maybe I'll replace the aluminum frame eventually with something homemade, I could retain aluminum frame for now and get a backpack with no plastic in it much faster.
When I got the pack it had 2 fabric panels (made of nylon in a canvas like weave I believe) which hold the frame off the back.
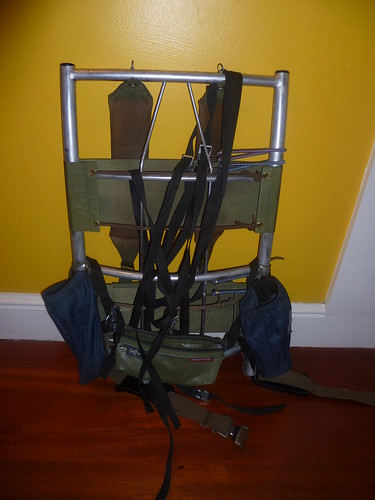
So, I decided my first task was to replace these. I had some 8 ounce canvas lying around, but I didn't have any grommets. Also, the last project where I tried grommets in that fabric didn't turn out so well, as the grommet pulled out:
http://www.blog.smalladventures.net/2014/07/dyi-chair-seat.html.
For this I wanted something that would hold up well and not suddenly fail while out in the bush.
Years ago I got my hands on a book called "arts of the sailor" from which I learned a lot of my knot and ropecraft. I remembered it having a description of how to make a grommet using thin twine. This is where kindle's excel, as I had the book with me!
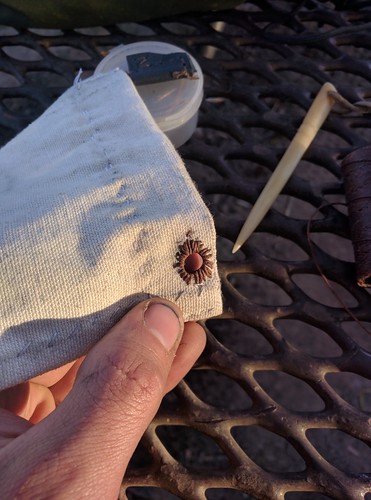
I had the waxed linen I use for almost all of my projects. After sewing up the canvas in to the right shape, with a triple layer end to help support the grommets, I started in on the grommets themselves. The first step is to make a ring-splice:
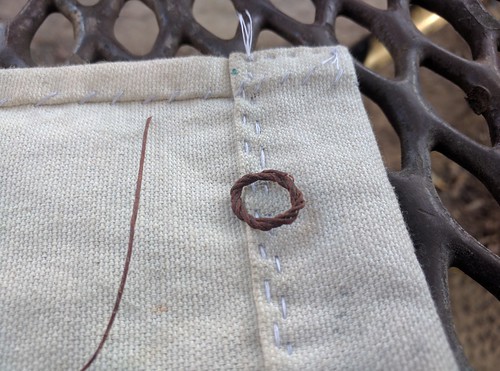
Next poke a hole in the fabric with an awl, and ream it out to the right size (ideally pushing the fibers aside, rather than breaking them). And then begin sewing the ring on to the fabric with a whipstitch that passes through the reamed out hole.
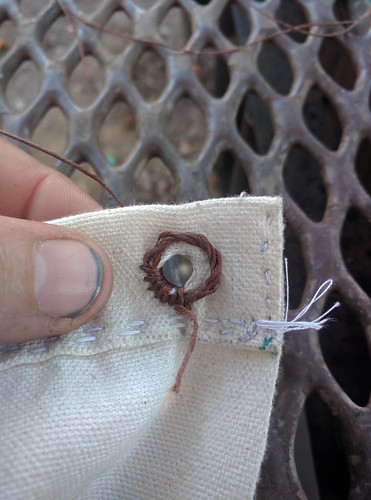
Here's my first completed grommet, not the prettiest, but it should work
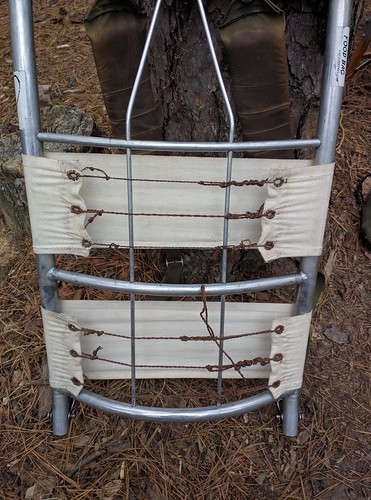
I did 3 on each side of 2 panels, by my 6'th one they were looking a lot prettier, the second panel I did is on the bottom. Using the same linen twine I legrolled some 8 strand 2 ply cordage to actually tie the panels on. In total making these 2 panels took probably a day and a half of sewing, because I wanted them to be extremely solid, and was doing it by hand. Interestingly, more of that time was spent sewing the panels themselves and reinforcing the ends than was spent on making the grommets.
With that done, the next step is the shoulder straps. Having recently replaced my roll quiver, at least for now, with a bamboo tube, I had some spare leather lying around, so I cut the shoulder straps from that. The cord tying it to the frame is nylon, since that's what I had, but it'll be easy to replace with something else, probably silk or linen so it doesn't chafe my side too much.
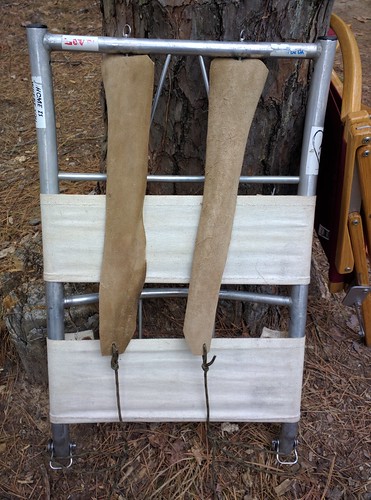
This is a usable backpack as is, and fine for a 2 or 3 day trip, and with no plastic (save some old stickers on the frame :P). To make it really nice I'll need to build a hipbelt as well. I'm looking at a base-weight of ~20 lbs for my no-plastic kit, so I need the pack to carry at least 35lbs well, preferrably 40+. At those weights, while I could do without a belt, I'd really like one.
The belt is a little more complicated, I'm thinking leather, but I have to get it shaped right, and figure out a way to suspend the pack from it that doesn't roll the belt... I may go with the partial belt, like the original, or a belt that goes all the way around, like the kelty hipbelt I had on it until recently.
Now that I learned how to make a proper twine grommet, I kind of want to go back and add these to my cotton tarp, as the tie-outs need repairs every so often due to wear.
UPDATE:
I've now used this for 6 days of backpacking recently (in 3 back to back overnight trips, 20 miles each), and another 3 day trip a little while back, this included some near winter weather.
I've been using hemp twine for the shoulder-straps. It works, but I've also been using it for my waterbottle and that one simply broke eventually, so I probably need a tougher twine.
The tightening strings on the back panels on this went *over* the metal stays. When I strap bags to the pack the bags push on the twine and loosen the back panels. I moved them so they run under the back stays, instead, directly behind the panel, this solved the problem.
Lastly, the lack of a hipbelt has NOT been a problem. This surprised me. The last 3 overnight trips were all in the mountains of New Mexico, with no reliable water sources. As a result I was carrying ~7 liters, or ~14 lbs of water. Added to my maybe 17 lbs of gear, and ~3 lbs of food, I was carrying over 34 lbs. It's rare I get over ~36 lbs, so that's a pretty good test for me. My shoulders did get sore at the heaviest weight, but they were recovered by morning... no big deal. So, I think I don't need a hipbelt.
UPDATE:
http://www.blog.smalladventures.net/2017/07/plasticless-backpack-try-2.html
Prairie Fires
2017-02-06
After getting our truck back in traveling fashion, we headed down to our friend Adam's place in Missouri, where it's the time of year for controlled burns. I wrote about Adam once before
http://www.blog.smalladventures.net/2016/10/ecological-restoration-with-adam-weiss.html
.
When Europeans set foot in the Americas, the midwest was mostly open Prairie. The reason for this is that fires regularly rolled across the plains. The Prairie ecology is made up of plants that have evolved with fire. Without fire they can't outcompete other plants, and in fact, many will fail to even germinate, as they've developed germination directly after a fire (the one time where there is no other full-grown vegetation to compete with) as a competitive advantage. Before we began farming these areas, much of the great plains had 10 feet of organic matter in the soil. Talk about rich fertile soil, and if nothing else that's an incredible amount of carbon burial.
I realize how counterintuitive this is... burning prairie *facilitates* carbon burial because prairies bury carbon as very slowly decomposing organic matter beneath the soil. When you burn a prairie, you're only burning the bit above the soil, furthering the ecology capable of storing it underneath. Each time it's burned the carbon released is soon reburied as the field sprouts up again, so even this carbon stays in a closed cycle until buried as root masses and stalks and such under the soil.
Anyway, all this means that if you want to bring back native plants and animals to these areas, you have to burn them... and as a bonus, it's really fun!
It's winter, so in general things are colder, and many perennial plants are dormant so will survive the burning. Adam says you can burn at other times though, depending on what plants you are trying to keep. Adam's obsessed with the weather and watches it like many people watch Facebook these days. For this burn he carefully chose a day with humidity low enough when things would burn well, after a decent spell without rain. If the humidity is really low the fire could easily run out of control though, and he wanted an easy to control cool fire for this burn. He also waited until the wind was very low, again to make the fire easier to control. This tends to happen most evenings even if it's been a nice sunny day (good for drying out the dew).
First we checked the fire-breaks were solid. Then, after making sure we had sprayers loaded, and weren't wearing plastic clothing, he gauged the wind direction. Then he went to the downwind end of the field and lit up a small fire, so he could watch the smoke
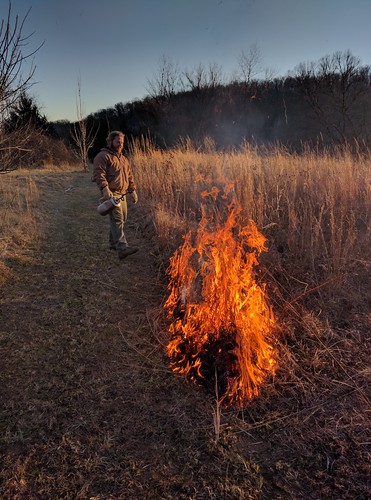
Seeing that this was squarely the downwind end of the field he spread that fire across the downwind side. This is called the "back fire".
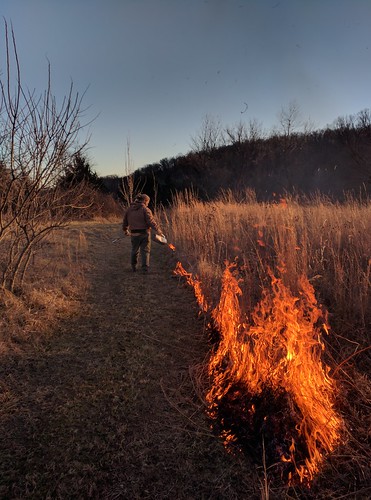
Once it had burned a few feet in to the field, he put a line just a few feet upwind of the first line of fire. This line has fuel downwind of it, but only maybe 6 or 8 feet of it, so it burns much faster, consuming that fuel, but not hot enough to be a problem and jump across. I think this is just a way to speed up the backfire.
This creates a really nice fire-break as it clears all burnable material away.
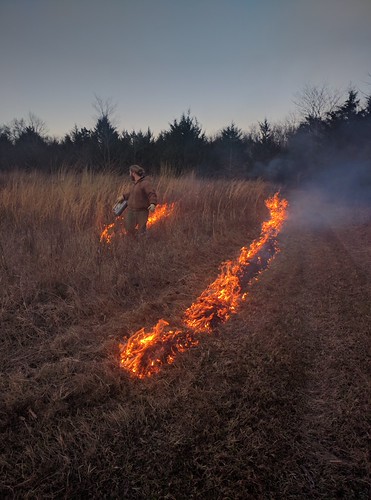
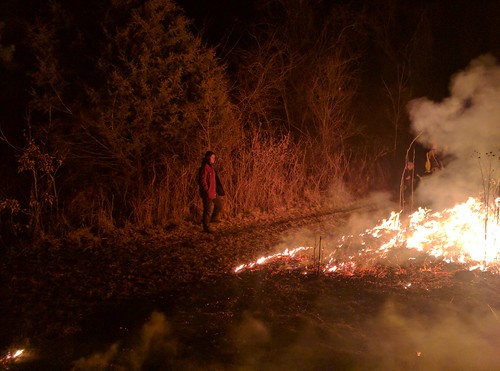
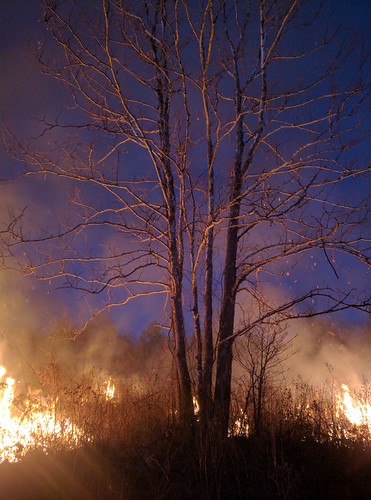
Using these two techniques he works his way around the field, working the edges towards the upwind side. Moving further forward only after he's confident the ever growing firebreak (due to the fire slowly marching in to the wind), is wide enough he can be confident it's not likely to jump, or at least would be easy to control if it did. (this picture is of a different fire, but is illustrates the point well).
Lastly he goes across the upwind side of the field and lights *most* of it (though not all)... The opening he leaves gives any small mammals such as rabbits an avenue of escape. Even if you don't care about small furry creatures (who are part of the ecology too) Adam's friend pointed out, a rabbit on fire running through the rest of the prairie will cause a mess really quickly.

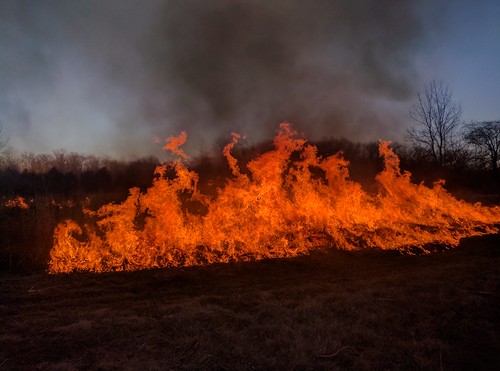
This last fire is called the "head fire", as it's upwind of the fuel. Having lots of fuel downwind to burn it roars up in to a huge inferno, and this is why Adam did it in that order, because the back fire marching in to the wind from the other side of the field has by now created an enormous fire-break that even that hot fire is unlikely to jump.
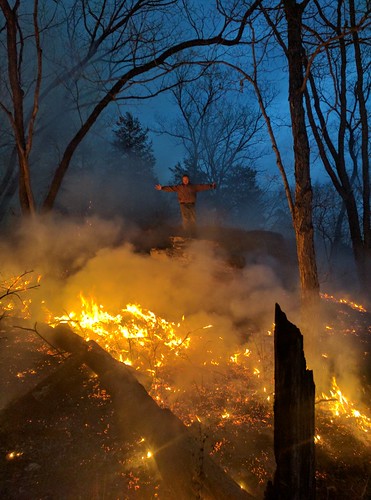
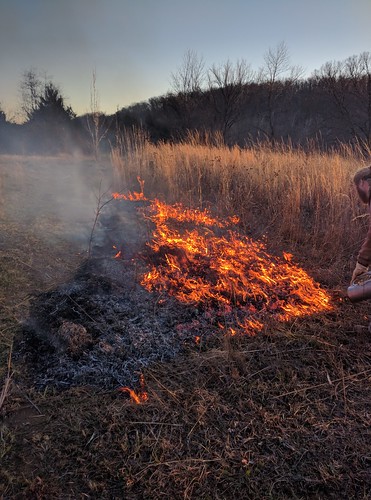
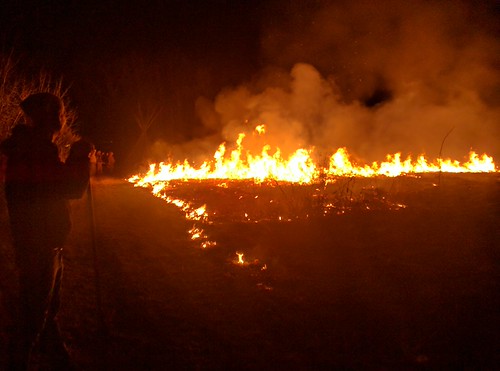
And now... here's some more cool pictures of fire :D
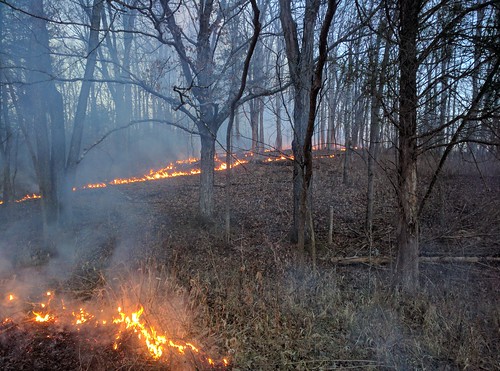
We also burned a section of woodland, after raking around each tree (Adam doesn't normally do this, but he had an overly hot wildfire run through here a couple of years ago just before his planned controlled burn, so he wanted to give the trees an easy time of it). This was a much cooler fire, hot enough to reduce the number of seedlings that come up and keep an open woodland with a very different ecology, but not hot enough to kill off full-grown healthy trees. This is another type of natural fire ecology. Adam had more help with the woodland burn, as the fire-breaks are necessarily not as good. This is the head fire marching slowly up the hill (the wind is light, and fuel sparse, so it was slow in this case).

This fire got hot enough it singed my cheek at one point. I found it pretty difficult to capture just how dramatic the fire was. Flames 20 feet tall at times when the head fires got going across the prairie areas.
DYI: truck cap roof rack
2017-01-21
Once we'd repaired the truck cap
http://www.blog.smalladventures.net/2017/01/reparing-truck-cap.html.
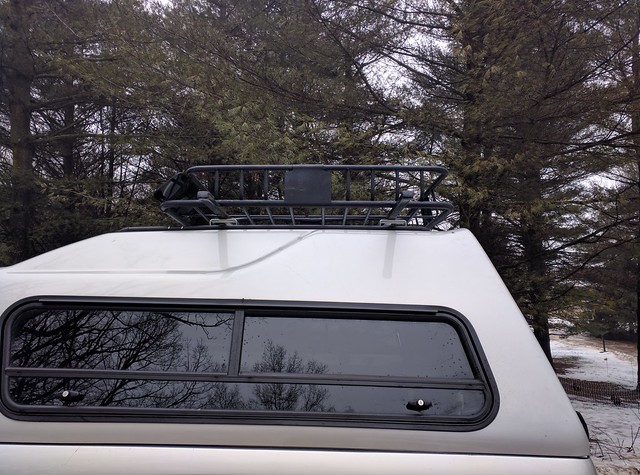
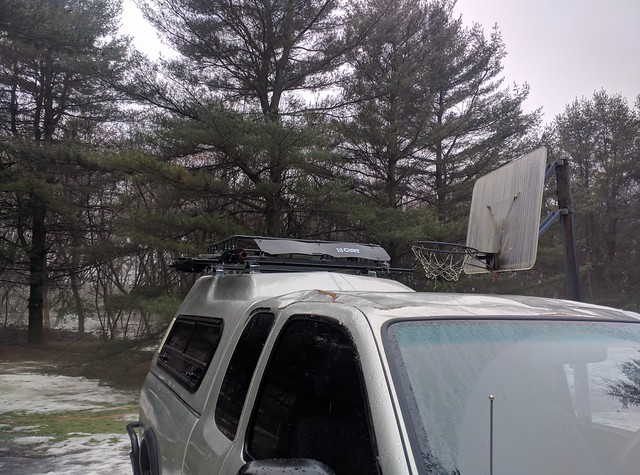
it was time to build a new roof-rack. New towers for the Thule roof-rack we had were something like $350. On top of that the "feet" for the towers had ripped out of the roof-rails damaging them... we could offset the rack several inches from where it was, but it wouldn't be as strong. We ended up with this:
I wanted to re-use the bars off the old rack if we could, but they'd been bent. So I found a tree with 2 nearby trunks spaced just about right. I stuck the bar between the trunks so I could bend it, using the rest of the bar as a giant lever... it worked great and it just a couple of minutes I'd straighted out both bars.
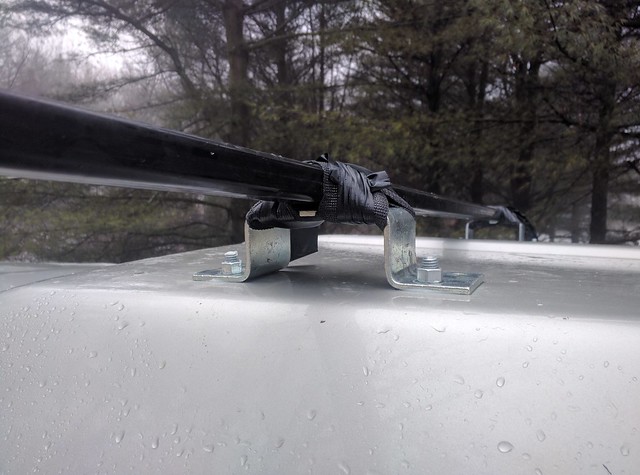
Next was the question of how to actually attach the bars to the truck. Angie and I took a ride to Home Depot and poking around came up with something we thought would work pretty well. 4 Door-stop plates, each bolted on with 2 large bolts, and huge washers on the underside.
Okay, that makes a nice stand-off for the bar, what flumoxed us for a while was how to attach the bar to the stand-off. We came up with some overly complicated methods involving bolts etc. We considered just using rope, and finally settled on fiberfix tape. It's simple and permanent, doesn't require tons of little bolts and plates, and we don't have to worry about UV damage like we would with rope. Great... simple enough.
When we got home I took a look at where the door-stop plates would actually mount, and I didn't like how far in they ended up. So, Angie helped me unbolt them and pull them off. I re-used some of those holes actually when drilling my new holes for the much larger bolts I was using.
Of course we applied silicone to the washers, plates, and bolts before sticking them through, to try and get a watertight seal. Here's the fully assembled roof-rack. This is just after applying the fiberfix, so it's still setting.
Angie and I both tested it and the whole thing feels VERY secure... actually it's probably overkill. When we rolled the truck the towers and track were the first part to fail, and as a result the bars, basket, and cap itself were all left mostly undamaged. If anything ever catches on this roof-rack it'll rip a chunk out of the roof of the cap... My plan is to not do that ;-).
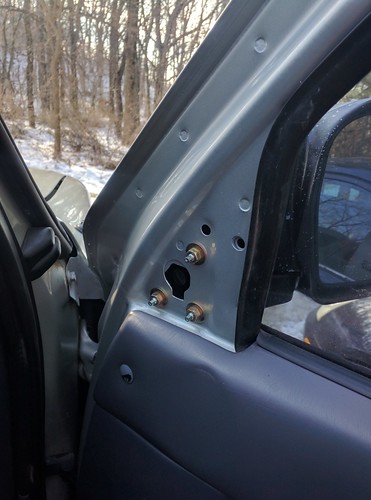
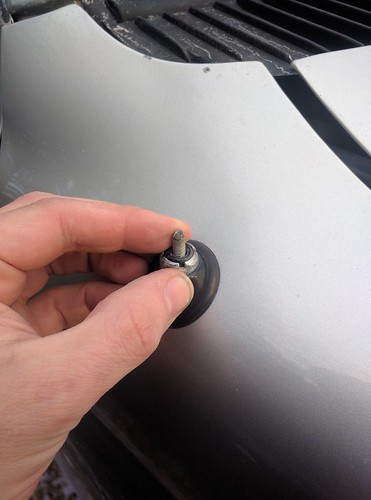
To get the truck fully fixed up and ready for travel we also had to get an alignment, turned out it was pretty far off. Just for looks I glued a plastic plate back on the front door
And 'cause music is nice we picked up screw-extractors and a new antenna. I borrowed my friend's drill (my bits), drilled it out, and extracted the base of the old antenna no problem.
We were able to save some, but not all the U-bolts I used to mount the basket to the old cross-bars. A few replacements and everything was back together again, highlift and roof-basket mounted up top.
After doing this, I am never buying a production roof-rack mounts again. This was really quite easy. I feel like the end result is at least as tough, and relatively attractive.
Cost for this was ~$50.0. That's for the replacement u-bolts, new standoff plates, bolts, nuts, washers, silicone and fiberfix... and we didn't even reuse the rails. If you were doing this from scratch you'd need to get something to use as crossbars of course.
Finally, we're ready for the road again! We do need to sand and paint a few spots on the cap so they don't rust, but overall we're fully functional again, and heading south toward Missouri in a couple of days, and then onward to Arkansas.
UPDATE:
The roof rack was sliding back and forth under the fiberfix binding, causing nasty weight shifts while cornering. We picked up some bolts, drilled the rack cross-bars using a hand-crank drill, and ran small 1/4" bolts straight through the rack and metal bracket to keep it from sliding. It's worked great since.
Reparing a truck cap
2017-01-21
When we rolled our truck
http://www.blog.smalladventures.net/2017/01/jack-is-back.html
, the cap got a little damaged
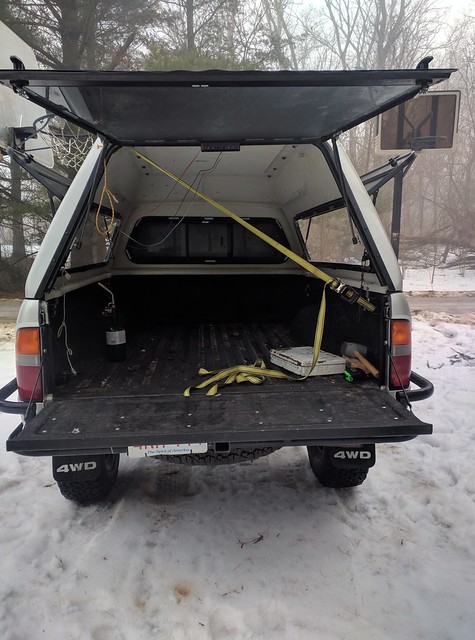
Our first thought was to just repair that crack on the right edge, and that would probably do it. So, first thing was to try a bunch of ways to push it back in to position, so we could somehow glue it back that way. Our first attempts were by hand and didn't go so well, then I tried this:
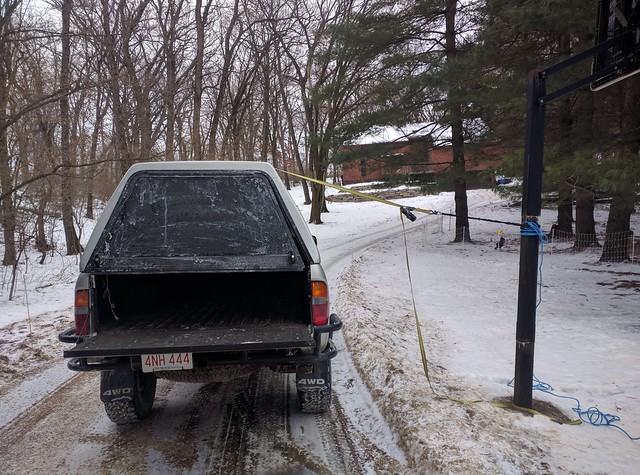
First I attached the ratchet strap to the one roof-rack tower that hadn't been broken off, but I quickly ripped that one off two. The picture above is the ratchet strap running down and around to the bumper on the left side. Using this we could wrack it just about back to straight, but it just popped back.
I posted about this on Facebook and my friends with boats suggested just grinding out a bunch of the fiberglass and putting it back. That seemed pretty reasonable, but it's not warm enough here in Wisconsin for epoxy to work well. I read a bunch about doing the repair to understand it... but then we called a specialist here in WI and he said he'd take a look.. Another shop had said he was the Guru for the whole area.
Well, when we got there he said if it was his he wouldn't bother repairing it. He said that random fiberglass like this is so weak to start with that the reduction in strength due to the damage doesn't matter, and he'd figure out a way to torque it back in place. He also noticed the right edge of the window frame had shifted downwards, so it was no longer level with the roofline. He also said he'd use superglue on the crakc.
So, Angie and I gave that a shot. We pushed, shoved, clamped it down in spots and unclamped it, hammered, tried bending the hinge... and nothing worked.
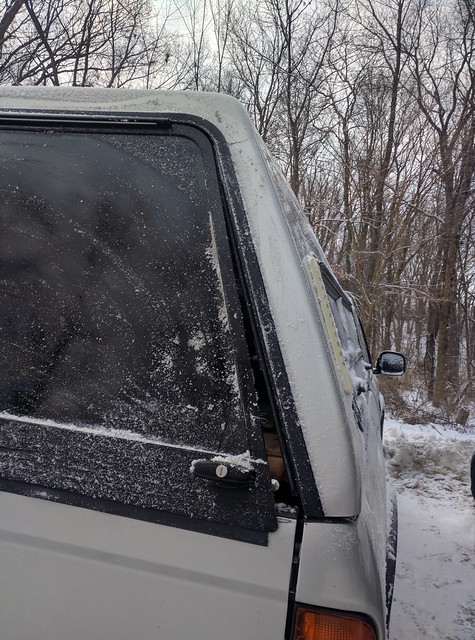
I got fed up, and as a last ditch I drilled a hole in the upper left corner of the cap, near the window, stuck a bolt through it to attach to (I actually used one of the J-clamps the cap is held on with to do it... ended up bending the bolt but that was cheap to replace) and ran a ratchet strap from there down to the bed on the right side, like this:
Cranking that tight I was able to actually wrack it back straight. So, since it was late I pulled it a bit past straight and let it sit overnight. Next day when I let it loose the cap had shifted a little, warping back!
I discovered online that some people used heat to rework fiberglass a little, so I cranked it tight again and hit it with my friend's propane torch on the corners where I needed it to warp back.
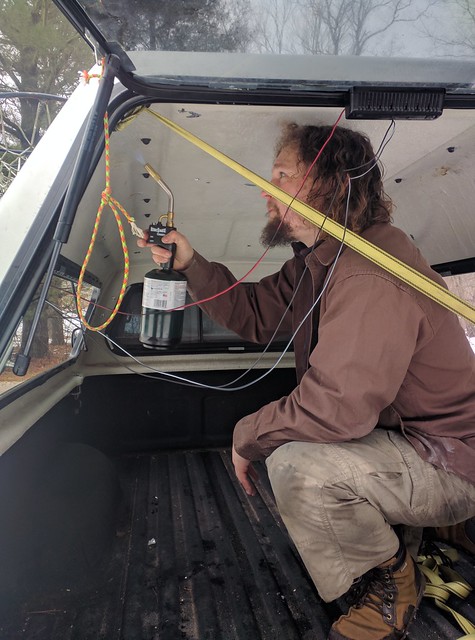
The heat allowed me to crank the strap a little tighter, a little more heat, crank it a little tighter, pulling the cap farther and farther past straight in the opposite direction. I released it a few times to check (letting it cool first). I got it pretty close, but not *quite* good enough to close the window properly.
So, we figured maybe repairing the crack would add a little more spring to that side and help a little more. We cranked it nice and tight again, compressing the crack together, and then glue the crack with fiberfix.
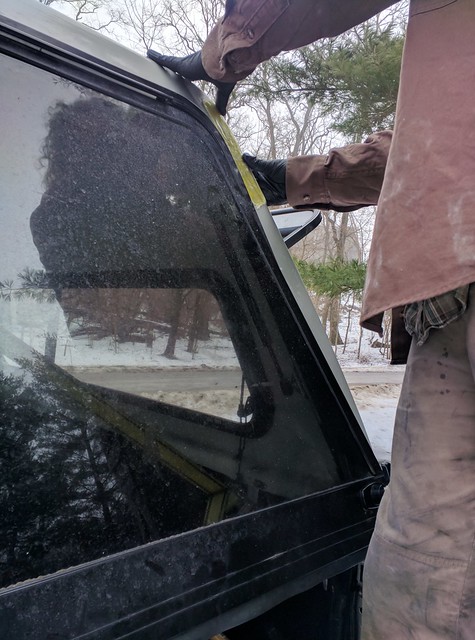
THAT did it, when we released the strap it was "close enough".
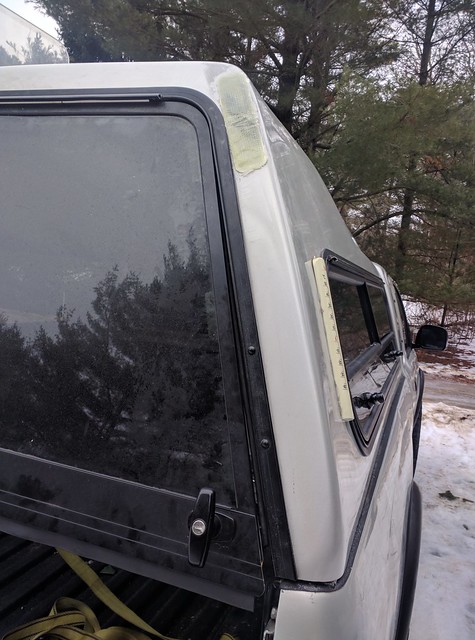
I held my judgement though until the next day. But it hadn't sprung back yet, it's now day 2 and it's still holding the position. Hooray! This was quite a long time in the making... so we
This cap cost us over $2000 new... If we'd been unable to repair it we probably would've bought a less nice used cap with less head-room and no windoors, and just made do.... but it's great to have our cap back.
There were also a couple of damaged spots in the roofline, but they aren't structural, so I just filled with a 5 minute epoxy today. Total cost ~$15 for epoxy. ~$12 for fiberfix ~$0.25 for a new bolt. A few cents worth of propane, and a borrowed ratchet strap.
Next up... the roofrack (and a few other repairs).
Jack is back!
2017-01-12
It's been wild
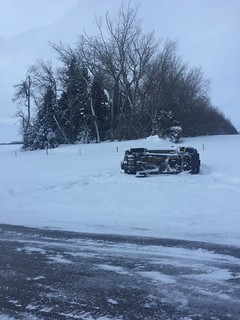
Last time I posted a picture of jack, he looked like this:
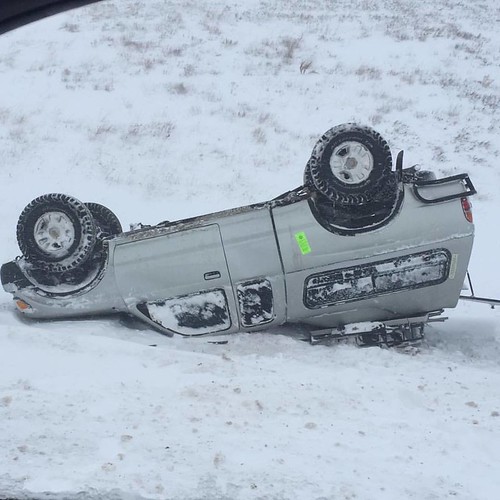
http://www.blog.smalladventures.net/2016/12/rolled-truck-in-north-dakota-blizzard.html
Well, picking up where that story left off, the insurance company totaled the truck. When we talked to the owner of the body shop it was at he said 20k to get it to original condition... well shit. Being a super nice guy he saw the looks on our faces and had a real conversation with us when I pressed him. After talking about what we wanted (mechanically sound and safe, but ignoring looks) he said he could do it for ~$1400... THAT sounded better to us.
It was Christmas-time, so we traveled back to our respective parent's houses by train. This consisted of: Walk 3 miles across Bismark, swap around clothes etc. at the truck, walk to bus station, leave on bus at 2am (bus is late actually 5am, get to Fargo at 8am, hang out in coffee shops, get on train next day at 2am, 2 day train ride getting in 8 hours late.
Money and paperwork
After totaling out the vehicle for about 11k, and subtracting the 1k deductible, the insurance company sold the truck back to us for a bit over $600. The tires alone are worth that. The trick is that if I buy it back, it's salvage title, so I can't insure it for collision or comprehensive... and the paperwork can get harry.
Here's how I ran the numbers on whether to buy it back:
- USAA valued my last totalled tacoma for parts at 8k, so I figure if I total it, I can sell it for ~6k fairly easily
- I bought it back for ~$600, and repair estimate was ~$1400, so that's ~$2k in on the vehicle.
So if it's totalled I should be 4k in the black, so that gives me a lot of room for further repairs
As far as how much money I lost on rolling it
- I bought it for $15k
- They payed me $9k
- I had to pay another $2k to get it
- I can still sell it for $8k trivially, as a running Tacoma
Which comes out break even. I lost a lot on hotels, eating out, lost time, etc. I need to repair the roof-rack, bla bla, but overall... I came out a lot better than one would expect for totalling a car.
As for paperwork, I was worried I'd have to drive it back to MA for a salvage inspection. The rules on the DMV website were opaque, the insurance folks at AAA didn't know. Finally I ended up talking with our total loss representative at Mapfre and they said that because the vehicle is over 10 years old, there is NO paperwork, no inspections, nothing. That's it, we're good to go.
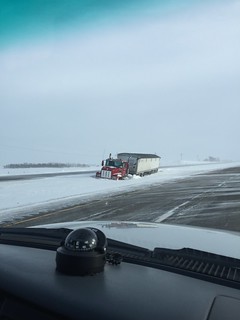
So, that's what we did... Being unsure when the truck would be complete Angie took the train up to my parent's house after Christmas. When it was ready we reversed the train/bus trip, picked up the truck in Bismark ND, and drove it back to my friend's house in Wisconsin. The drive back was a little exciting. First we drove from Bismark to Fargo. It was fine most of the way, but the highways in Fargo were black ice and weather looked bad in Minnesota, so we decided we were done for the day. We stopped at a motel 6 and slept for 18 hours (having not slept properly for 3 nights prior), breaking in the middle for dinner. The next morning we looked and Minneapolis was in fact a disaster as predicted, so we decided to route south around it via Sioux Falls, adding 2 hours to the drive on an ideal day. A good chunk of the road heading south was glare ice, and we did those parts at 20-30 mph, blinkers flashing as we looked out at cars and trucks that had slid off the road on either side. From Sioux Falls to Madison WI was a lot better, and we made it here by about 1am.
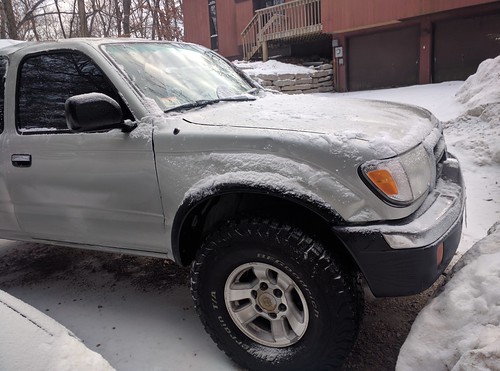
The truck
So, here he is... He feels like he could use an alignment, but everything seems to be running great. This is the side that didn't roll through the snow. The remainder of the roof rack is in the back on top of the platform.
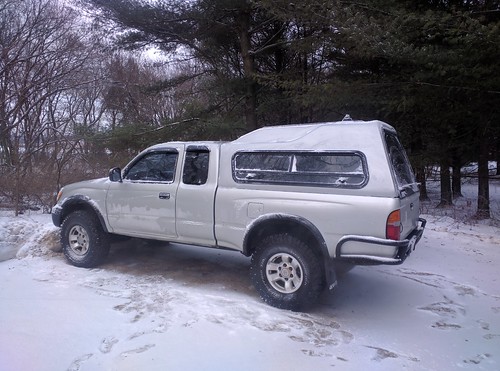
On the other side though it looks really good for having been rolled. The door didn't open properly before due to a dent in the front quarter panel, and of course the mirror was smashed. The shop popped the dent out, as well as the fender and the door itself. When Angie first tried pulling the door latch it would lock the door, but something popped back in to place and it seems to work properly now. Amazingly, the window even rolls down and back up again smoothly!
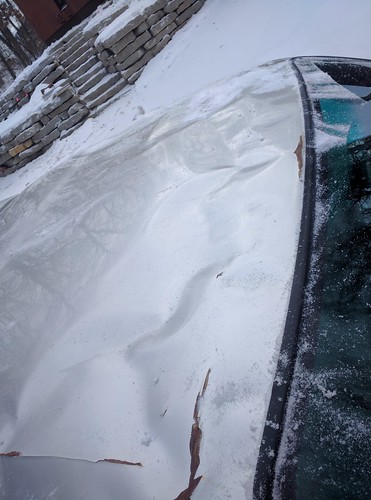
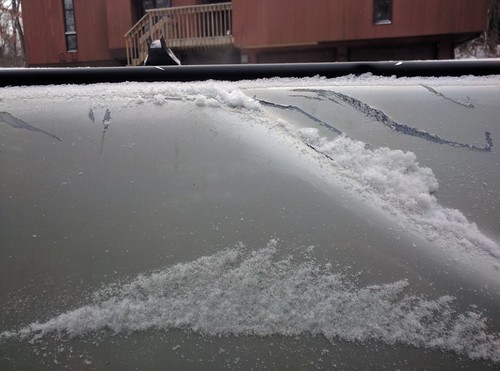
The roof of the cab took most of the damage. They shoved it back in to place and got a really solid seal around the window, but it definitely looks a little worse for the wear. I need to sand and repaint the spots that really got creased. The cab may rust through before the truck wears out now... oh well... if it does I'll have to either replace that sheet metal or do a cab swap, for now it works fine though.
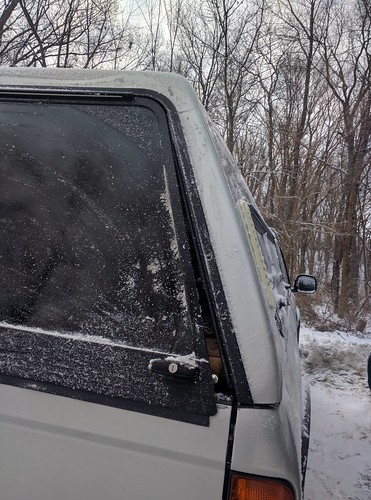
The cap lost a few little chunks of fiberglass, no biggy, but I think I'll fill in the biggest hole just to keep water from getting in there, freezing, and opening things up wider. I might just mix up epoxy and shove it in there.
The most immediately problematic damage is a crack in the truck cap. Our theory is that we can repair this either with fiberfix or a standard fiberglass repair kit. It's an issue because the cap is twisting left, so the window doesn't close properly (as you can see here), and the structural integrity is an issue for remounting the roof rack. In theory it should be an easy fix. A major reason we headed for a friend's place is that our stuff has to go somewhere while we take it all apart and put it back together, so a garage is likely to be helpful.
Other minor work we need to do includes checking the transmission and differential fluid levels, bending the bed sides back inwards maybe an inch, sanding and painting the dents on the body so they don't rust, remounting the right front signal properly, replacing/repairing the roof rack, replacing one storage box that got smashed, and replacing the radio antenna... but that's all minor stuff.
Jack is back, and back on the road! And with a little luck pretty soon we'll be fully operational again. Then we're heading south :D.